> ## Documentation Index
> Fetch the complete documentation index at: https://docs.upsolve.ai/llms.txt
> Use this file to discover all available pages before exploring further.
# Data Models
> Create curated views of your database with descriptions, annotations, and versioning.
## What is a Data Model?
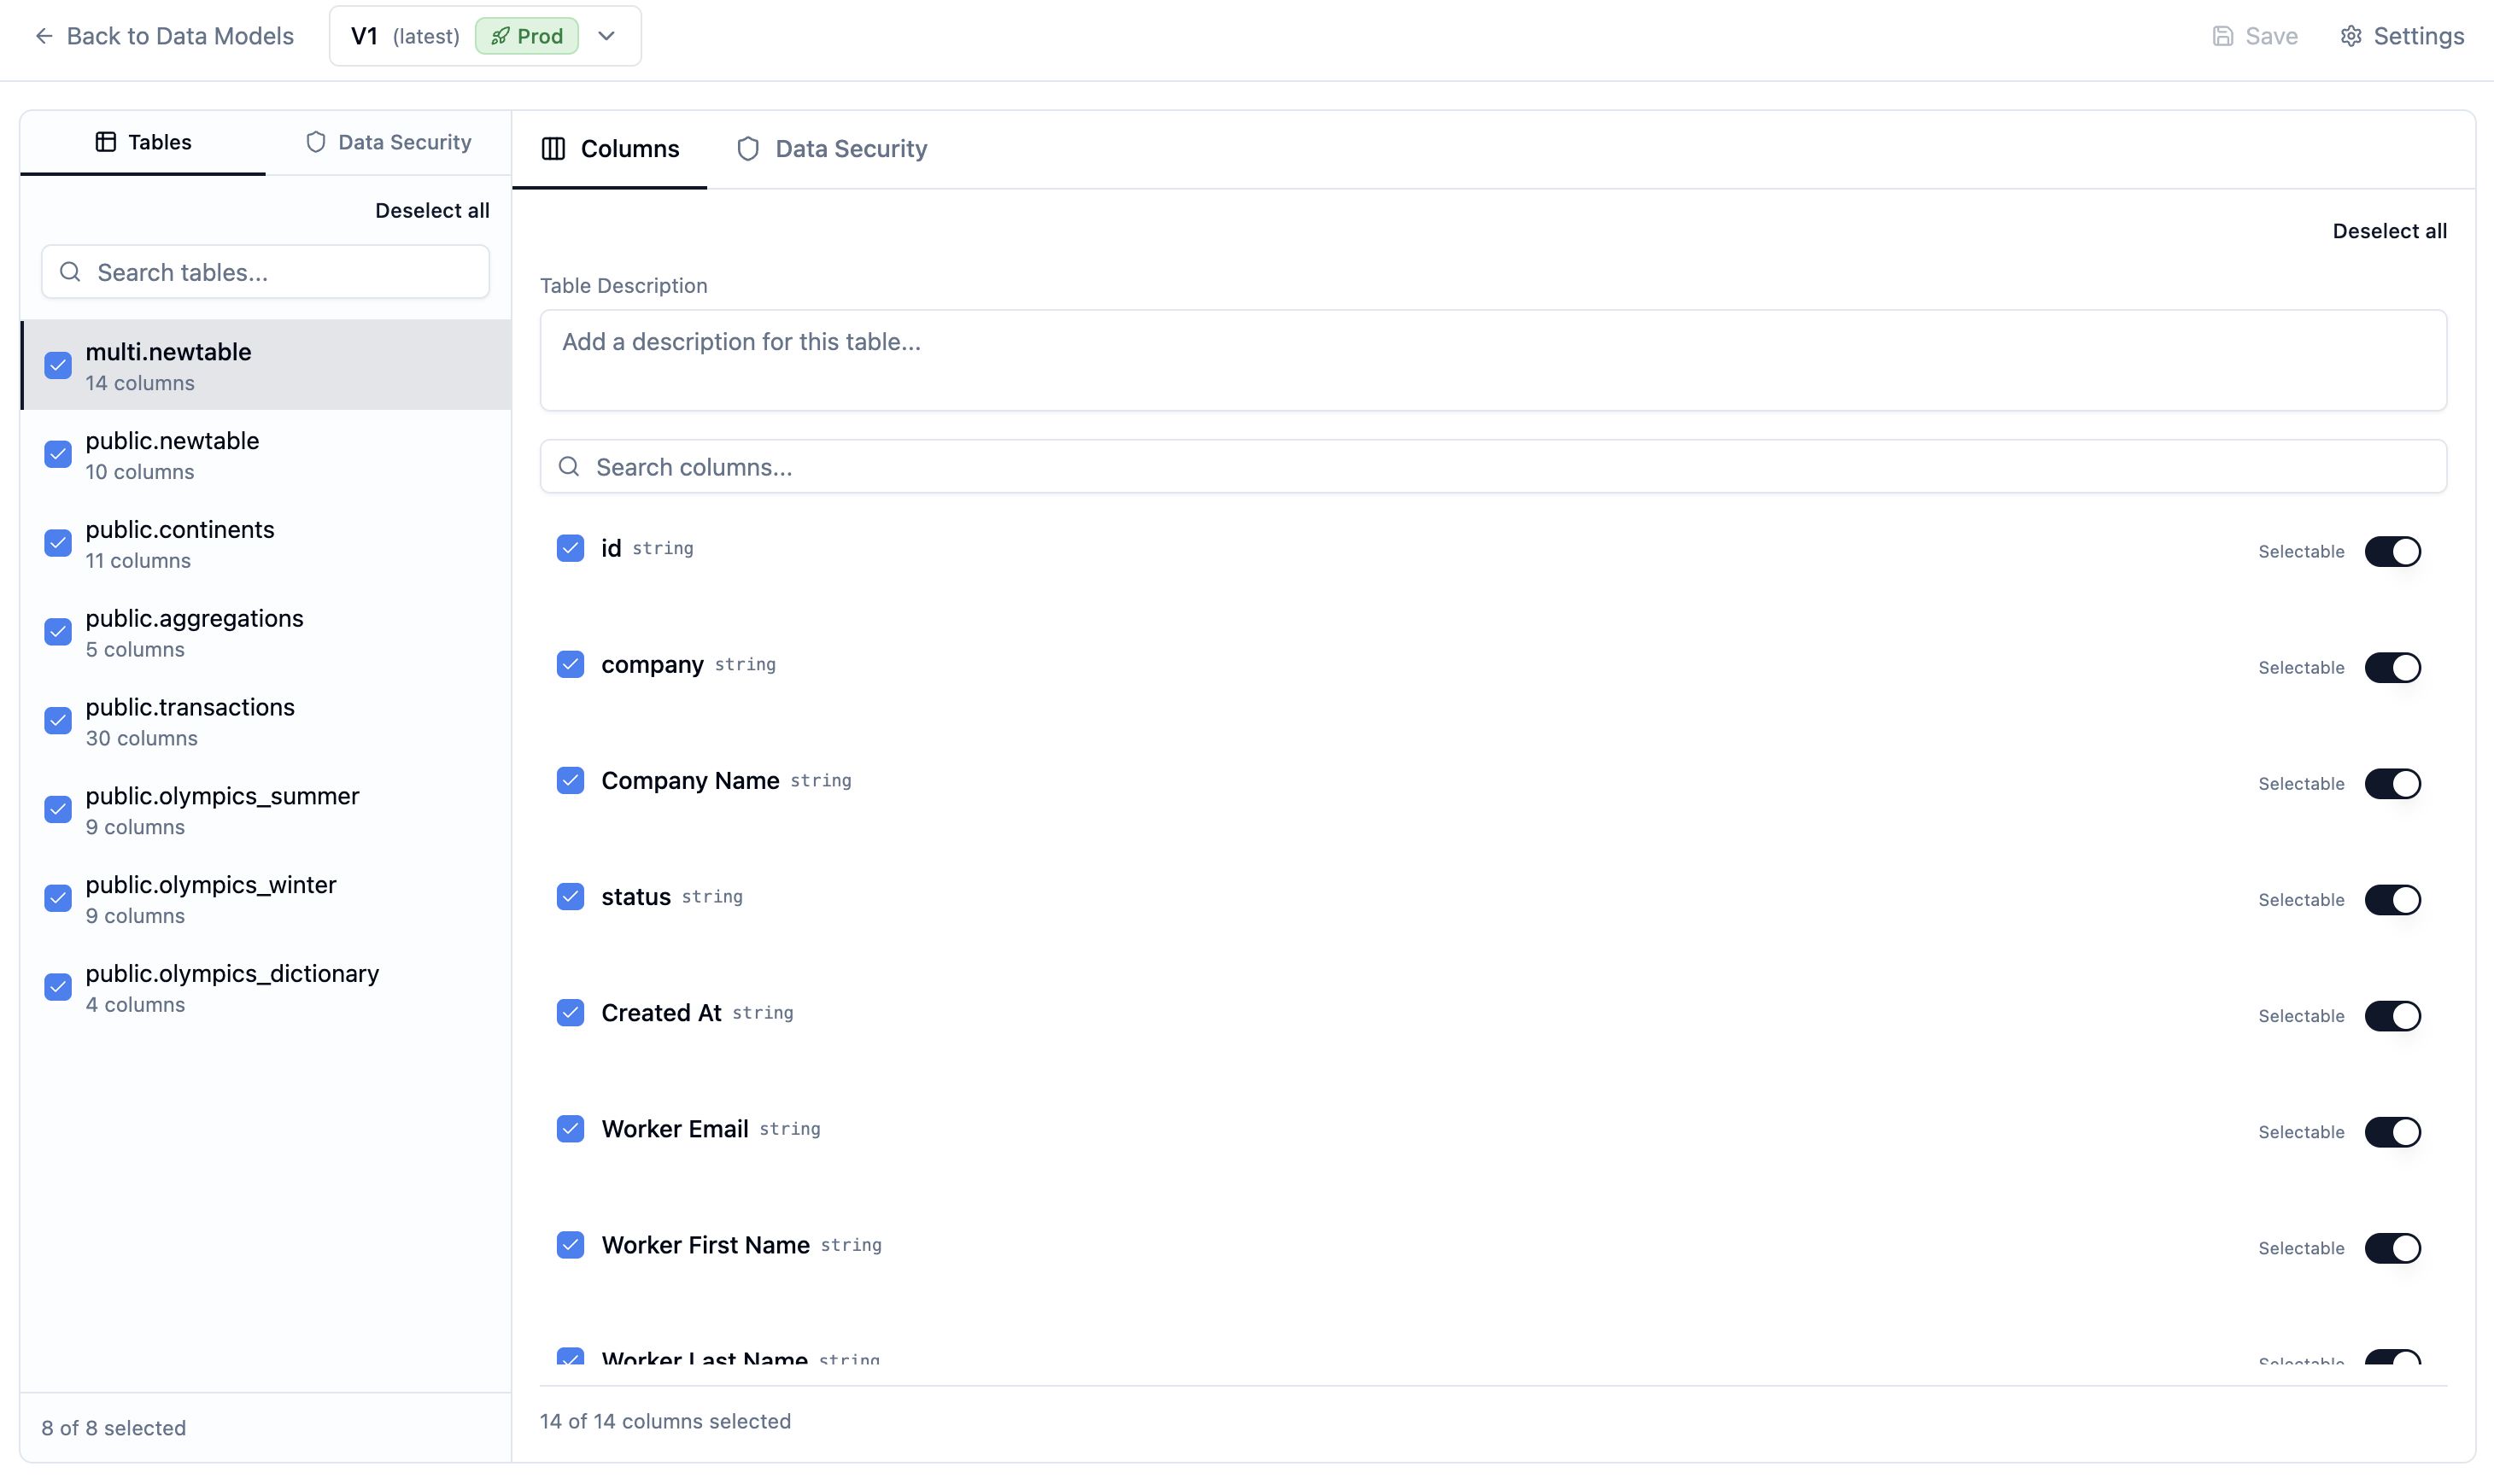
A Data Model is a curated view of your database that:
* **Selects** which tables and columns are available
* **Describes** fields with human-readable annotations
* **Secures** data with row-level security rules
* **Versions** changes so you can track and rollback
 ## Why Use Data Models?
1. **Simplify for AI** - Only expose relevant tables so AI agents aren't overwhelmed
2. **Add context** - Descriptions help AI understand what columns mean
3. **Control access** - Data Security rules ensure users see only their data
4. **Safe deployments** - Versioning prevents breaking changes
## Creating a Data Model
1. Navigate to your project's **Data Models** tab
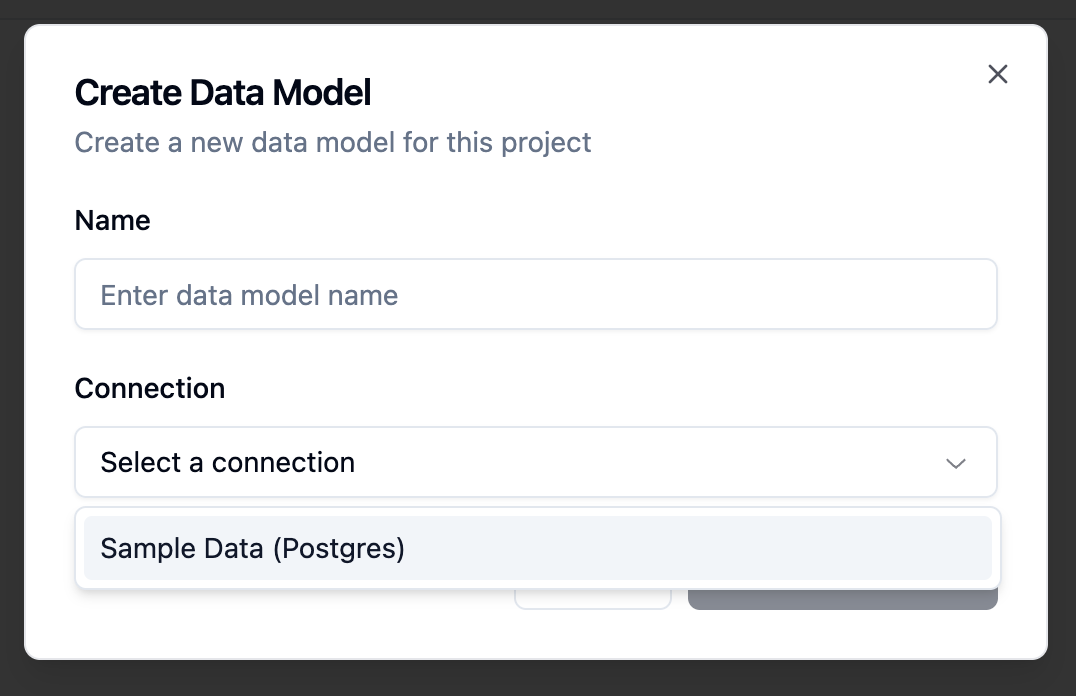
2. Click **Create Data Model**
3. Select the connection to base it on
4. Enter a name for your data model
5. Click **Create**
The system will fetch all tables and columns from your connection automatically.
## Why Use Data Models?
1. **Simplify for AI** - Only expose relevant tables so AI agents aren't overwhelmed
2. **Add context** - Descriptions help AI understand what columns mean
3. **Control access** - Data Security rules ensure users see only their data
4. **Safe deployments** - Versioning prevents breaking changes
## Creating a Data Model
1. Navigate to your project's **Data Models** tab
2. Click **Create Data Model**
3. Select the connection to base it on
4. Enter a name for your data model
5. Click **Create**
The system will fetch all tables and columns from your connection automatically.
 ## Configuring Your Data Model
### Selecting Tables and Columns
By default, all tables are selected. To customize:
1. Open your data model
2. Uncheck tables you want to hide
3. Expand tables to uncheck specific columns
4. Click **Save Changes**
## Configuring Your Data Model
### Selecting Tables and Columns
By default, all tables are selected. To customize:
1. Open your data model
2. Uncheck tables you want to hide
3. Expand tables to uncheck specific columns
4. Click **Save Changes**
 ### Adding Descriptions
Help AI and users understand your data:
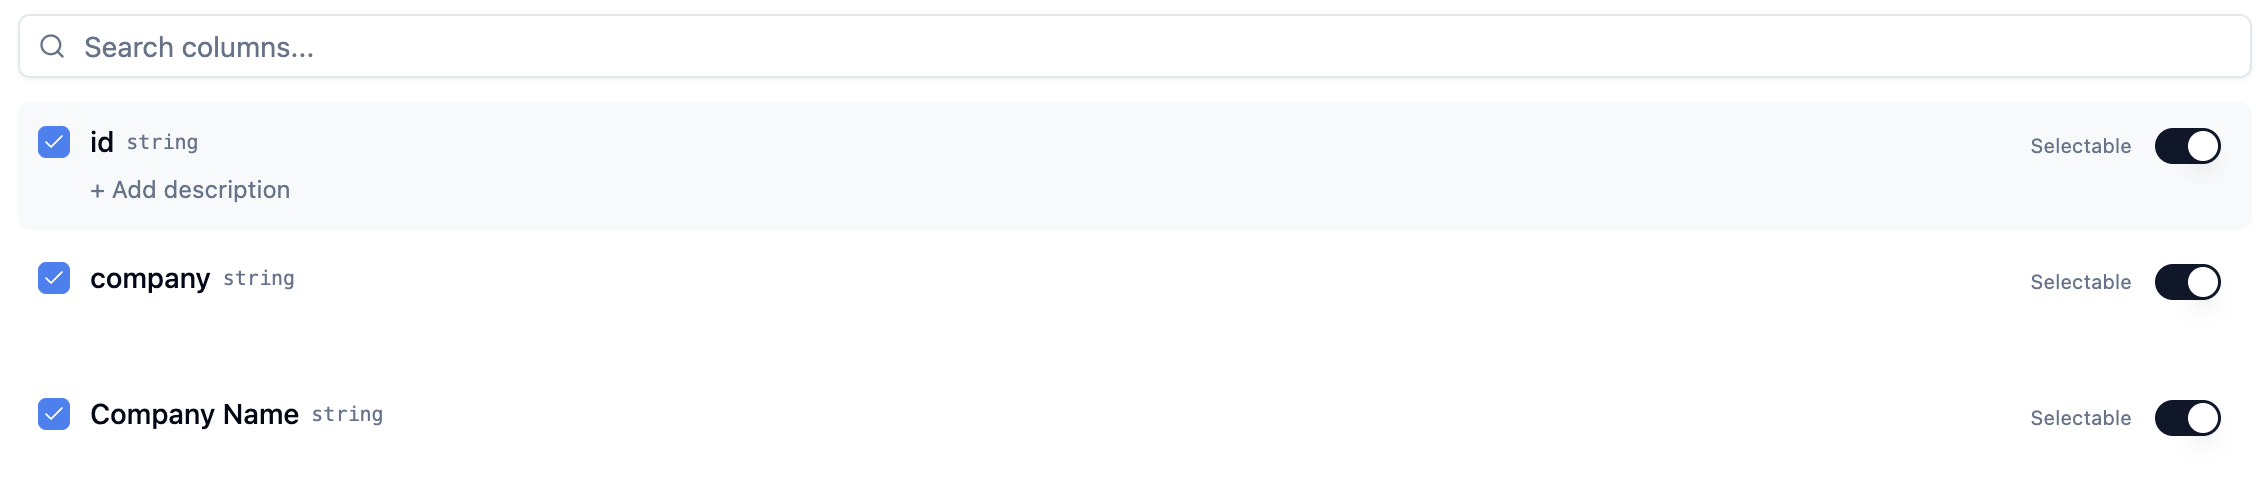
1. Click the edit icon next to a table or column
2. Enter a description
3. For AI agents, mark columns as "selectable" if they contain categorical values users might filter by
### Adding Descriptions
Help AI and users understand your data:
1. Click the edit icon next to a table or column
2. Enter a description
3. For AI agents, mark columns as "selectable" if they contain categorical values users might filter by
 ## Data Security
Data Security controls which rows of data each user can access. You can define **Global Security Rules** that apply across all tables, or configure per-table rules for specific needs.
### Understanding Data Security
The Data Security system uses SQL-based filtering with dynamic variables:
* **`{{user.*}}`** - Access properties of the currently authenticated user
* **`{{organization.*}}`** - Access properties of the user's organization
For example, to filter an `orders` table so users only see their own orders:
```sql theme={null}
SELECT *
FROM "orders"
WHERE "user_id" = '{{user.id}}'
```
### Global Security Rules
Global Security Rules let you define filtering logic once and apply it to all applicable tables automatically. This is ideal when you have consistent patterns like:
* Multi-tenant data separated by `tenant_id`
* User-owned data filtered by `user_id`
* Schema-based isolation (each tenant has their own database schema)
#### Accessing Global Rules
1. Open your data model
2. Click the **Data Security** tab in the left sidebar
3. You'll see the Global Rules editor
## Data Security
Data Security controls which rows of data each user can access. You can define **Global Security Rules** that apply across all tables, or configure per-table rules for specific needs.
### Understanding Data Security
The Data Security system uses SQL-based filtering with dynamic variables:
* **`{{user.*}}`** - Access properties of the currently authenticated user
* **`{{organization.*}}`** - Access properties of the user's organization
For example, to filter an `orders` table so users only see their own orders:
```sql theme={null}
SELECT *
FROM "orders"
WHERE "user_id" = '{{user.id}}'
```
### Global Security Rules
Global Security Rules let you define filtering logic once and apply it to all applicable tables automatically. This is ideal when you have consistent patterns like:
* Multi-tenant data separated by `tenant_id`
* User-owned data filtered by `user_id`
* Schema-based isolation (each tenant has their own database schema)
#### Accessing Global Rules
1. Open your data model
2. Click the **Data Security** tab in the left sidebar
3. You'll see the Global Rules editor
 #### Rule Types
**Schema Rules** - Dynamic schema prefixing for multi-tenant databases where each tenant has their own schema:
#### Rule Types
**Schema Rules** - Dynamic schema prefixing for multi-tenant databases where each tenant has their own schema:
 This generates SQL like:
```sql theme={null}
SELECT *
FROM "{{user.schema}}"."orders"
```
**Column Rules** - Automatic WHERE clause filtering based on column names:
This generates SQL like:
```sql theme={null}
SELECT *
FROM "{{user.schema}}"."orders"
```
**Column Rules** - Automatic WHERE clause filtering based on column names:
 This generates SQL like:
```sql theme={null}
SELECT *
FROM "orders"
WHERE "user_id" = '{{user.id}}'
```
#### Creating a Global Rule
1. Click the **Data Security** tab in the sidebar
2. Click **Add Rule**
3. Choose **Schema Rule** or **Column Rule**
4. Configure the rule settings
5. The rule is automatically enabled
This generates SQL like:
```sql theme={null}
SELECT *
FROM "orders"
WHERE "user_id" = '{{user.id}}'
```
#### Creating a Global Rule
1. Click the **Data Security** tab in the sidebar
2. Click **Add Rule**
3. Choose **Schema Rule** or **Column Rule**
4. Configure the rule settings
5. The rule is automatically enabled
 #### How Rules Are Applied
* **Schema rules** affect all tables - they change where data is fetched from
* **Column rules** only affect tables that have the specified column - tables without the column are unaffected
* Multiple rules are combined with AND logic
* Rules are applied in priority order (lower priority number = applied first)
#### How Rules Are Applied
* **Schema rules** affect all tables - they change where data is fetched from
* **Column rules** only affect tables that have the specified column - tables without the column are unaffected
* Multiple rules are combined with AND logic
* Rules are applied in priority order (lower priority number = applied first)
 ### Per-Table Data Security
When you select a table and go to its **Data Security** tab, you'll see how the global rules apply to that specific table.
### Per-Table Data Security
When you select a table and go to its **Data Security** tab, you'll see how the global rules apply to that specific table.
 #### Manual Overrides (Break Glass)
Sometimes you need custom logic for a specific table. You can override global rules:
1. Select the table
2. Go to the **Data Security** tab
3. Click **Edit manually**
4. Confirm the warning dialog
5. Edit the SQL directly
#### Manual Overrides (Break Glass)
Sometimes you need custom logic for a specific table. You can override global rules:
1. Select the table
2. Go to the **Data Security** tab
3. Click **Edit manually**
4. Confirm the warning dialog
5. Edit the SQL directly
 Once in manual mode, you have full control over the SQL:
 #### Resetting to Global Rules
To return a table to global rule management:
1. Click **Reset to global**
2. Confirm the dialog
3. Your manual edits will be replaced with the auto-generated SQL
#### Resetting to Global Rules
To return a table to global rule management:
1. Click **Reset to global**
2. Confirm the dialog
3. Your manual edits will be replaced with the auto-generated SQL
 ### Testing Data Security
You can test your security rules to see exactly what data a specific user would see:
1. Select a table
2. Go to the **Data Security** tab
3. Select a user from the top-right user dropdown
4. Click **Test Query**
5. View the filtered results
### Testing Data Security
You can test your security rules to see exactly what data a specific user would see:
1. Select a table
2. Go to the **Data Security** tab
3. Select a user from the top-right user dropdown
4. Click **Test Query**
5. View the filtered results
 Testing uses your actual database connection and shows real data filtered by the security rules. This helps verify your configuration before deploying.
## Versioning
Every change to a data model creates a new version. This means:
* You can see the history of changes
* You can compare versions
* Agents and applications link to specific versions
### Viewing Versions
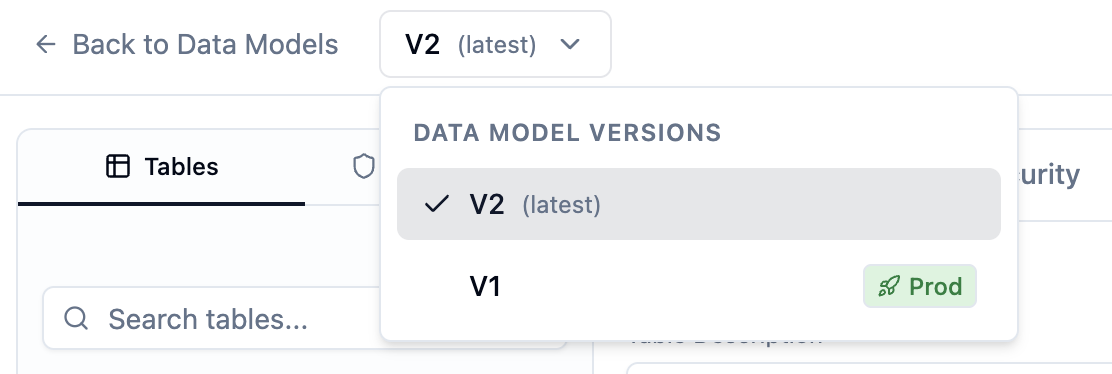
1. Open your data model
2. Click the **Versions** tab in the sidebar
3. See all versions with timestamps and change information
Testing uses your actual database connection and shows real data filtered by the security rules. This helps verify your configuration before deploying.
## Versioning
Every change to a data model creates a new version. This means:
* You can see the history of changes
* You can compare versions
* Agents and applications link to specific versions
### Viewing Versions
1. Open your data model
2. Click the **Versions** tab in the sidebar
3. See all versions with timestamps and change information
 ## Production Status
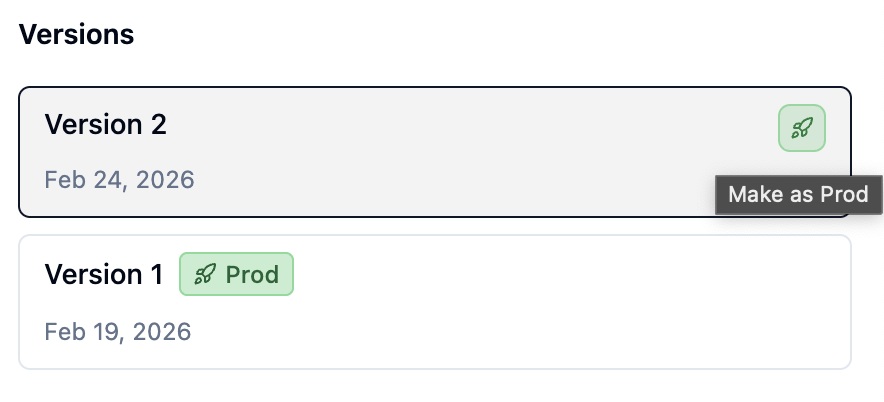
Before agents and applications can use a data model in production, you must mark a version as "Production."
### Setting Production
1. Open your data model
2. Go to the **Versions** tab
3. Click **Set as Production** on the version you want
4. The system validates the schema against your connection
5. If successful, the version is now production
## Production Status
Before agents and applications can use a data model in production, you must mark a version as "Production."
### Setting Production
1. Open your data model
2. Go to the **Versions** tab
3. Click **Set as Production** on the version you want
4. The system validates the schema against your connection
5. If successful, the version is now production
 ### Validation
When setting production, the system checks:
* All tables in your data model exist in the connection
* All columns in your data model exist in their tables
* If validation fails, you'll see which tables/columns are missing
If your database schema changes, you may need to update your data model to match.
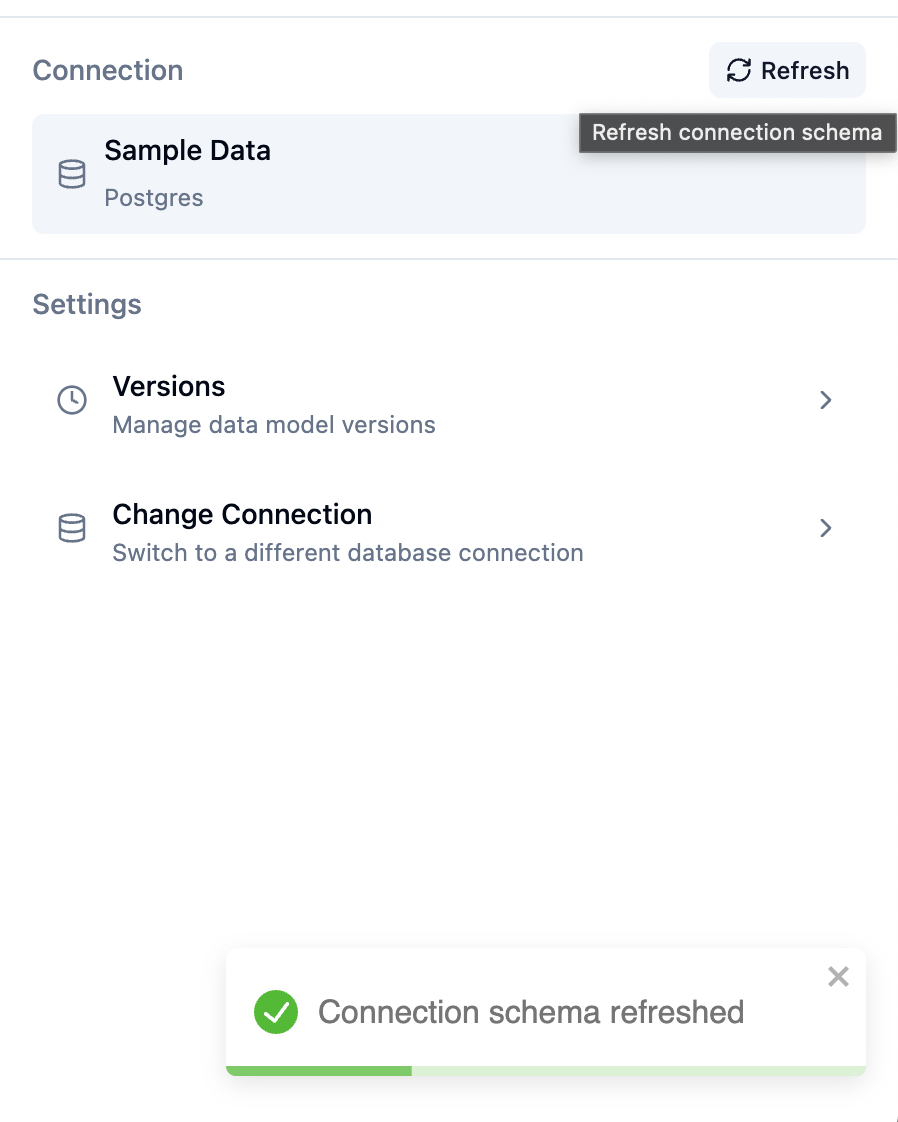
## Syncing with Connection Changes
If your database schema changes:
1. Open your data model
2. Go to the **Connection** tab
3. Click **Refresh Schema**
4. New tables/columns will appear (you can select them)
5. Missing tables/columns will show warnings
### Validation
When setting production, the system checks:
* All tables in your data model exist in the connection
* All columns in your data model exist in their tables
* If validation fails, you'll see which tables/columns are missing
If your database schema changes, you may need to update your data model to match.
## Syncing with Connection Changes
If your database schema changes:
1. Open your data model
2. Go to the **Connection** tab
3. Click **Refresh Schema**
4. New tables/columns will appear (you can select them)
5. Missing tables/columns will show warnings
 ## Data Model Errors
If a production data model has errors (e.g., missing tables), you'll see a warning banner. This typically happens when:
* A table was dropped from the database
* A column was renamed or removed
* The connection credentials changed
## Next Steps
* [Create an Agent](/ai-agent-builder/agents) that uses this data model
* [Build an Application](/ai-agent-builder/applications) for dashboards
* [Manage Project Users](/ai-agent-builder/users) to define user properties for Data Security
## Data Model Errors
If a production data model has errors (e.g., missing tables), you'll see a warning banner. This typically happens when:
* A table was dropped from the database
* A column was renamed or removed
* The connection credentials changed
## Next Steps
* [Create an Agent](/ai-agent-builder/agents) that uses this data model
* [Build an Application](/ai-agent-builder/applications) for dashboards
* [Manage Project Users](/ai-agent-builder/users) to define user properties for Data Security