> ## Documentation Index
> Fetch the complete documentation index at: https://docs.upsolve.ai/llms.txt
> Use this file to discover all available pages before exploring further.
# Complete Setup Guide
> End-to-end walkthrough from a blank project to a production-ready agent.
This guide walks you through the complete process of setting up Agent Studio from scratch — from connecting your database to deploying a live agent your users can chat with.
## The full journey
Here's every step from nothing to production:
```mermaid theme={null}
flowchart TD
A[Create Project] --> B[Add Connection]
B --> B2[Register Initial End Users]
B2 --> C[Create Data Model with RLS Permissions]
C --> D[Set Data Model to Production]
D --> E[Create Agent]
D --> F[Create Application]
E --> G[Add Golden Assets]
F --> H[Build Templates]
G --> I[Set Agent Production]
H --> J[Publish Templates]
I --> K[Add Project Organizations]
J --> K
K --> L[Register Remaining End Users]
L --> M[Generate User Tokens]
```
Agent and application setup can happen in parallel once your data model is in production. Organizations and users come last — they're what gates live access.
## Step 1: Create your project
A project is the container for everything: your connection, data model, agent, and the organizations and users who will access it.
1. Go to the **Projects** section
2. Click **Create Project**
3. Enter a name (e.g., "Customer Analytics")
4. Click **Create**
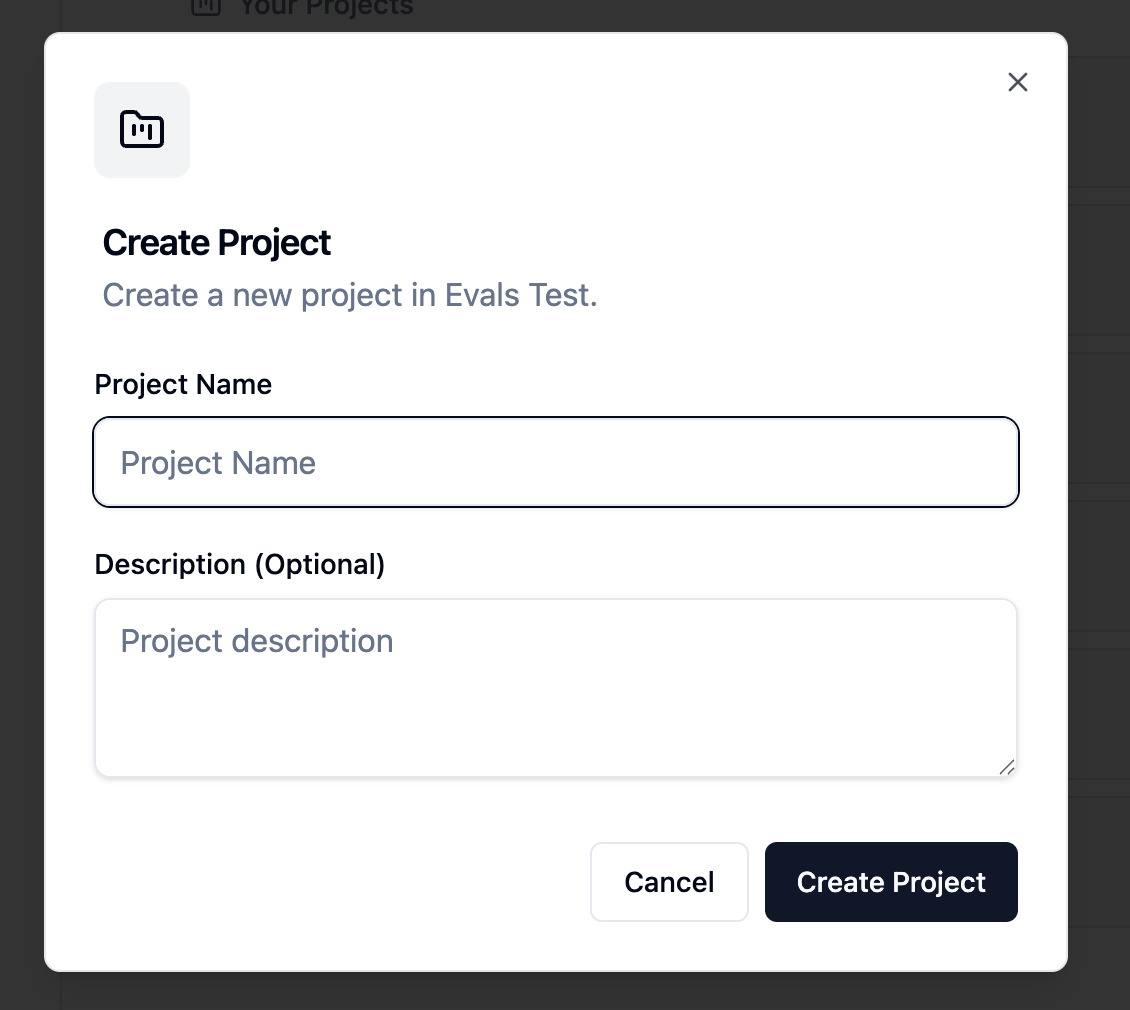 When the project is created, Upsolve automatically sets up default user roles and an admin user for you.
## Step 2: Add a connection
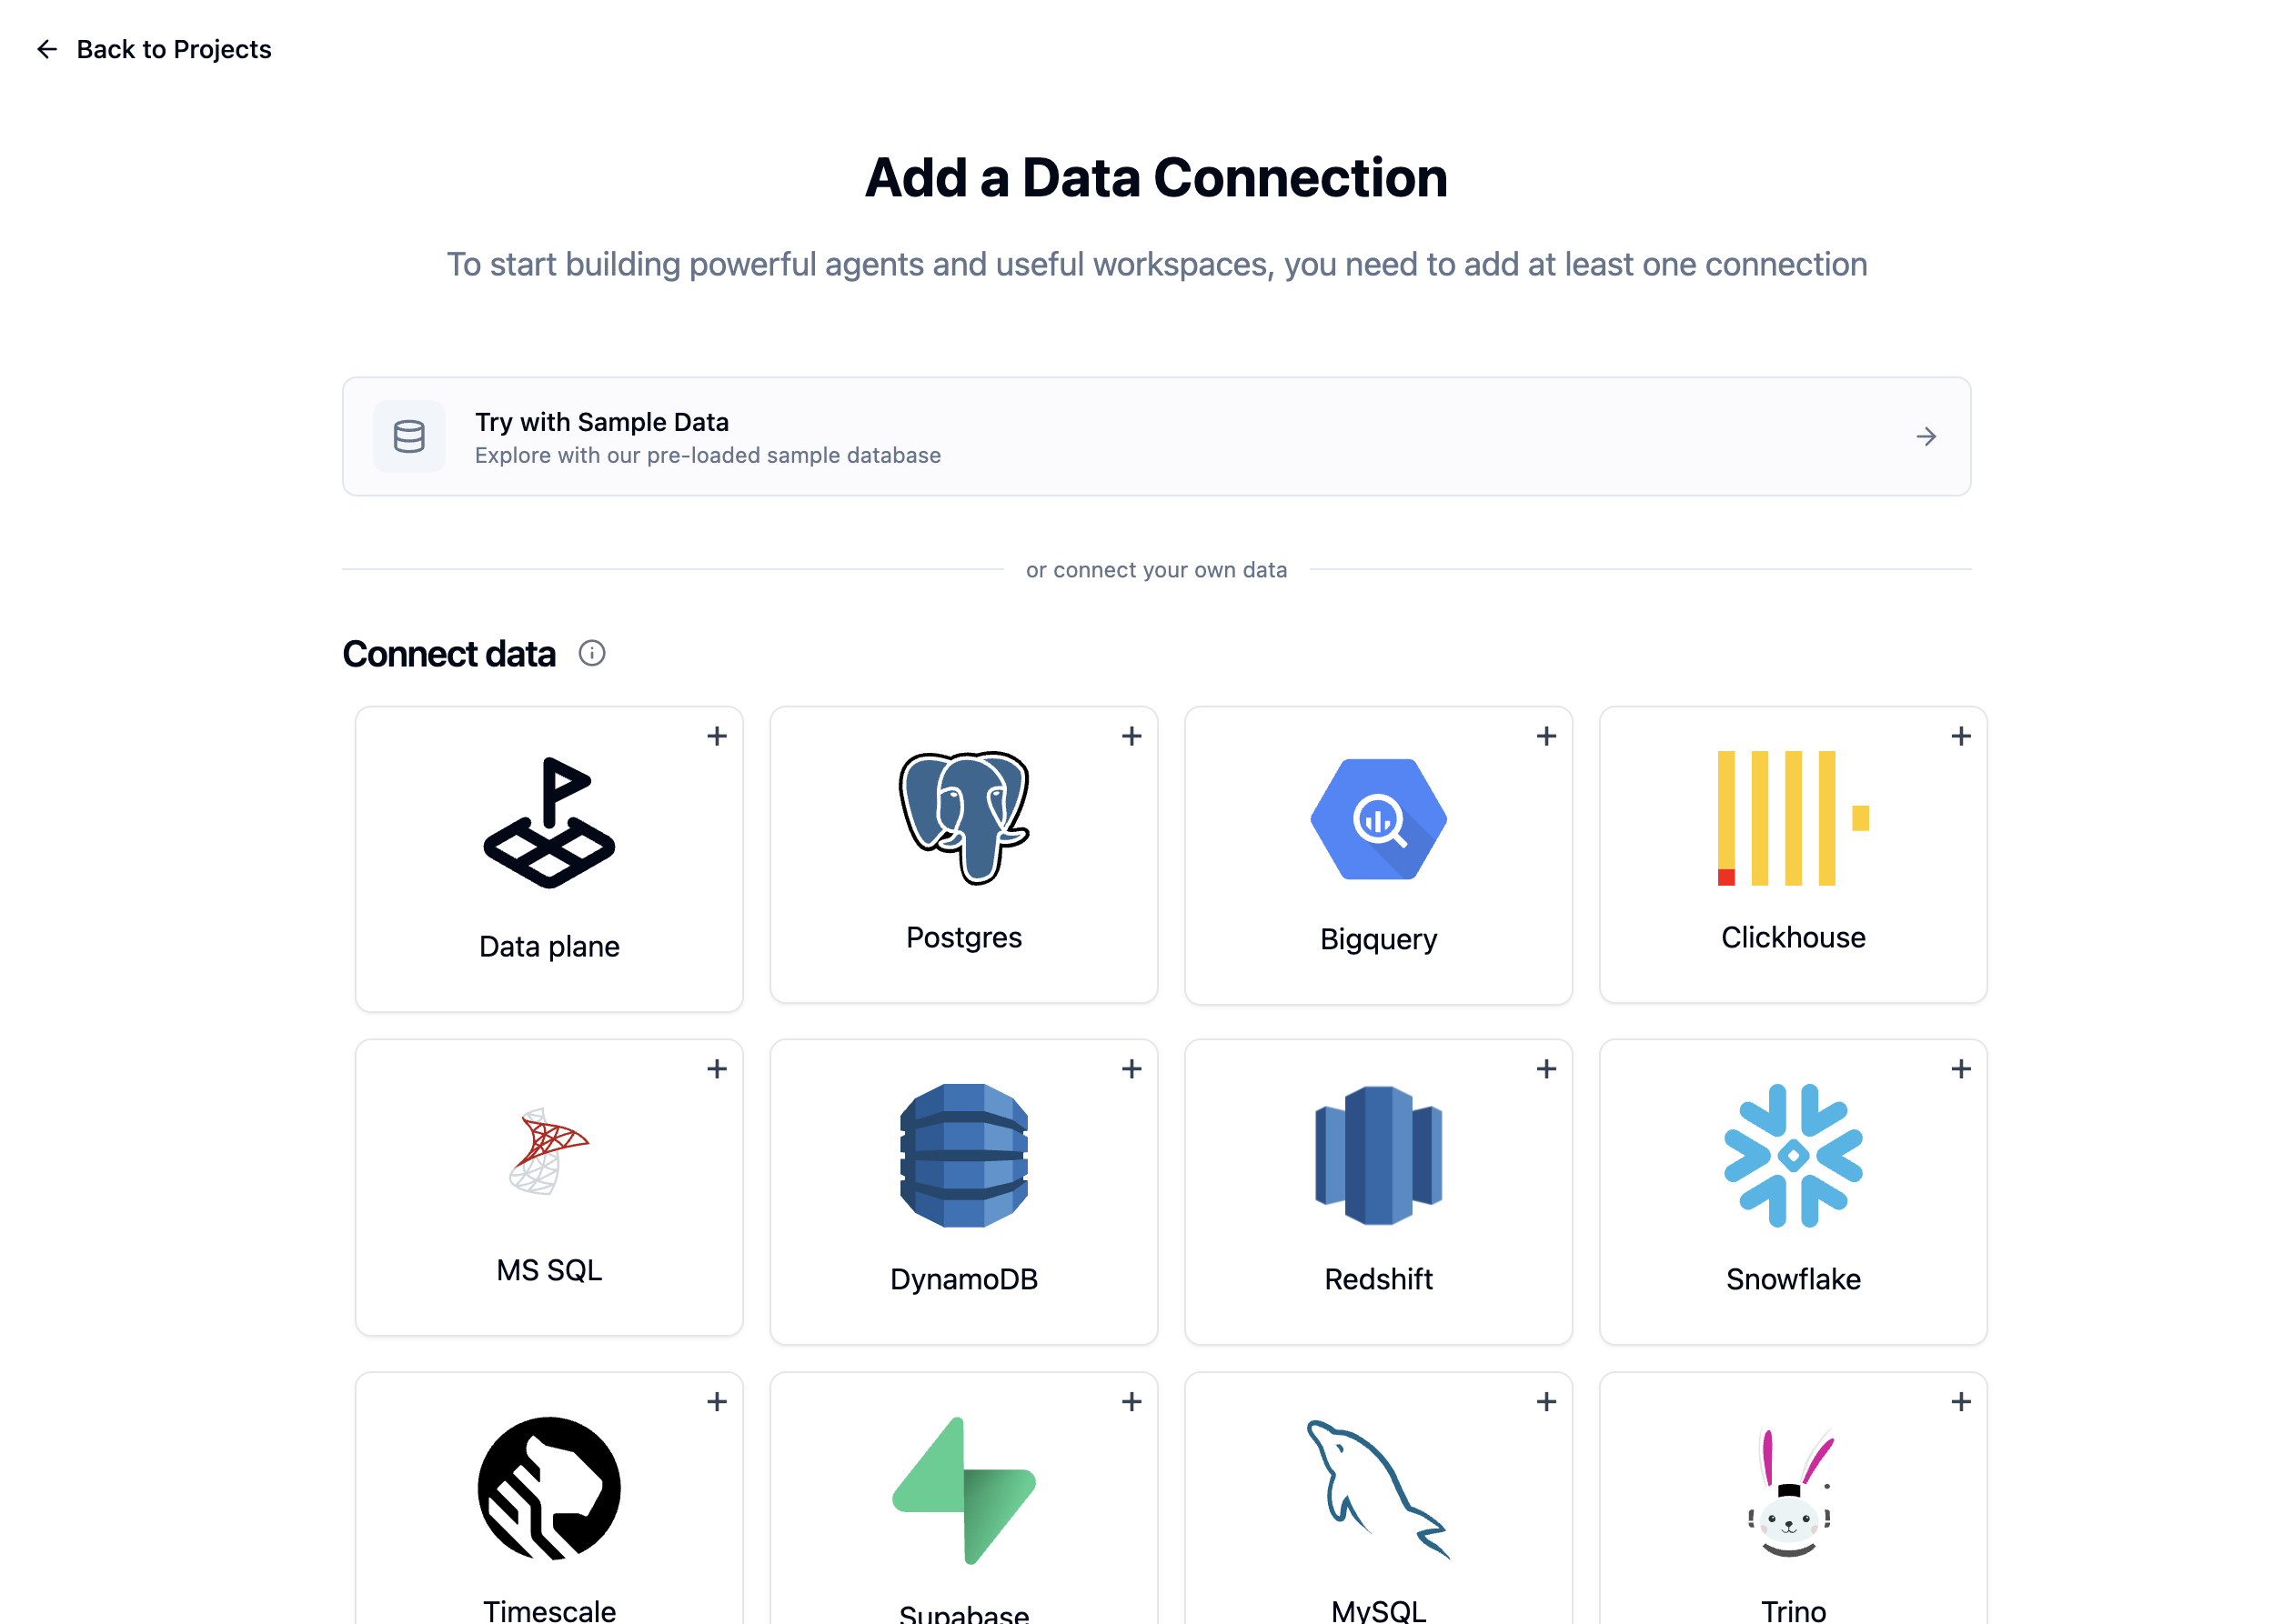
Connections link your project to a database. Every data model, agent, and application in the project draws from it.
1. Click **Add Connection** in your new project
2. Choose **Try Demo Data** to explore with sample data, or connect your real database
3. For real databases, select your database type, enter credentials, and test the connection
4. Click **Save**
When the project is created, Upsolve automatically sets up default user roles and an admin user for you.
## Step 2: Add a connection
Connections link your project to a database. Every data model, agent, and application in the project draws from it.
1. Click **Add Connection** in your new project
2. Choose **Try Demo Data** to explore with sample data, or connect your real database
3. For real databases, select your database type, enter credentials, and test the connection
4. Click **Save**
 ## Step 3: Create and configure your data model
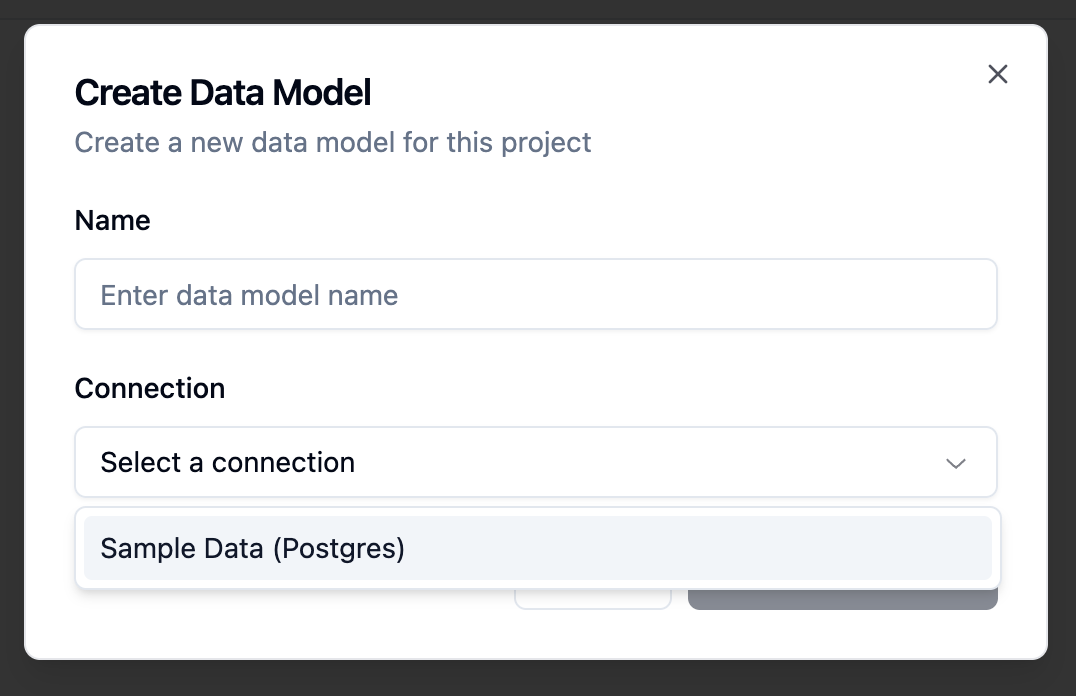
The data model defines exactly what the agent can see and how it should interpret your schema. This is worth spending time on — a well-annotated data model is the foundation of agent accuracy.
1. Go to the **Data Models** tab
2. Click **Create Data Model**
3. Select your connection and enter a name
4. Click **Create**
## Step 3: Create and configure your data model
The data model defines exactly what the agent can see and how it should interpret your schema. This is worth spending time on — a well-annotated data model is the foundation of agent accuracy.
1. Go to the **Data Models** tab
2. Click **Create Data Model**
3. Select your connection and enter a name
4. Click **Create**
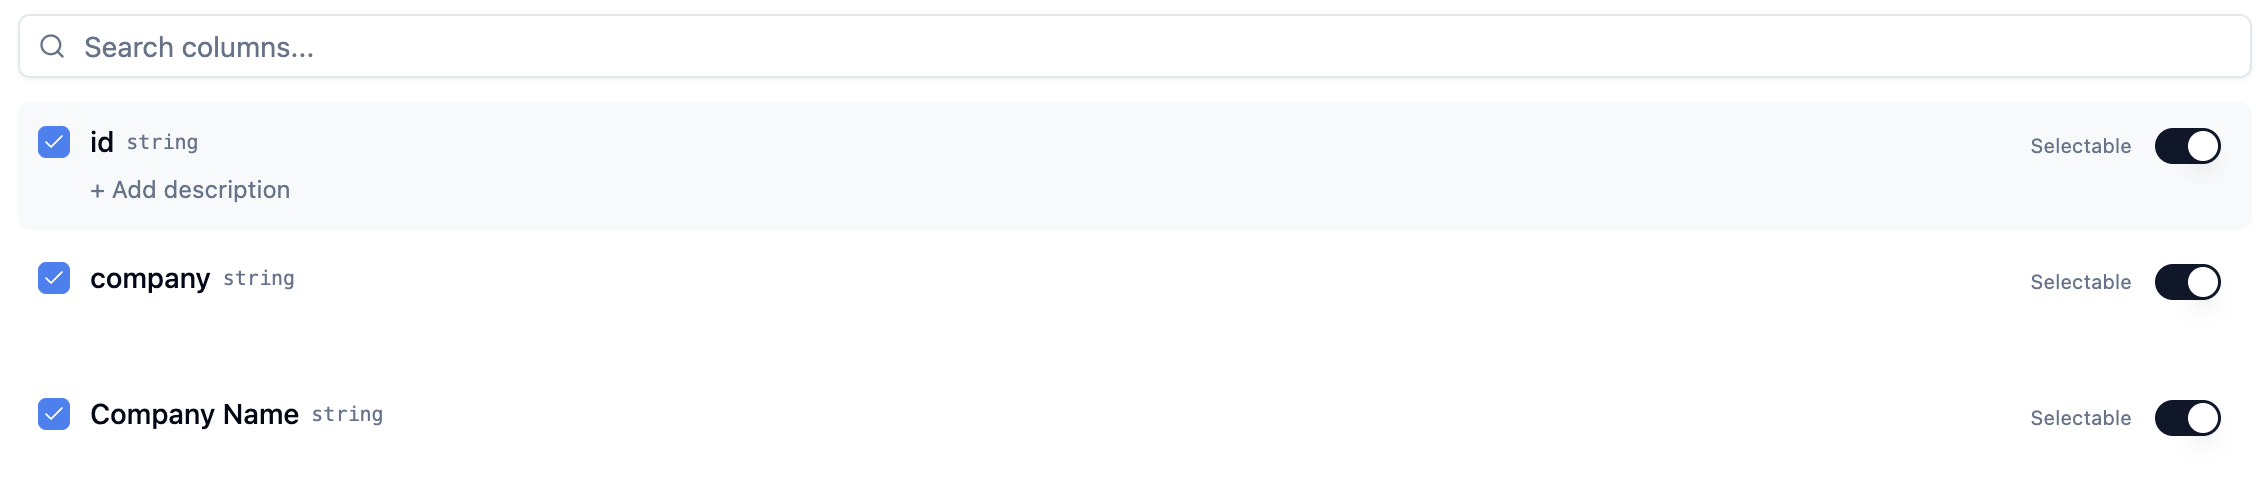
 Upsolve fetches all tables and columns from your connection automatically. From there, configure the model:
1. **Select tables** — Uncheck tables that aren't relevant to this agent's use case
2. **Select columns** — Uncheck sensitive or irrelevant columns within each table
3. **Add descriptions** — Annotate tables and columns with plain-English context so the agent understands what the data means, not just what it's named
4. **Mark selectables** — Flag categorical columns (region, status, owner) so the agent can enumerate valid filter values at query time
5. Click **Save**
Upsolve fetches all tables and columns from your connection automatically. From there, configure the model:
1. **Select tables** — Uncheck tables that aren't relevant to this agent's use case
2. **Select columns** — Uncheck sensitive or irrelevant columns within each table
3. **Add descriptions** — Annotate tables and columns with plain-English context so the agent understands what the data means, not just what it's named
4. **Mark selectables** — Flag categorical columns (region, status, owner) so the agent can enumerate valid filter values at query time
5. Click **Save**
 See [Data Model & Schema](/ai-agent-builder/data-model-schema) for a full guide on what makes a good data model configuration.
### Configure data security
If you're building for multiple customers or need to restrict what data each user sees, configure row-level security rules on your tables now.
1. Click on a table in the data model
2. Go to the **Data Security** tab
3. Write a filter rule using `{{organization.*}}` or `{{user.*}}` placeholders:
```sql theme={null}
SELECT *
FROM "orders"
WHERE "company_id" = {{organization.company_id}}
```
4. Click **Save**
See [Data Model & Schema](/ai-agent-builder/data-model-schema) for a full guide on what makes a good data model configuration.
### Configure data security
If you're building for multiple customers or need to restrict what data each user sees, configure row-level security rules on your tables now.
1. Click on a table in the data model
2. Go to the **Data Security** tab
3. Write a filter rule using `{{organization.*}}` or `{{user.*}}` placeholders:
```sql theme={null}
SELECT *
FROM "orders"
WHERE "company_id" = {{organization.company_id}}
```
4. Click **Save**
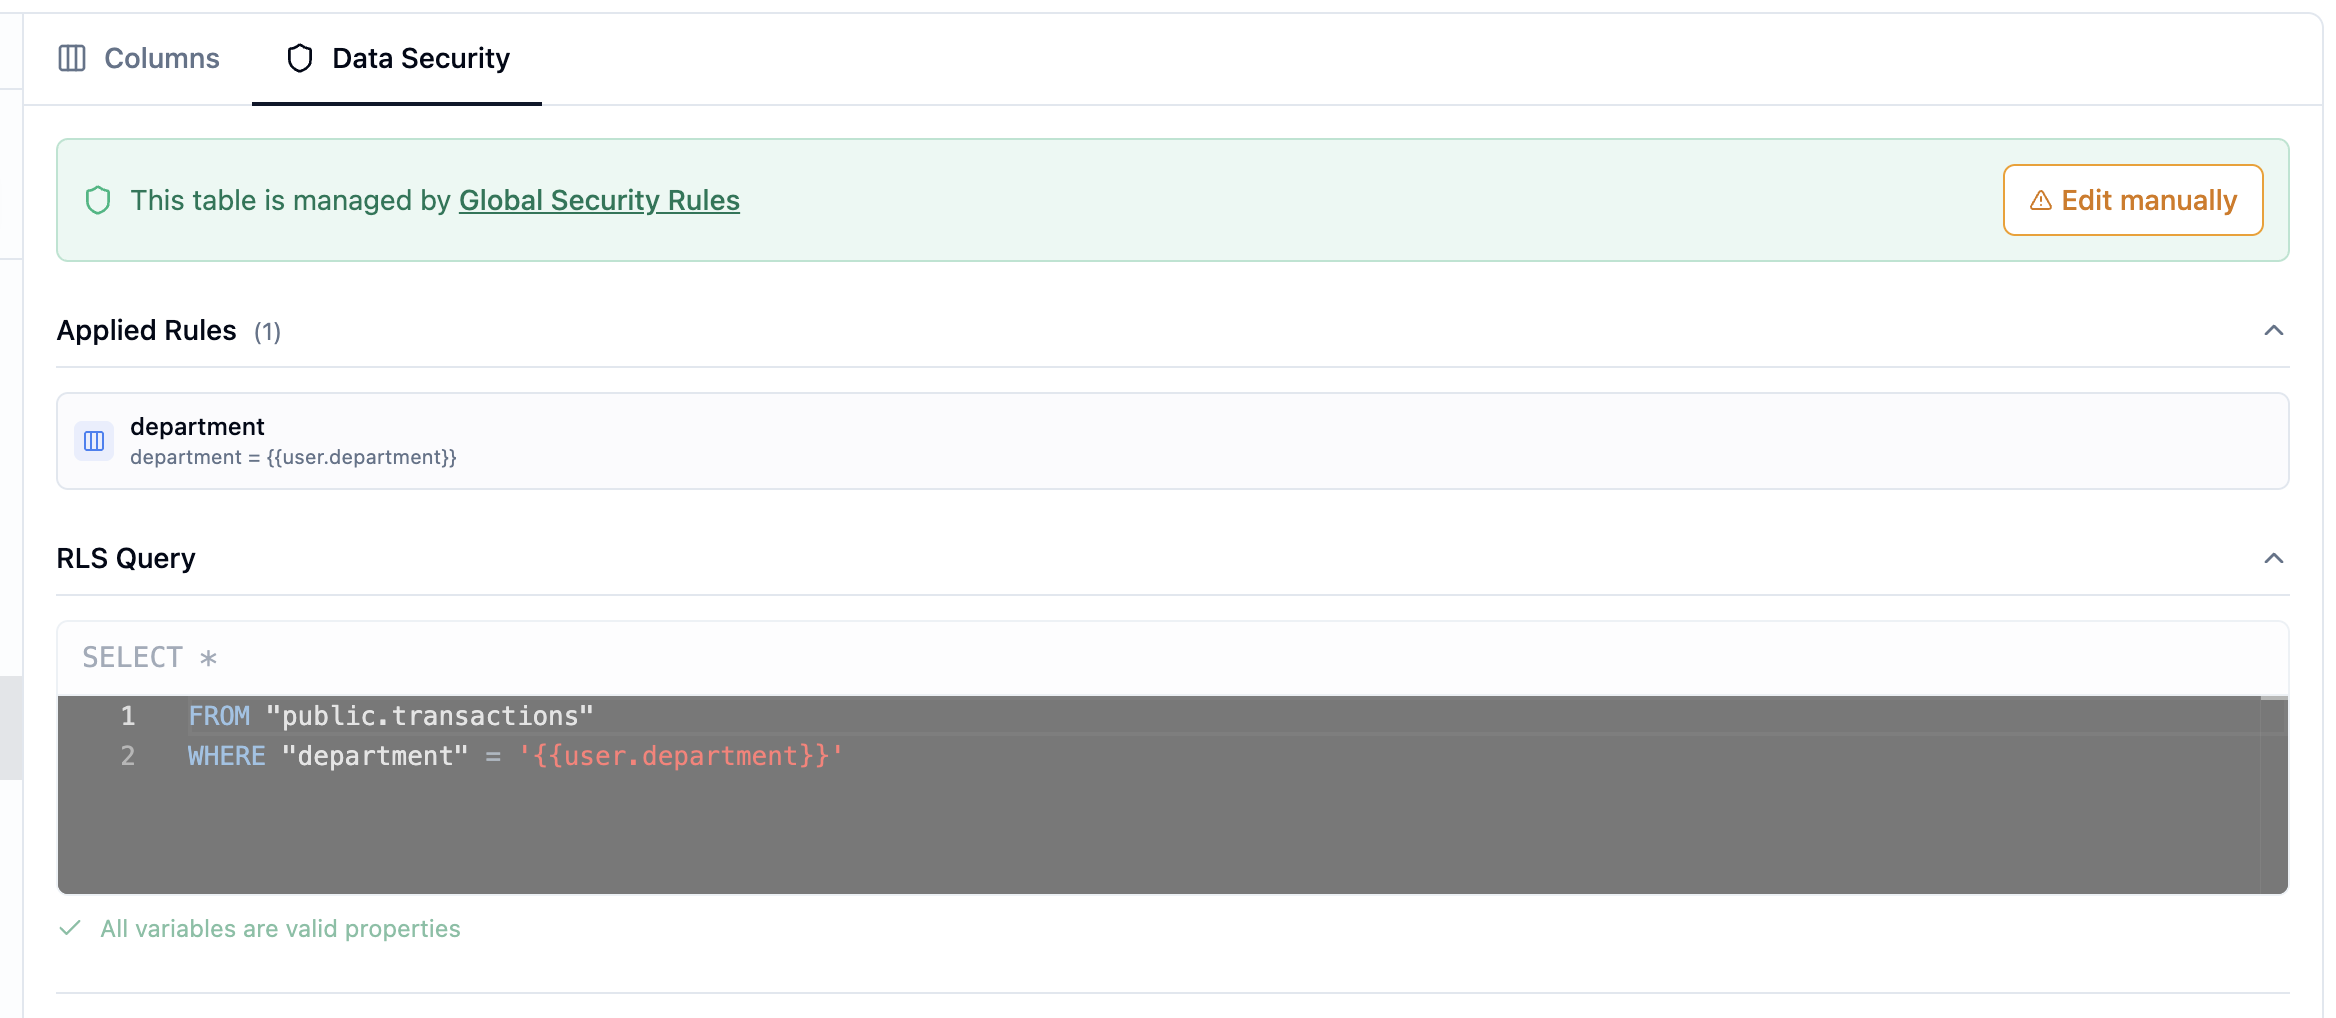 See [Row-Level Security](/ai-agent-builder/rls) for the full guide on security rule types, testing, and global rules.
## Step 4: Set the data model to production
Agents and applications can only use a data model once a version has been marked as production. This validates the schema against your live connection before exposing it.
1. Open your data model and go to the **Versions** tab
2. Click **Set as Production** on the latest version
3. Wait for validation to pass
See [Row-Level Security](/ai-agent-builder/rls) for the full guide on security rule types, testing, and global rules.
## Step 4: Set the data model to production
Agents and applications can only use a data model once a version has been marked as production. This validates the schema against your live connection before exposing it.
1. Open your data model and go to the **Versions** tab
2. Click **Set as Production** on the latest version
3. Wait for validation to pass
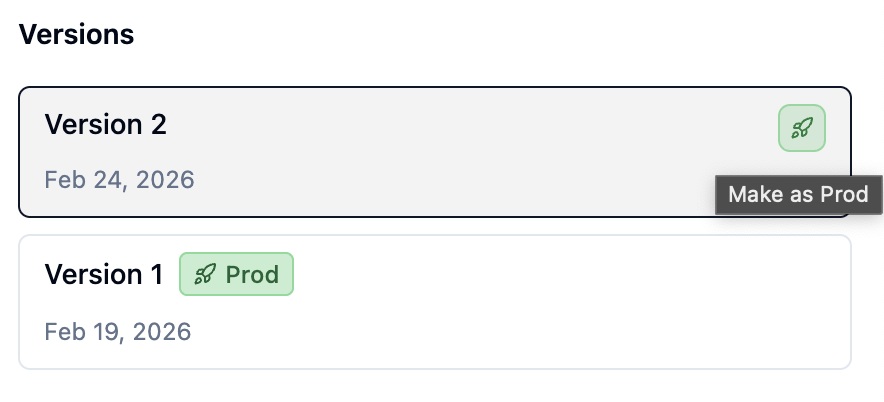 If validation fails, you'll see which tables or columns couldn't be found in the connection — typically a sign that the schema has changed since the data model was created.
## Step 5: Create an agent or application
You can create either or both — they share the same data model.
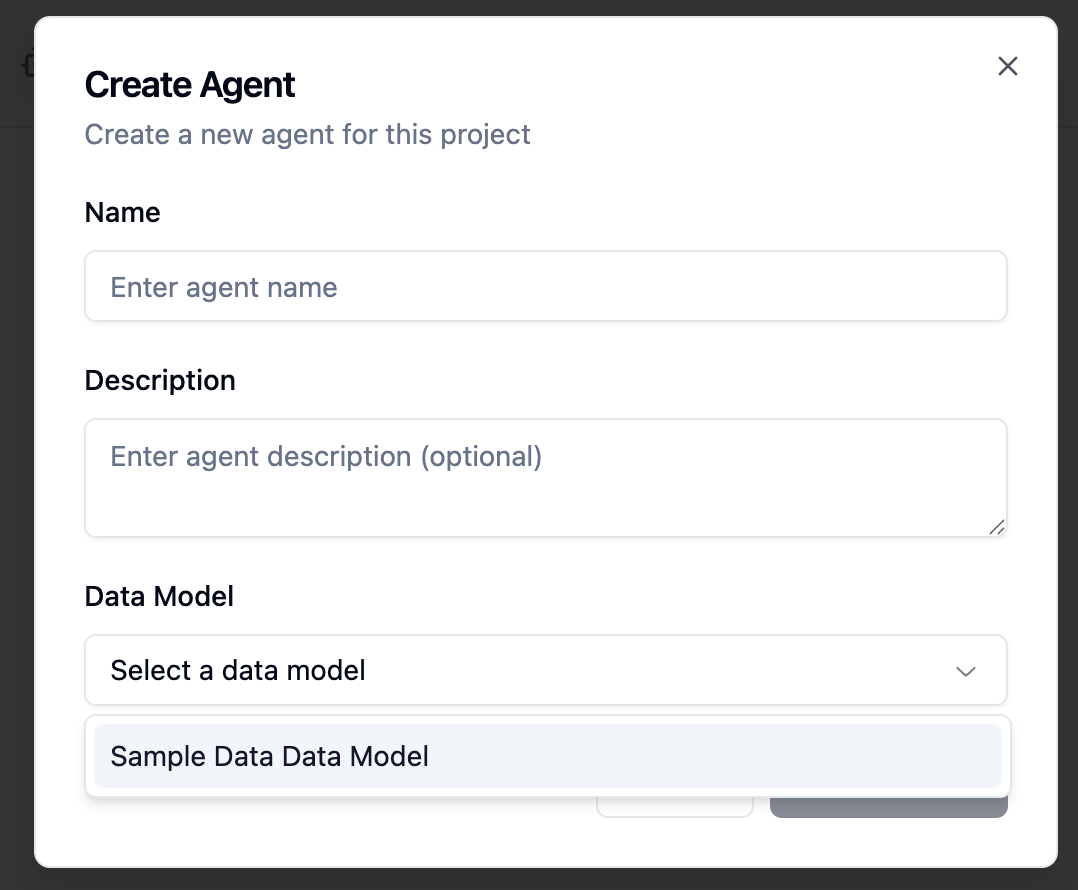
### Option A: Create an agent
1. Go to the **Agents** tab
2. Click **Create Agent**
3. Select your production data model
4. Click **Create**
If validation fails, you'll see which tables or columns couldn't be found in the connection — typically a sign that the schema has changed since the data model was created.
## Step 5: Create an agent or application
You can create either or both — they share the same data model.
### Option A: Create an agent
1. Go to the **Agents** tab
2. Click **Create Agent**
3. Select your production data model
4. Click **Create**
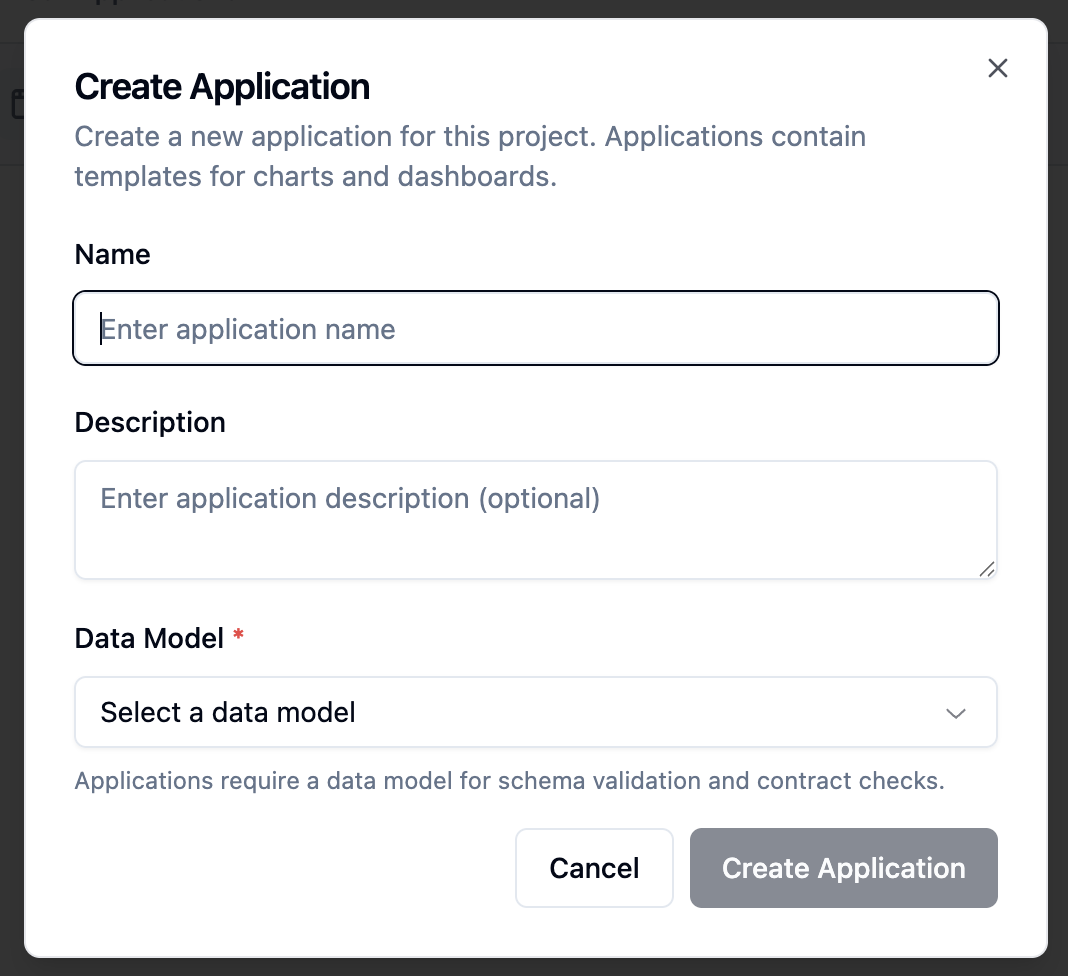
 ### Option B: Create an application
1. Go to the **Applications** tab
2. Click **Create Application**
3. Select your production data model
4. Click **Create**
### Option B: Create an application
1. Go to the **Applications** tab
2. Click **Create Application**
3. Select your production data model
4. Click **Create**
 ## Step 6: Encode your context
This is the core work that determines agent quality. Before setting your agent to production, work through the three encoding steps:
**System prompt** — Write the business rules, KPI definitions, and behavioral guardrails the agent should always follow. See [System Prompts](/ai-agent-builder/system-prompts).
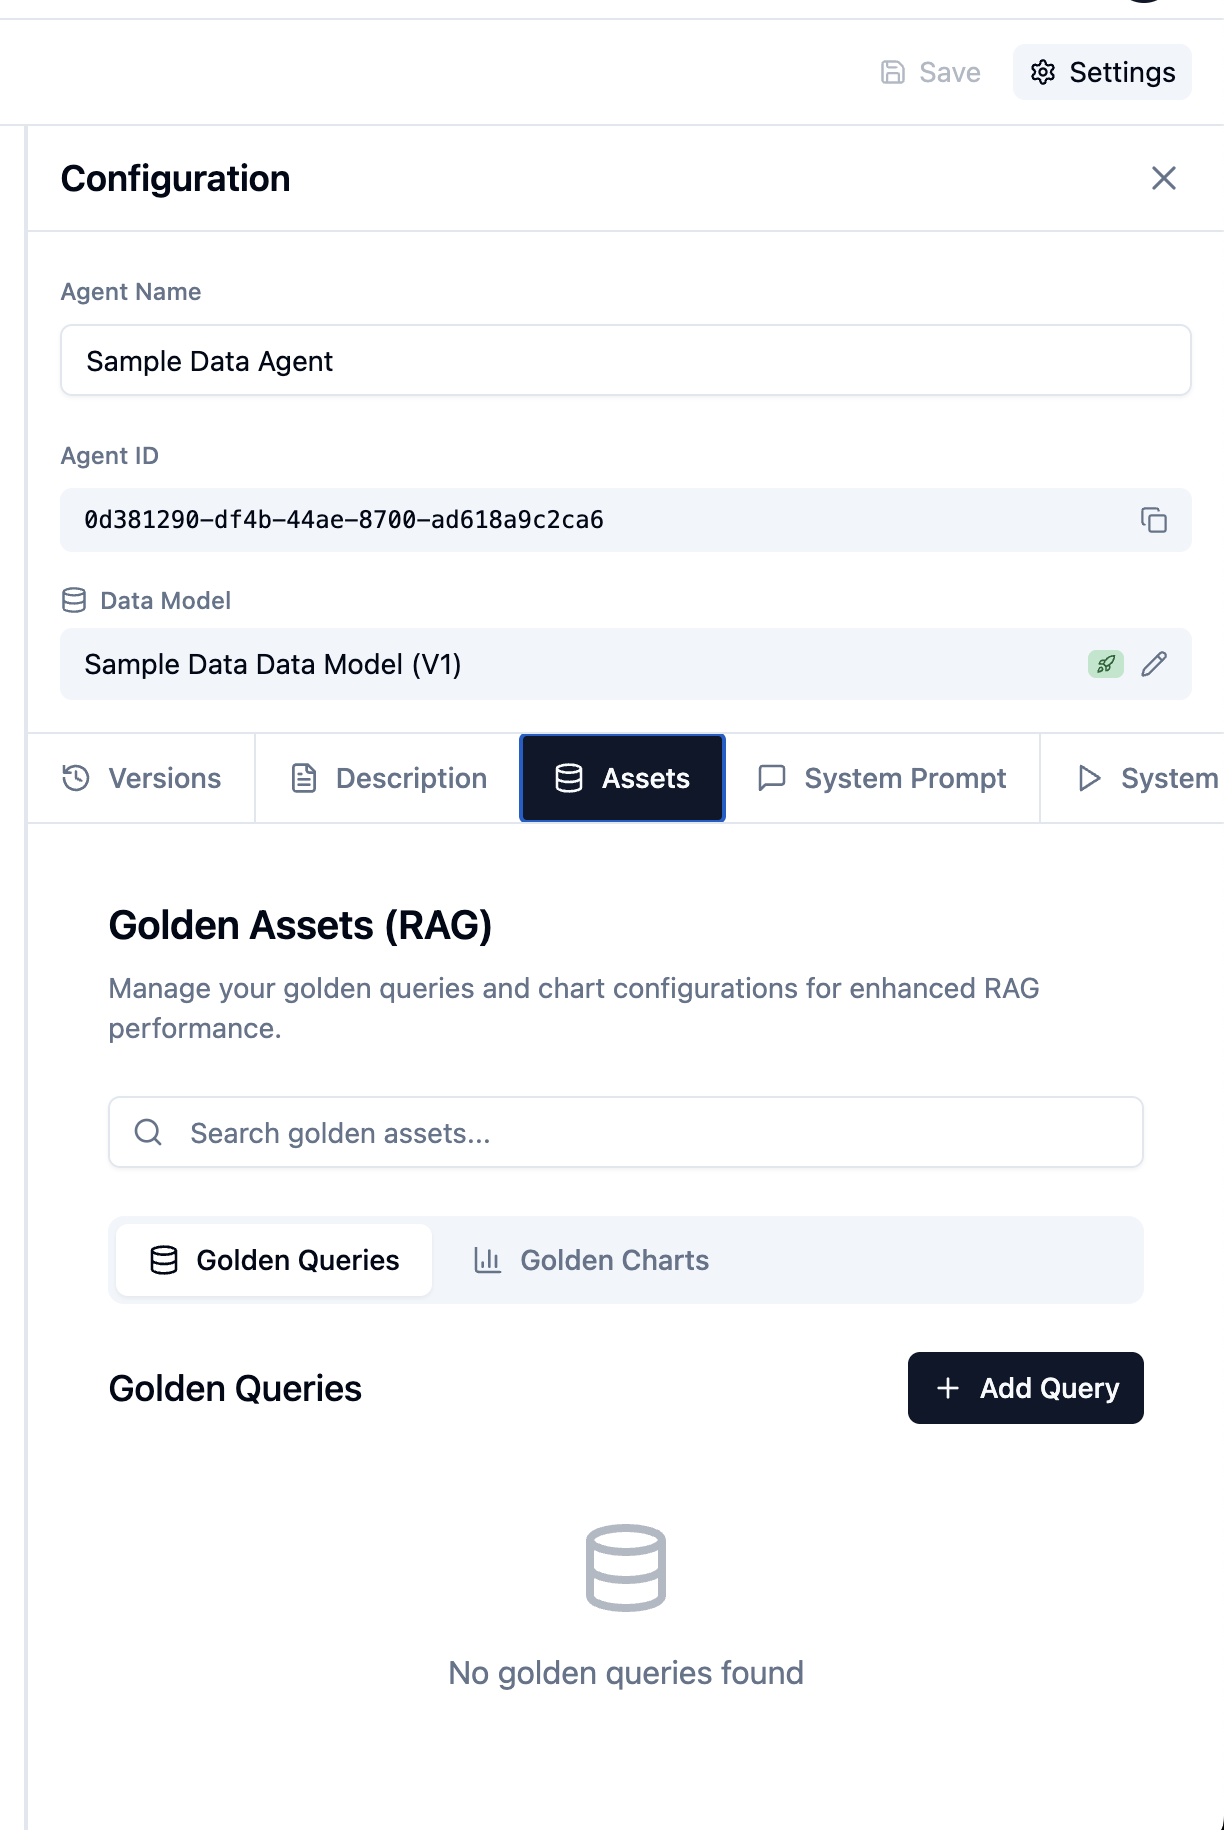
**Golden Assets** — Add 10–20 examples covering your highest-frequency question patterns. Golden Queries pair a natural language question with the correct SQL; Golden Charts go further and include a chart configuration too. The agent retrieves these as reference when answering similar questions. See [Golden Assets](/ai-agent-builder/golden-assets).
## Step 6: Encode your context
This is the core work that determines agent quality. Before setting your agent to production, work through the three encoding steps:
**System prompt** — Write the business rules, KPI definitions, and behavioral guardrails the agent should always follow. See [System Prompts](/ai-agent-builder/system-prompts).
**Golden Assets** — Add 10–20 examples covering your highest-frequency question patterns. Golden Queries pair a natural language question with the correct SQL; Golden Charts go further and include a chart configuration too. The agent retrieves these as reference when answering similar questions. See [Golden Assets](/ai-agent-builder/golden-assets).
 ### For applications: build templates
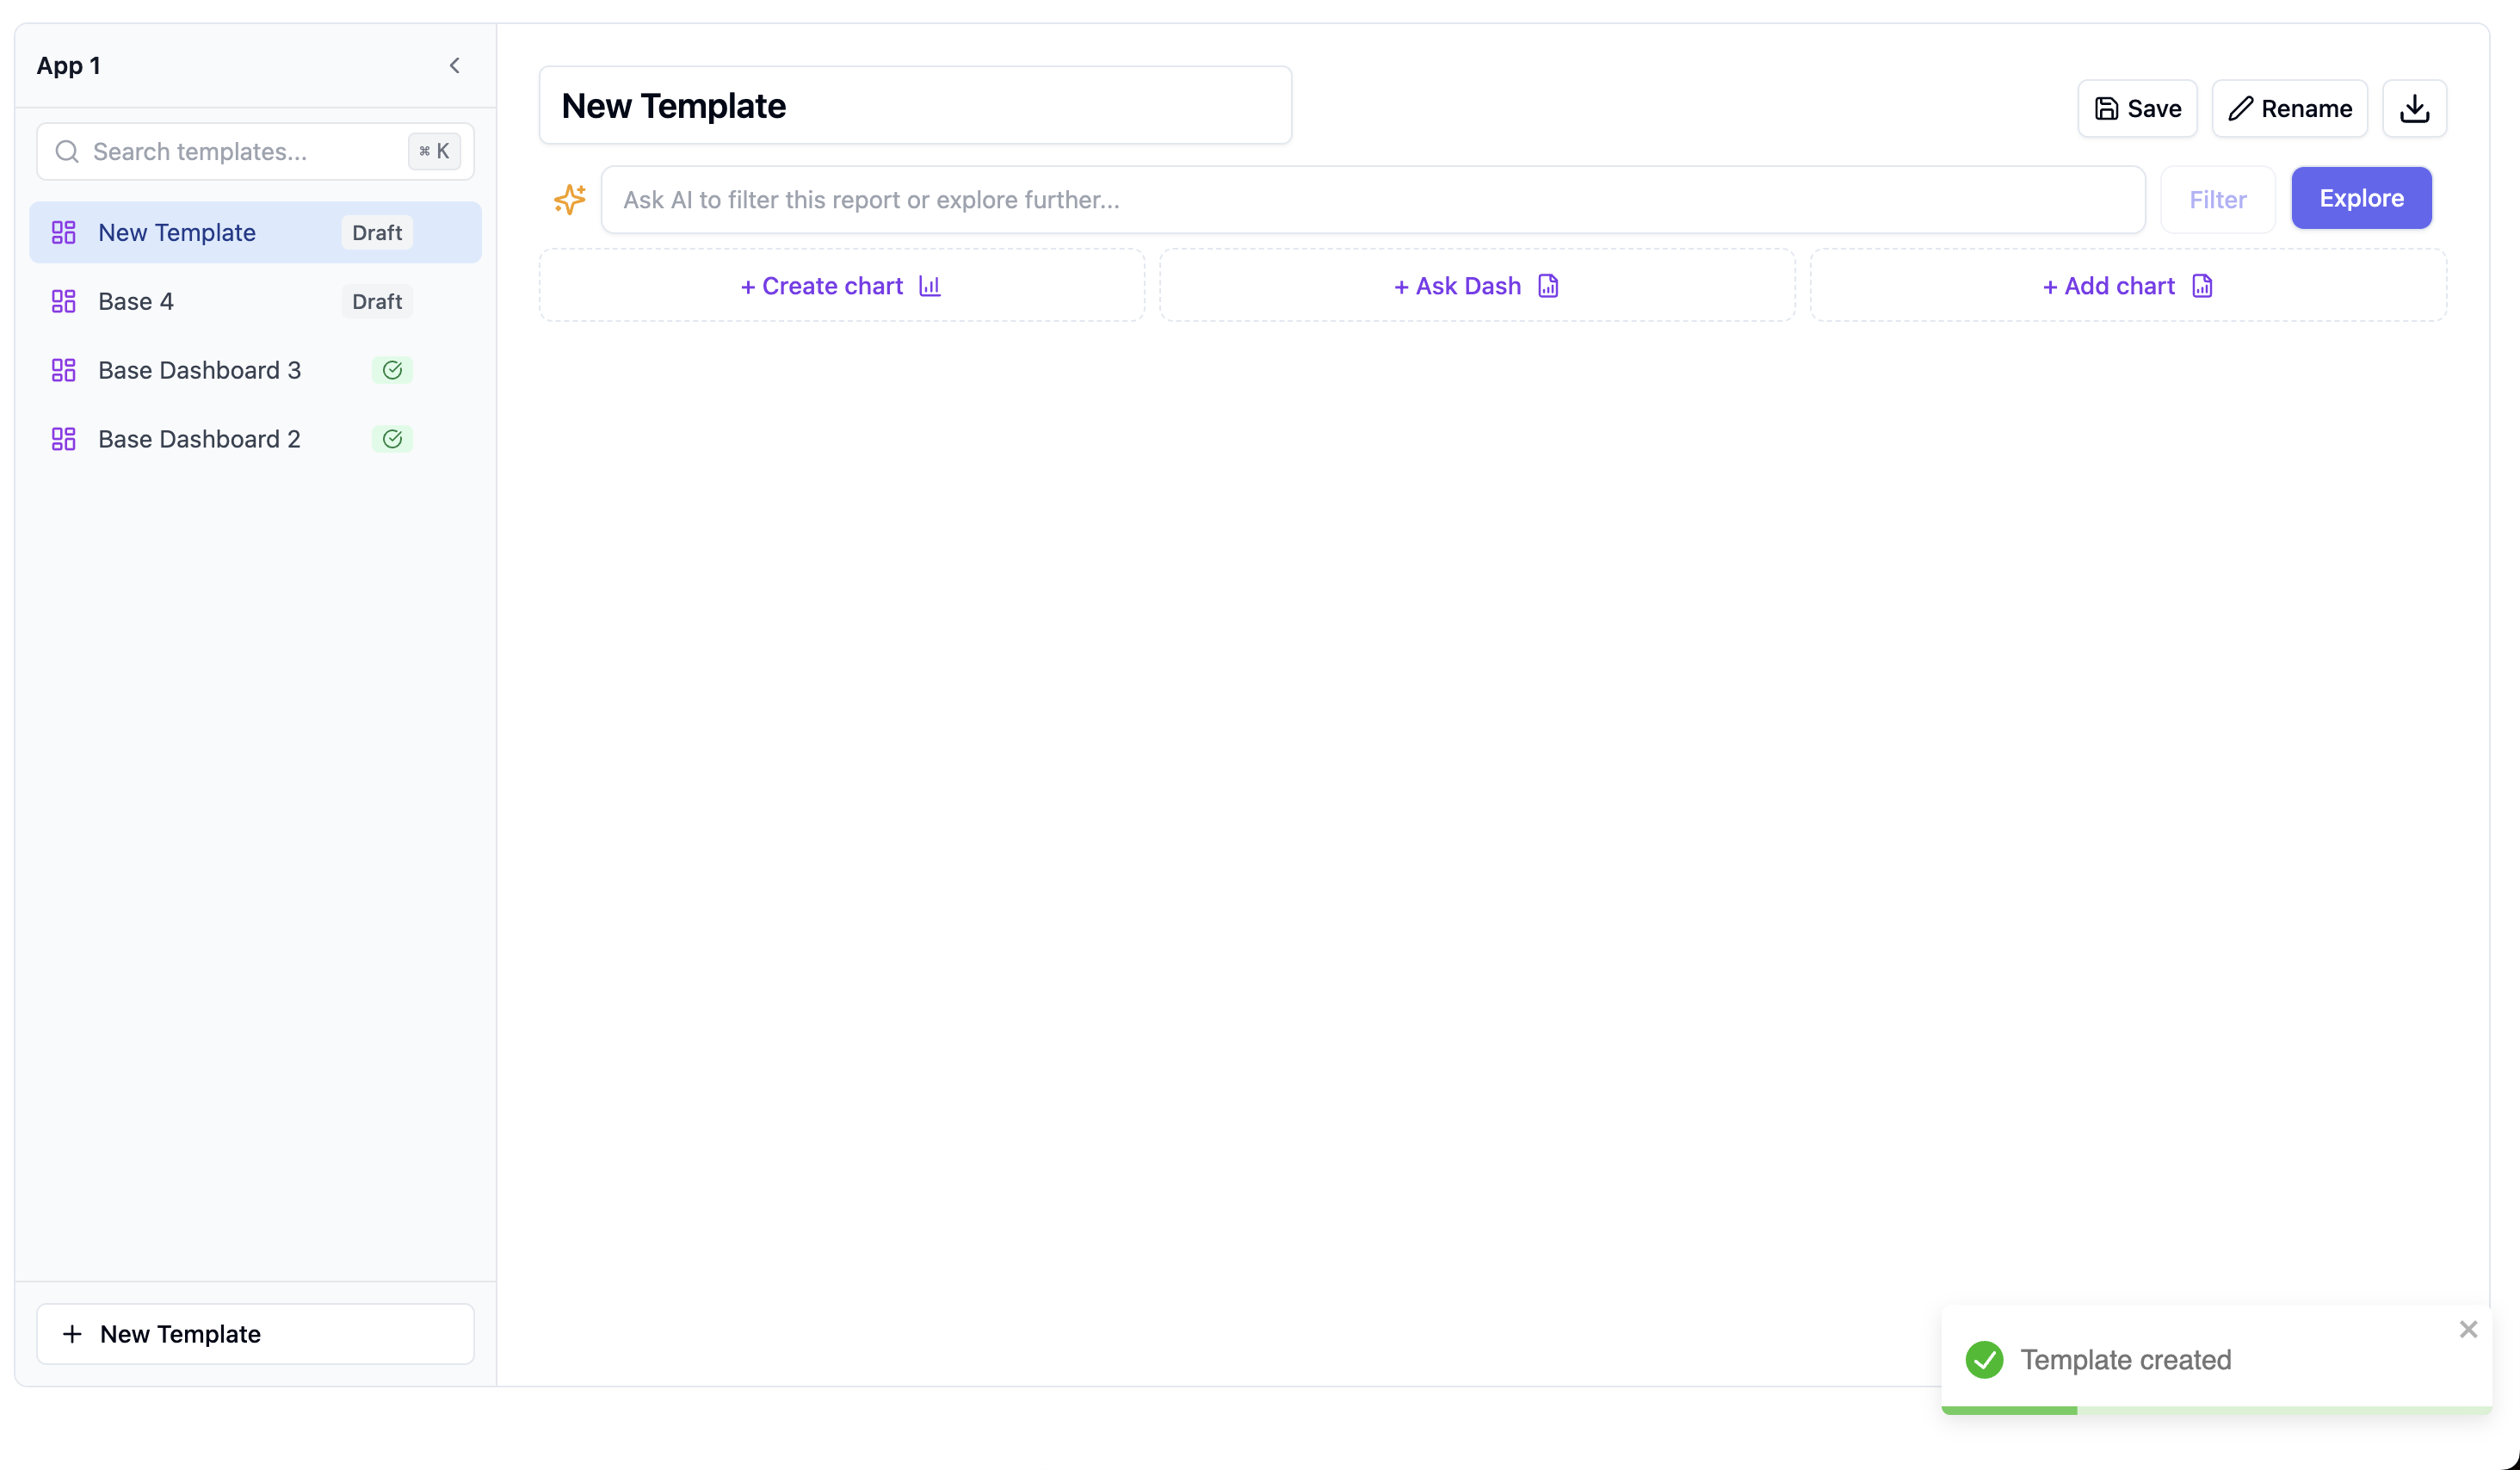
1. Click **Add Dashboard** in your application
2. Name it and add charts by clicking **Add Chart**
3. Configure each chart with your data and arrange the layout
4. Click **Save**
### For applications: build templates
1. Click **Add Dashboard** in your application
2. Name it and add charts by clicking **Add Chart**
3. Configure each chart with your data and arrange the layout
4. Click **Save**
 Add 10–20 Golden Assets for best agent results.
## Step 7: Go to production
### For agents
1. Test the agent in admin view — check the observability trace on a few responses to confirm the SQL and logic are correct
2. Go to the **Versions** tab
3. Click **Set as Production**
### For applications
1. Preview each template as a test user to confirm RLS is working
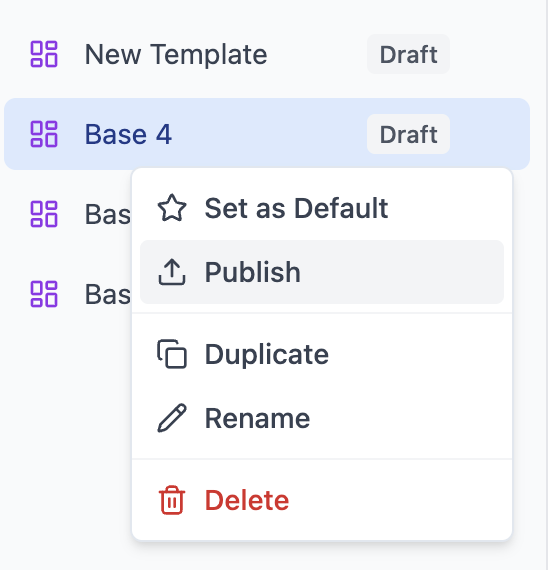
2. Click **Publish** on each template — this propagates copies to all spaces
Add 10–20 Golden Assets for best agent results.
## Step 7: Go to production
### For agents
1. Test the agent in admin view — check the observability trace on a few responses to confirm the SQL and logic are correct
2. Go to the **Versions** tab
3. Click **Set as Production**
### For applications
1. Preview each template as a test user to confirm RLS is working
2. Click **Publish** on each template — this propagates copies to all spaces
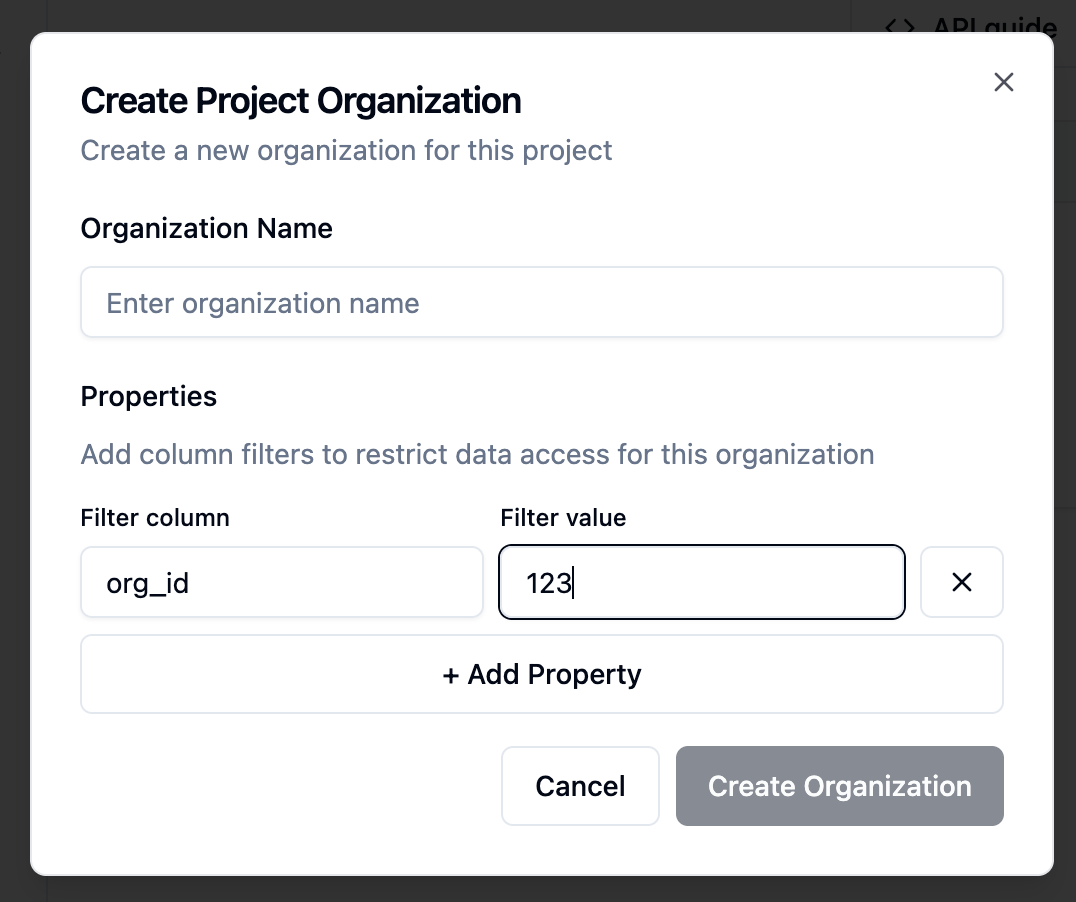
 ## Step 8: Add project organizations
Organizations represent your customers or tenants. Each one gets isolated access to their own data, governed by the security rules you configured in the data model.
1. Go to the **Organizations** tab
2. Click **Add Organization**
3. Enter the organization name (e.g., "Acme Corp")
4. Add properties that your security rules reference:
```json theme={null}
{
"company_id": "acme-123"
}
```
5. Click **Create**
## Step 8: Add project organizations
Organizations represent your customers or tenants. Each one gets isolated access to their own data, governed by the security rules you configured in the data model.
1. Go to the **Organizations** tab
2. Click **Add Organization**
3. Enter the organization name (e.g., "Acme Corp")
4. Add properties that your security rules reference:
```json theme={null}
{
"company_id": "acme-123"
}
```
5. Click **Create**
 A Space is automatically created for each organization in every application — their private copy of your published templates.
## Step 9: Register end users
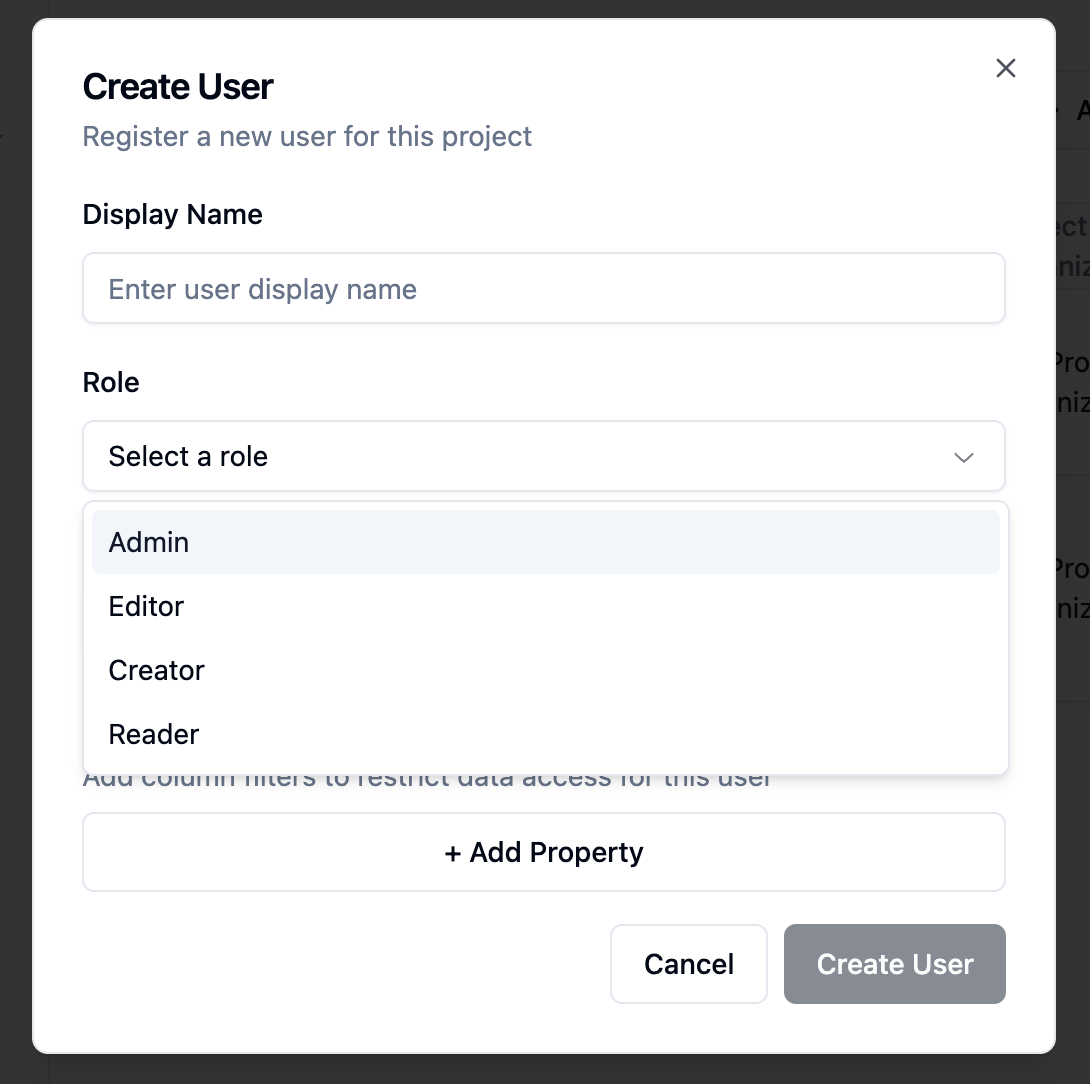
Users can be added via the UI or programmatically via API. Each user belongs to an organization and is assigned a role that controls their permissions.
### Via the UI
1. Go to the **Users** tab
2. Click **Add User**
3. Enter the user name, select their organization and role
4. Add any user-level properties needed for security rules
5. Click **Create**
A Space is automatically created for each organization in every application — their private copy of your published templates.
## Step 9: Register end users
Users can be added via the UI or programmatically via API. Each user belongs to an organization and is assigned a role that controls their permissions.
### Via the UI
1. Go to the **Users** tab
2. Click **Add User**
3. Enter the user name, select their organization and role
4. Add any user-level properties needed for security rules
5. Click **Create**
 ### Via API
```bash theme={null}
curl -X POST https://api.upsolve.ai/api/v1/project/user/register \
-H "Authorization: Bearer YOUR_API_KEY" \
-H "Content-Type: application/json" \
-d '{
"name": "John Smith",
"projectId": "YOUR_PROJECT_ID",
"userRoleId": "READER_ROLE_ID",
"projectOrganizationId": "ACME_ORG_ID",
"properties": {
"department": "sales"
}
}'
```
## Step 10: Generate user tokens
Users authenticate with short-lived JWT tokens generated server-side from your API key. These tokens are how Upsolve knows who is accessing the agent and which security rules to apply.
```bash theme={null}
curl -X POST https://api.upsolve.ai/api/v1/project/user/token \
-H "Authorization: Bearer YOUR_API_KEY" \
-H "Content-Type: application/json" \
-d '{
"userId": "USER_ID_FROM_REGISTRATION",
"expiration": "24h"
}'
```
Response:
```json theme={null}
{
"token": "eyJhbGciOiJIUzI1NiIs..."
}
```
Pass this token from your backend to your frontend to authenticate users within your embedded agent or dashboard.
## You're done!
Users can now:
* Chat with agents using natural language
* View dashboards with their filtered data
* Create their own charts and dashboards in their space
## Setup checklist
| Step | Required for |
| ----------------------------------------- | ------------------------------- |
| Project created | Everything |
| Connection added | Data access |
| Data model created and configured | Agents & applications |
| Data model set to production | Going live |
| Data security configured | Multi-tenant isolation |
| Agent created | AI chat |
| Context encoded (prompts + Golden Assets) | Agent accuracy |
| Agent set to production | User access to agent |
| Application created | Dashboard features (embeddable) |
| Dashboard templates published | User access to dashboards |
| Organizations added | Tenant isolation |
| Users registered | End-user access |
## Next steps
Deep dive into data model configuration, system prompts, and Golden Assets.
Embed your agent in your product with the backend and frontend setup guides.
### Via API
```bash theme={null}
curl -X POST https://api.upsolve.ai/api/v1/project/user/register \
-H "Authorization: Bearer YOUR_API_KEY" \
-H "Content-Type: application/json" \
-d '{
"name": "John Smith",
"projectId": "YOUR_PROJECT_ID",
"userRoleId": "READER_ROLE_ID",
"projectOrganizationId": "ACME_ORG_ID",
"properties": {
"department": "sales"
}
}'
```
## Step 10: Generate user tokens
Users authenticate with short-lived JWT tokens generated server-side from your API key. These tokens are how Upsolve knows who is accessing the agent and which security rules to apply.
```bash theme={null}
curl -X POST https://api.upsolve.ai/api/v1/project/user/token \
-H "Authorization: Bearer YOUR_API_KEY" \
-H "Content-Type: application/json" \
-d '{
"userId": "USER_ID_FROM_REGISTRATION",
"expiration": "24h"
}'
```
Response:
```json theme={null}
{
"token": "eyJhbGciOiJIUzI1NiIs..."
}
```
Pass this token from your backend to your frontend to authenticate users within your embedded agent or dashboard.
## You're done!
Users can now:
* Chat with agents using natural language
* View dashboards with their filtered data
* Create their own charts and dashboards in their space
## Setup checklist
| Step | Required for |
| ----------------------------------------- | ------------------------------- |
| Project created | Everything |
| Connection added | Data access |
| Data model created and configured | Agents & applications |
| Data model set to production | Going live |
| Data security configured | Multi-tenant isolation |
| Agent created | AI chat |
| Context encoded (prompts + Golden Assets) | Agent accuracy |
| Agent set to production | User access to agent |
| Application created | Dashboard features (embeddable) |
| Dashboard templates published | User access to dashboards |
| Organizations added | Tenant isolation |
| Users registered | End-user access |
## Next steps
Deep dive into data model configuration, system prompts, and Golden Assets.
Embed your agent in your product with the backend and frontend setup guides.