> ## Documentation Index
> Fetch the complete documentation index at: https://docs.upsolve.ai/llms.txt
> Use this file to discover all available pages before exploring further.
# Zoom
> Discover a seamless integration process! Learn how to connect Zoom to Upsolve effortlessly for streamlined transactions.
This article guides you through the process of connecting Zoom to Upsolve, allowing you to seamlessly access your Zoom data within the Upsolve platform.
## Prerequisites
Before you start, you will need the following information from Zoom.
* Client ID (required for advanced authentication)
* Client Secret (required for advanced authentication)
Follow the steps below to obtain it:
1. Navigate to the [Zoom Marketplace](https://marketplace.zoom.us/) and select 'Build App' from the dropdown menu to begin the app creation process.
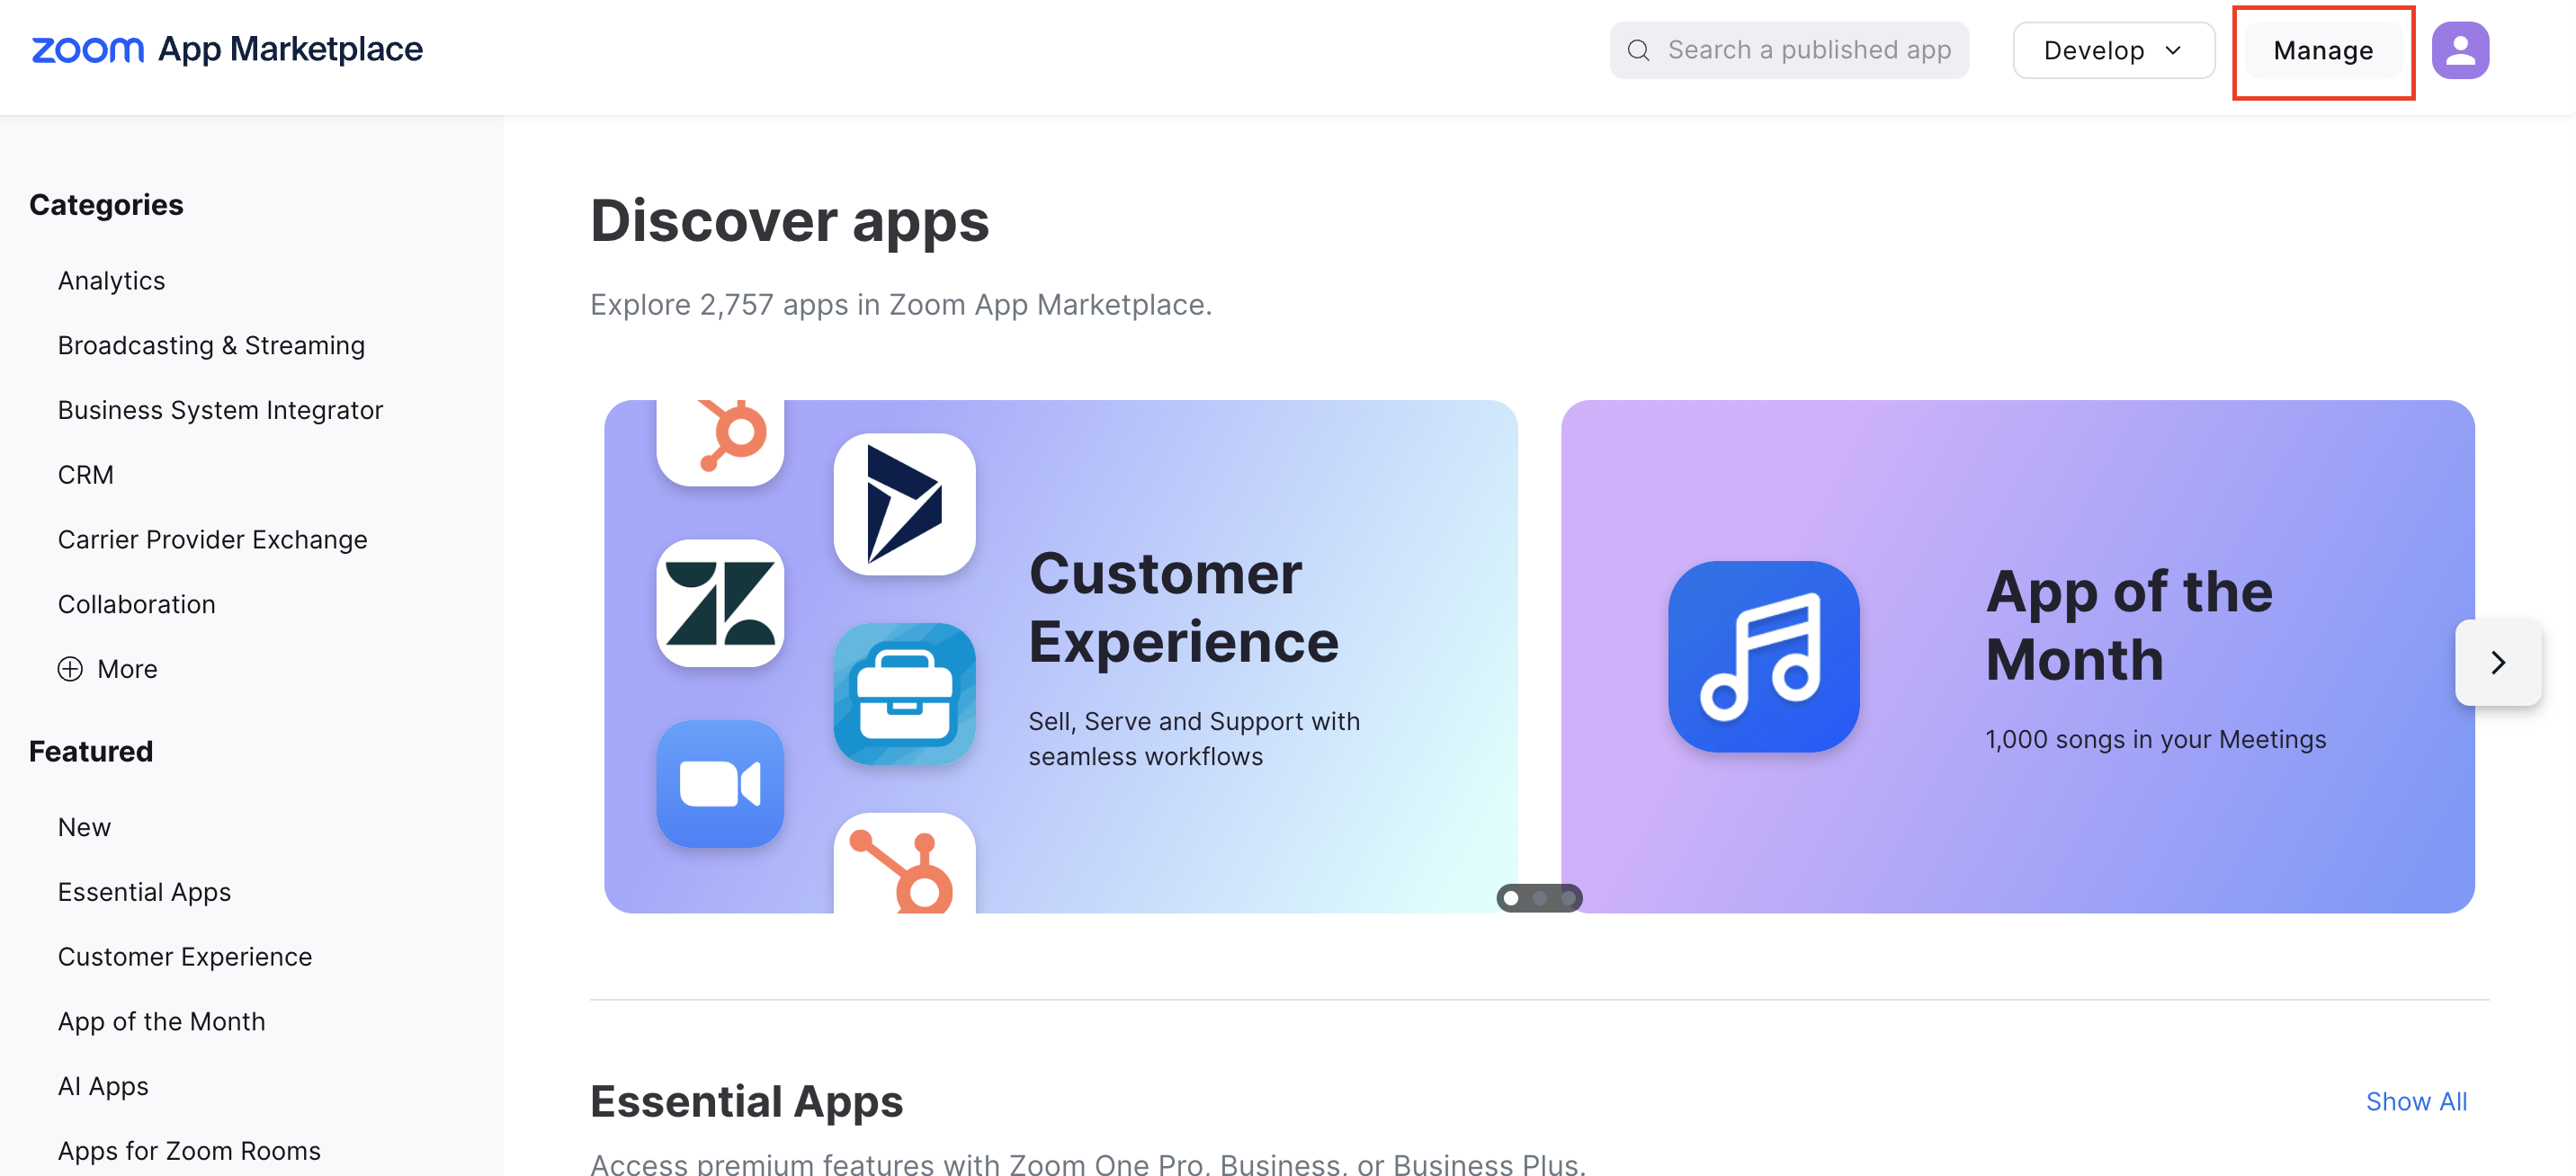 2. Choose the type of app you want to create from the available options.
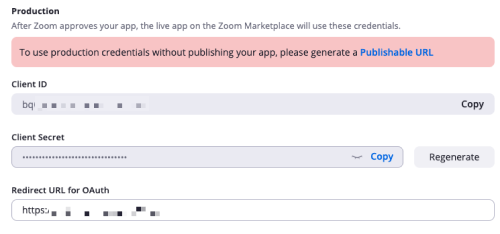 3. In the left-side menu, locate the section highlighted in a red rectangle and copy your Client ID and Client Secret from there.
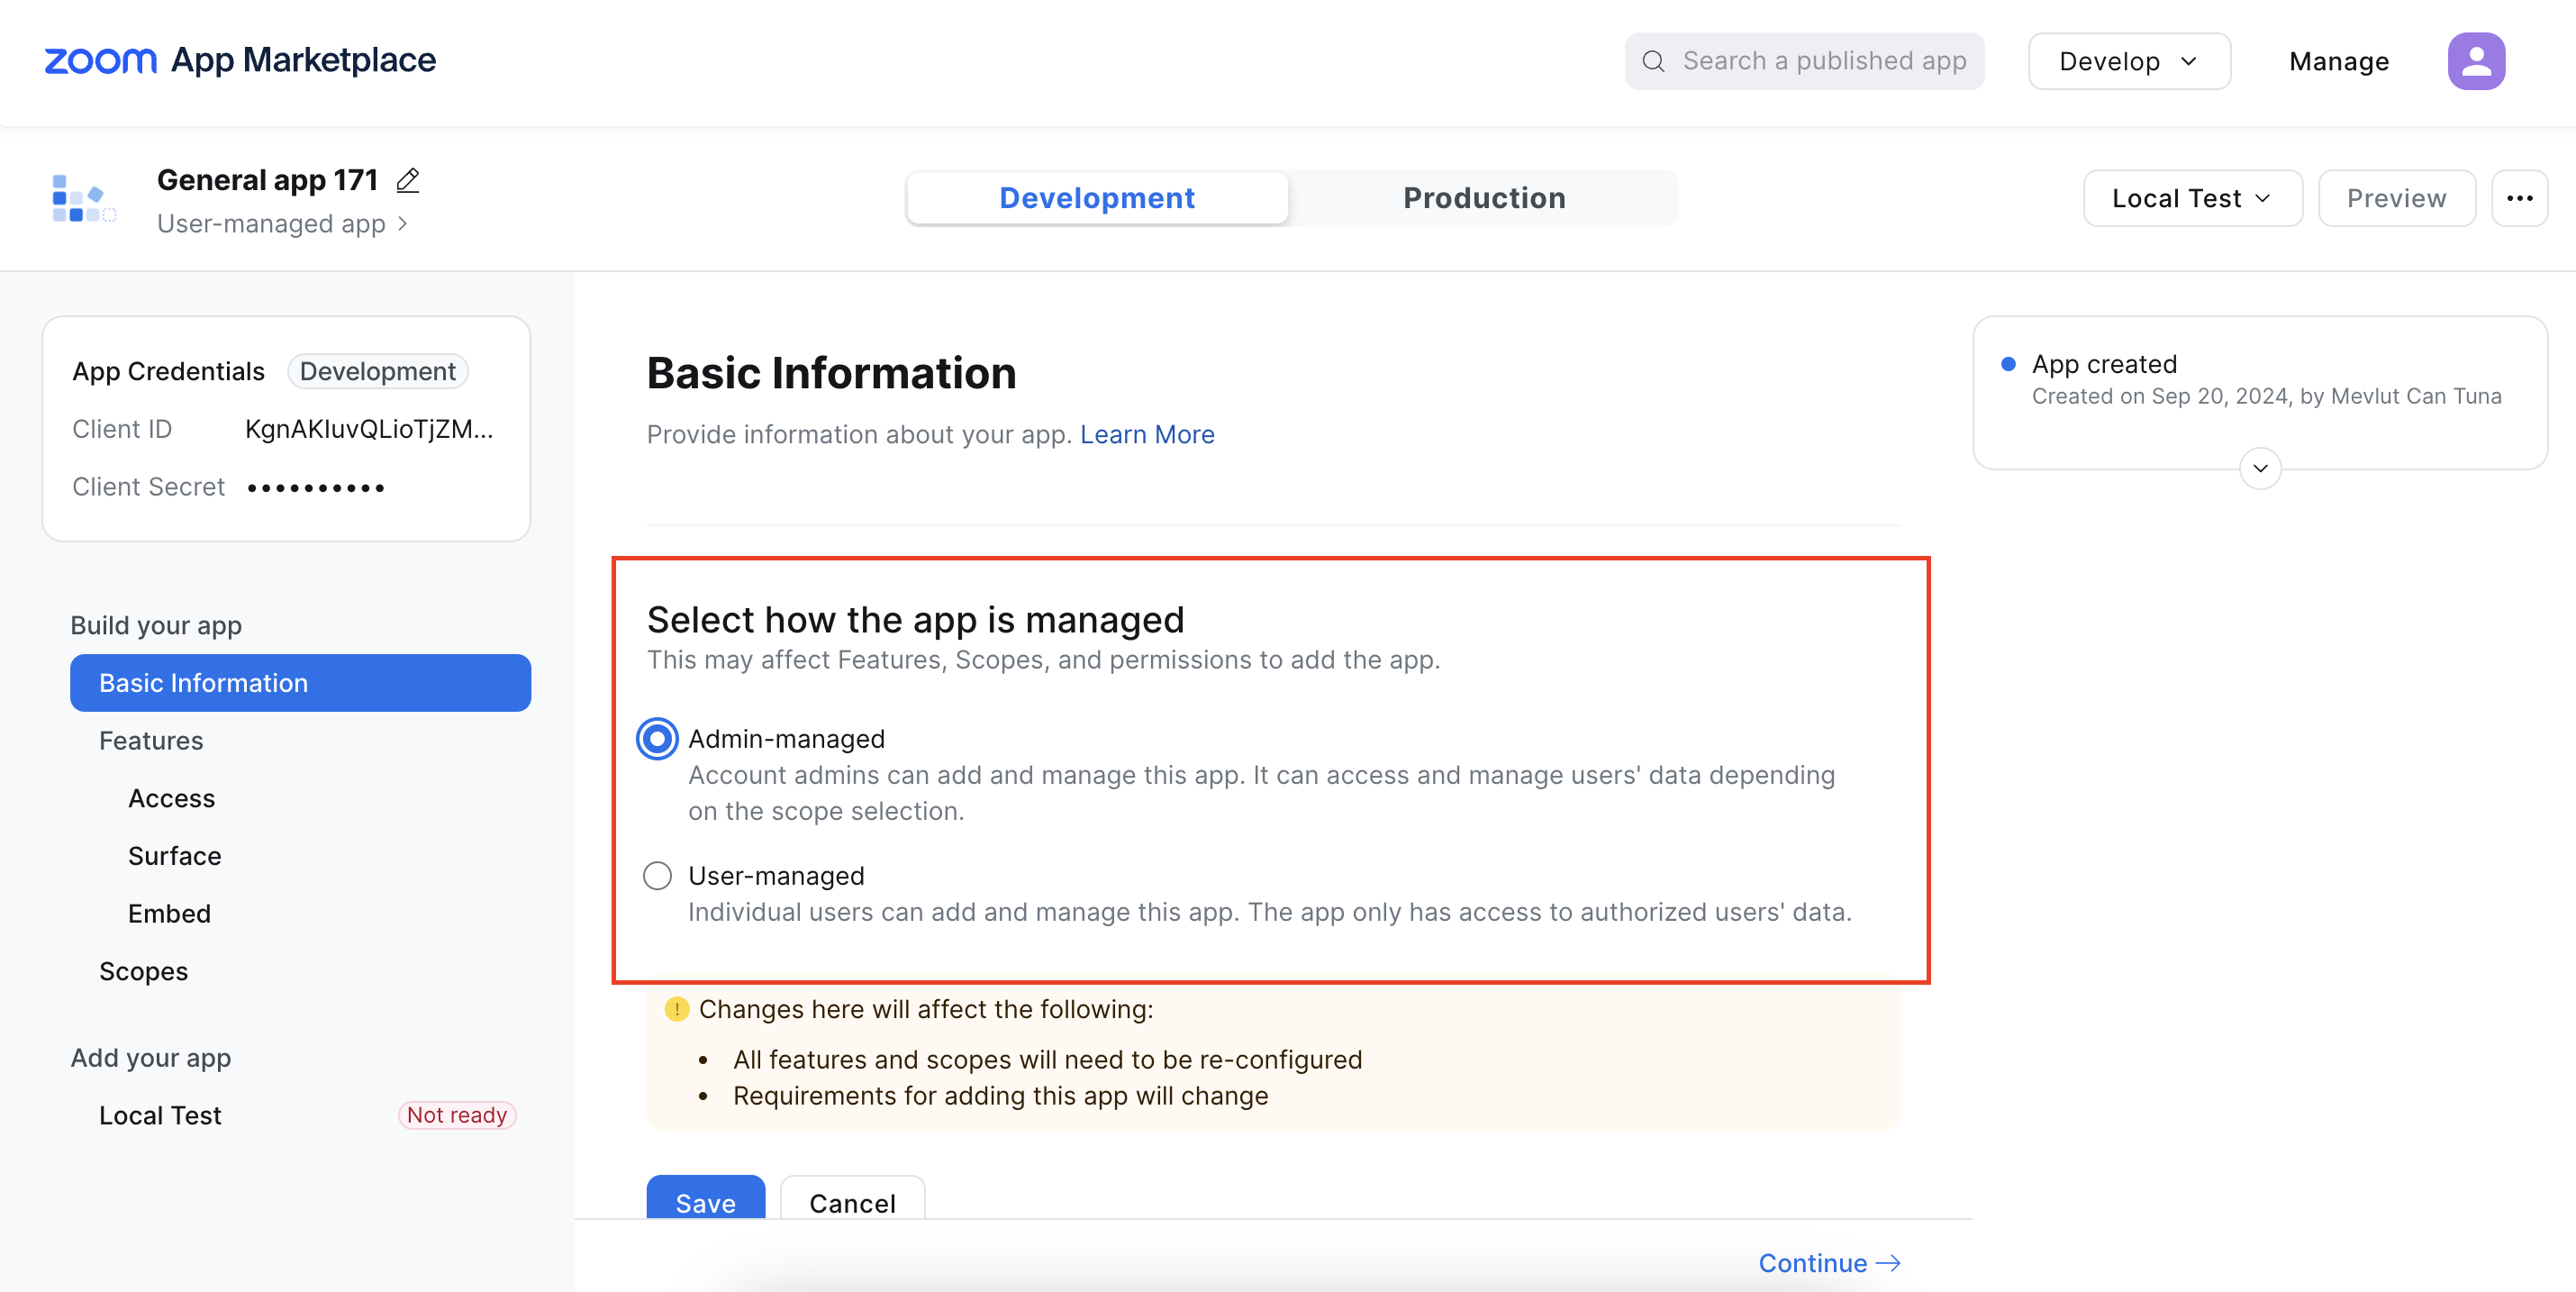
 4. Scroll down to the "Select how the app is managed" section and select "Admin-managed" to specify the management type for your app.
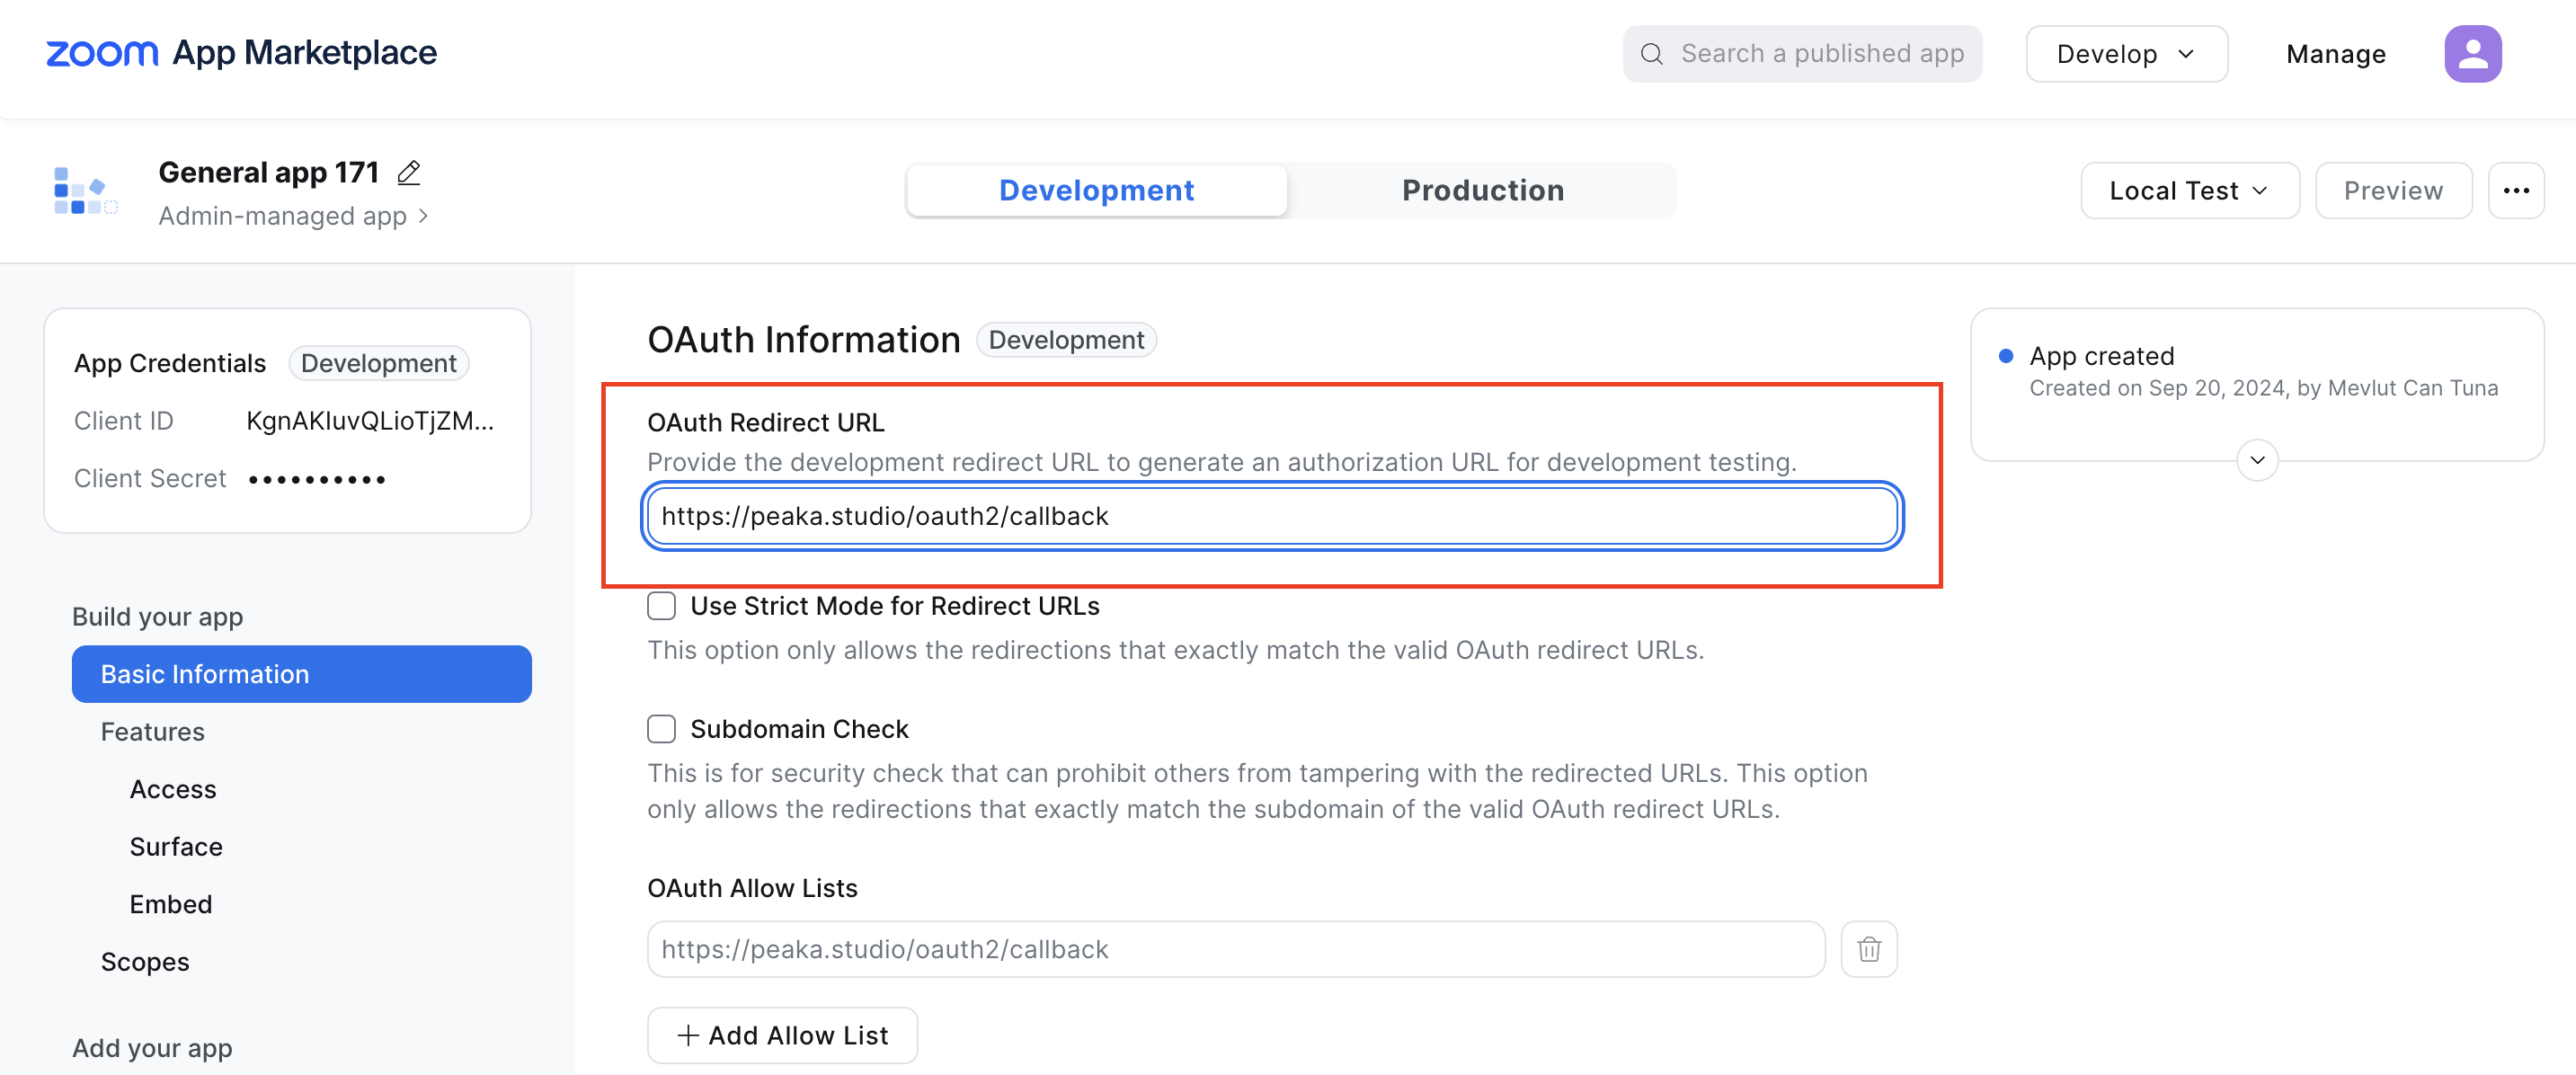
 5. Scroll down to the "OAuth Information" section, where you will find the field for the OAuth Redirect URL. Enter `https://upsolve.studio/oauth2/callback` in this field, as it is crucial for redirecting users after they complete the authentication process.
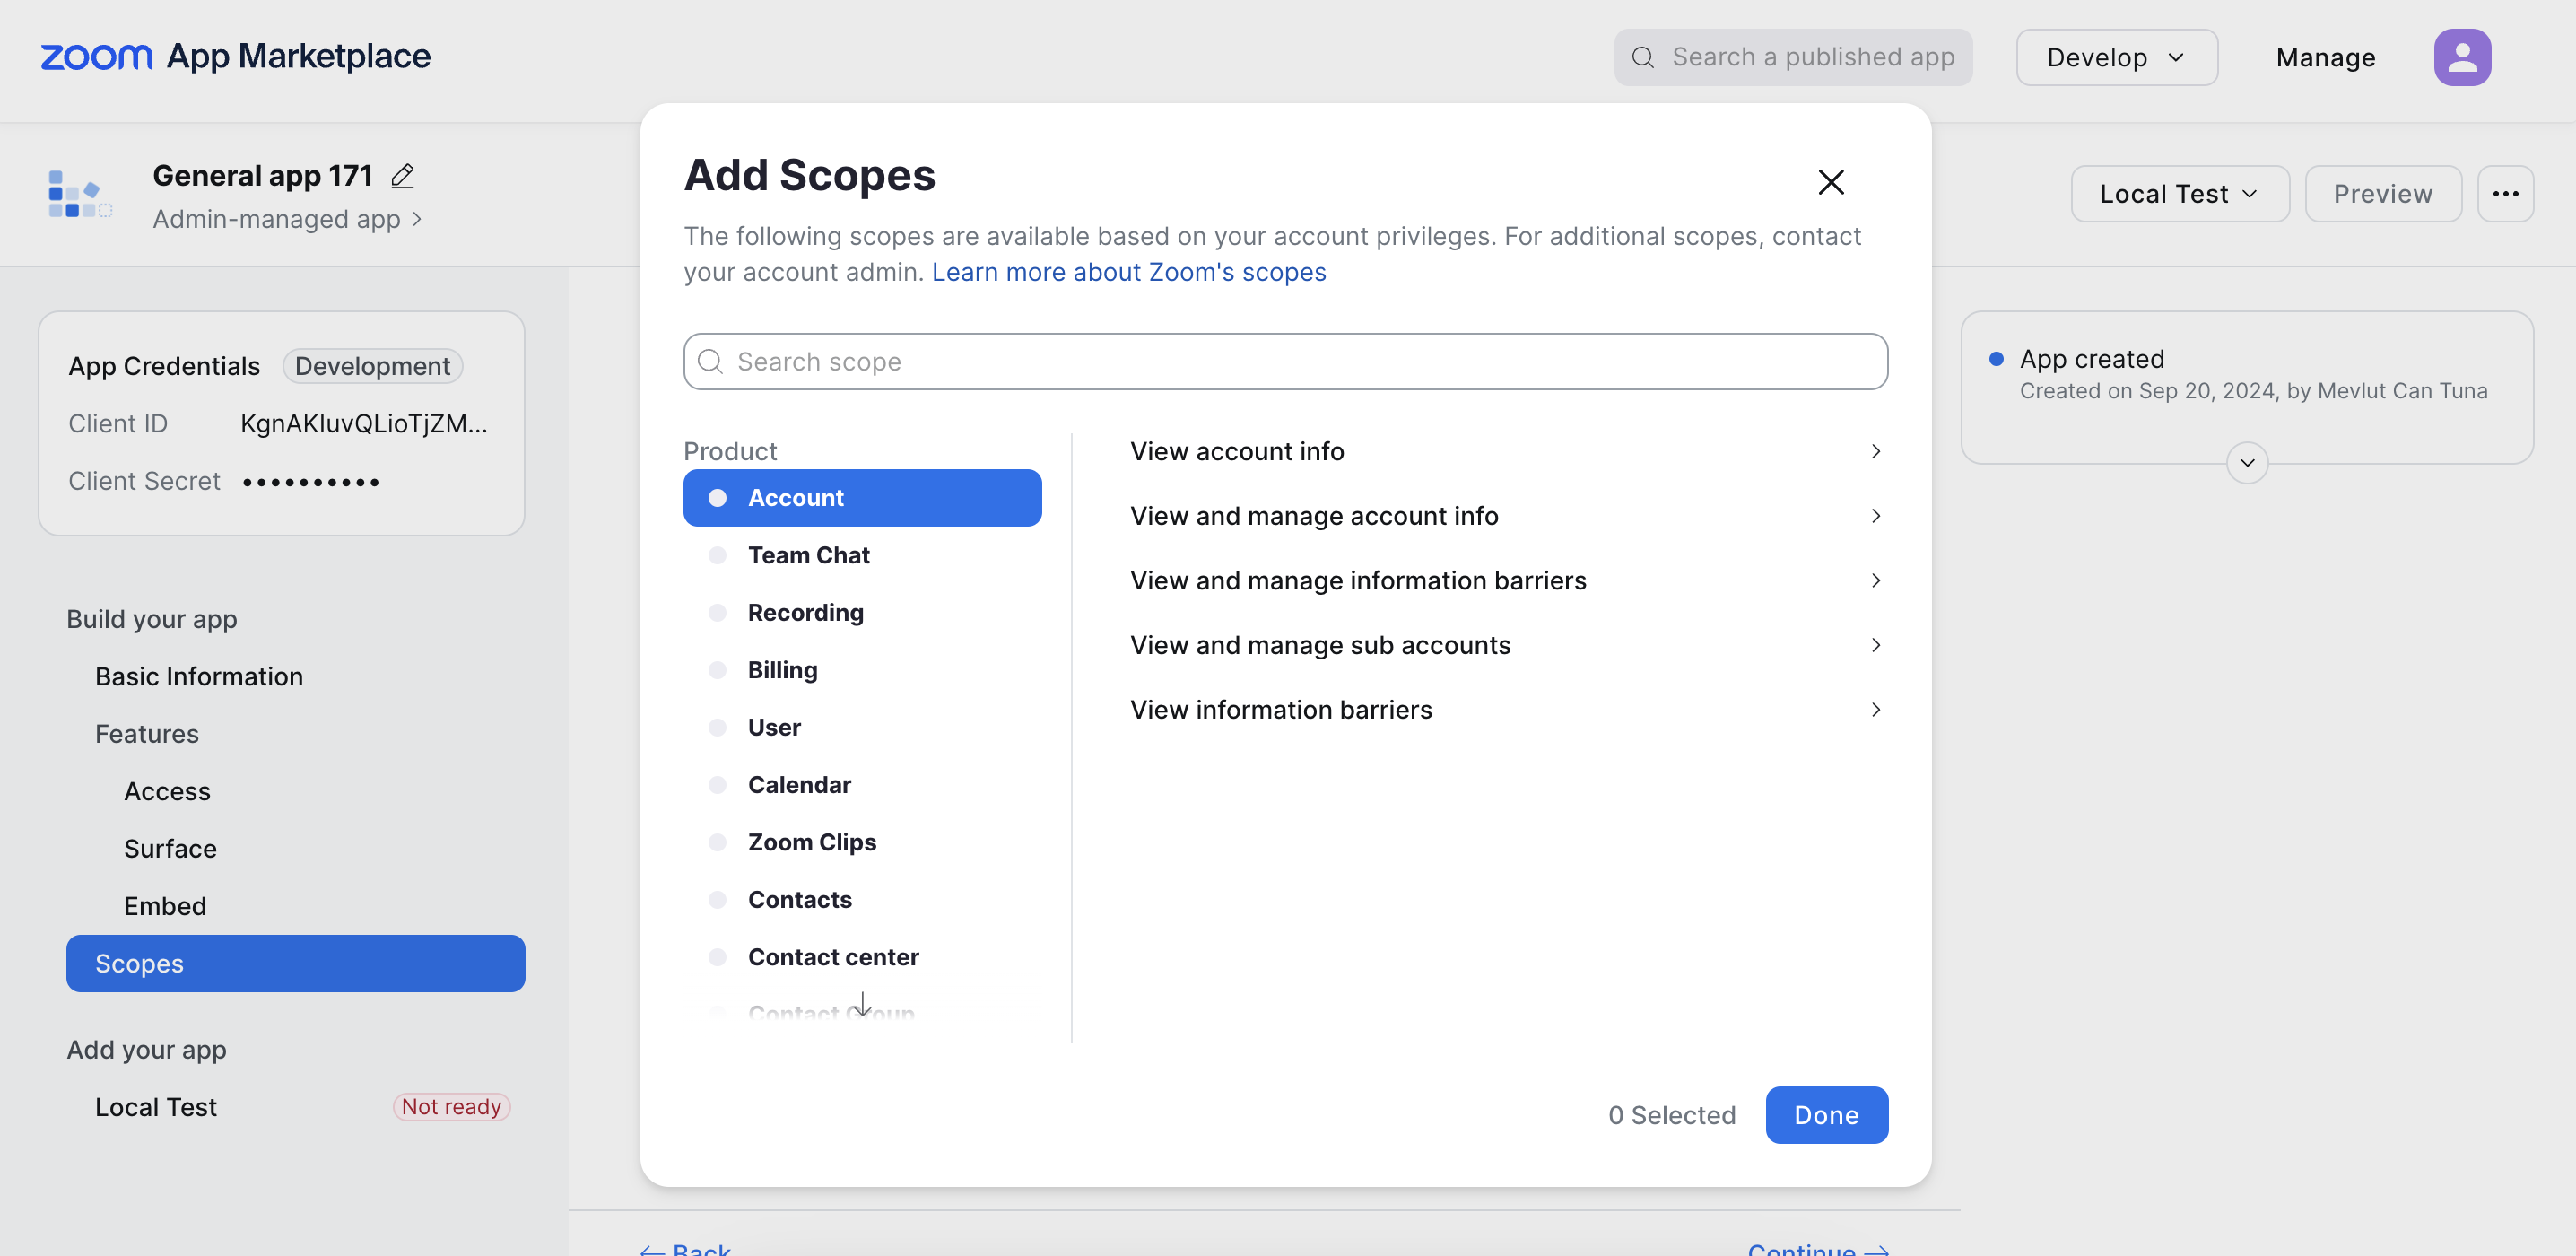
 6. In the left-side menu, click on the "Scopes" option, then click the "Add Scopes" button to proceed with defining the permissions your app will require.
7. In the modal that appears, choose the following mandatory scopes to ensure your app has the necessary permissions for optimal functionality:
* View users
* View a user's meetings
* View a past meeting's instances
* View a past meeting's participants
* View a meeting's registrants
* View a user's upcoming meetings
* View a meeting
* View a meeting's participant
* View a past meeting
* View a meeting's registrant
6. In the left-side menu, click on the "Scopes" option, then click the "Add Scopes" button to proceed with defining the permissions your app will require.
7. In the modal that appears, choose the following mandatory scopes to ensure your app has the necessary permissions for optimal functionality:
* View users
* View a user's meetings
* View a past meeting's instances
* View a past meeting's participants
* View a meeting's registrants
* View a user's upcoming meetings
* View a meeting
* View a meeting's participant
* View a past meeting
* View a meeting's registrant
 8. After reviewing your selected scopes, click the "Continue" button.
## Connecting Zoom to Upsolve
Now that you have obtained the necessary integration data and credentials, you can connect Zoom to Upsolve using the following steps:
1. Navigate to the data model page in Upsolve.
2. In the side menu bar, click the "New Data Source" button to initiate the connection process.
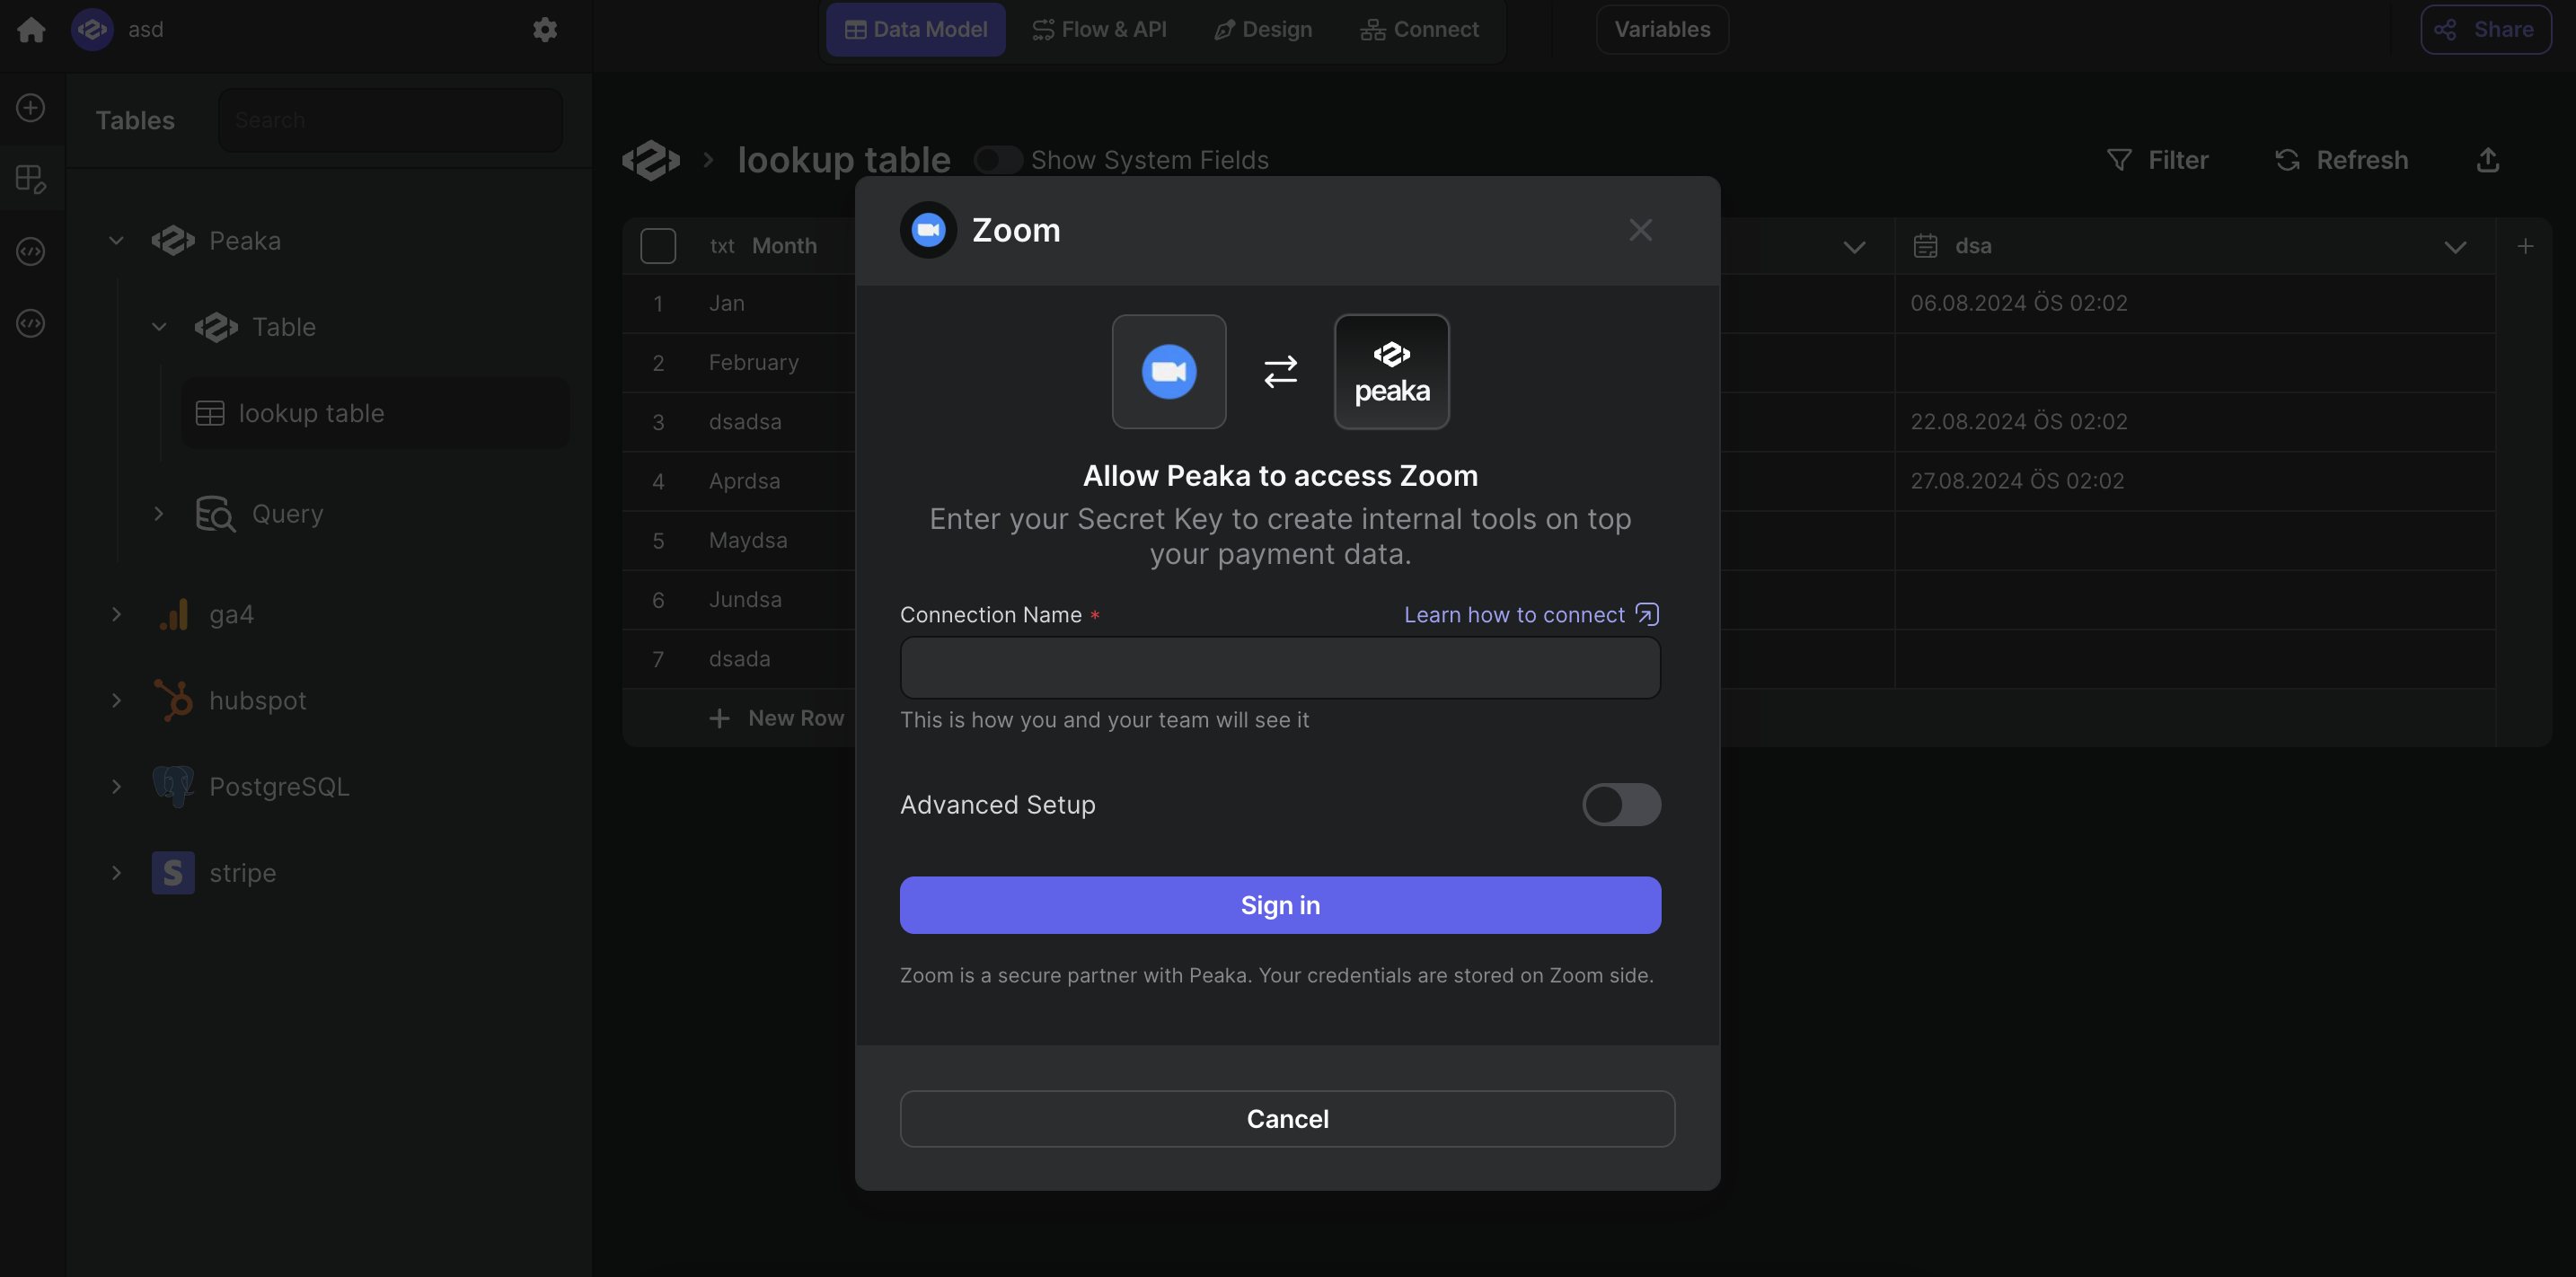
3. In the modal that appears, select "Zoom" as your data source.
4. Enter a name for your data source and paste values that you got before.
8. After reviewing your selected scopes, click the "Continue" button.
## Connecting Zoom to Upsolve
Now that you have obtained the necessary integration data and credentials, you can connect Zoom to Upsolve using the following steps:
1. Navigate to the data model page in Upsolve.
2. In the side menu bar, click the "New Data Source" button to initiate the connection process.
3. In the modal that appears, select "Zoom" as your data source.
4. Enter a name for your data source and paste values that you got before.
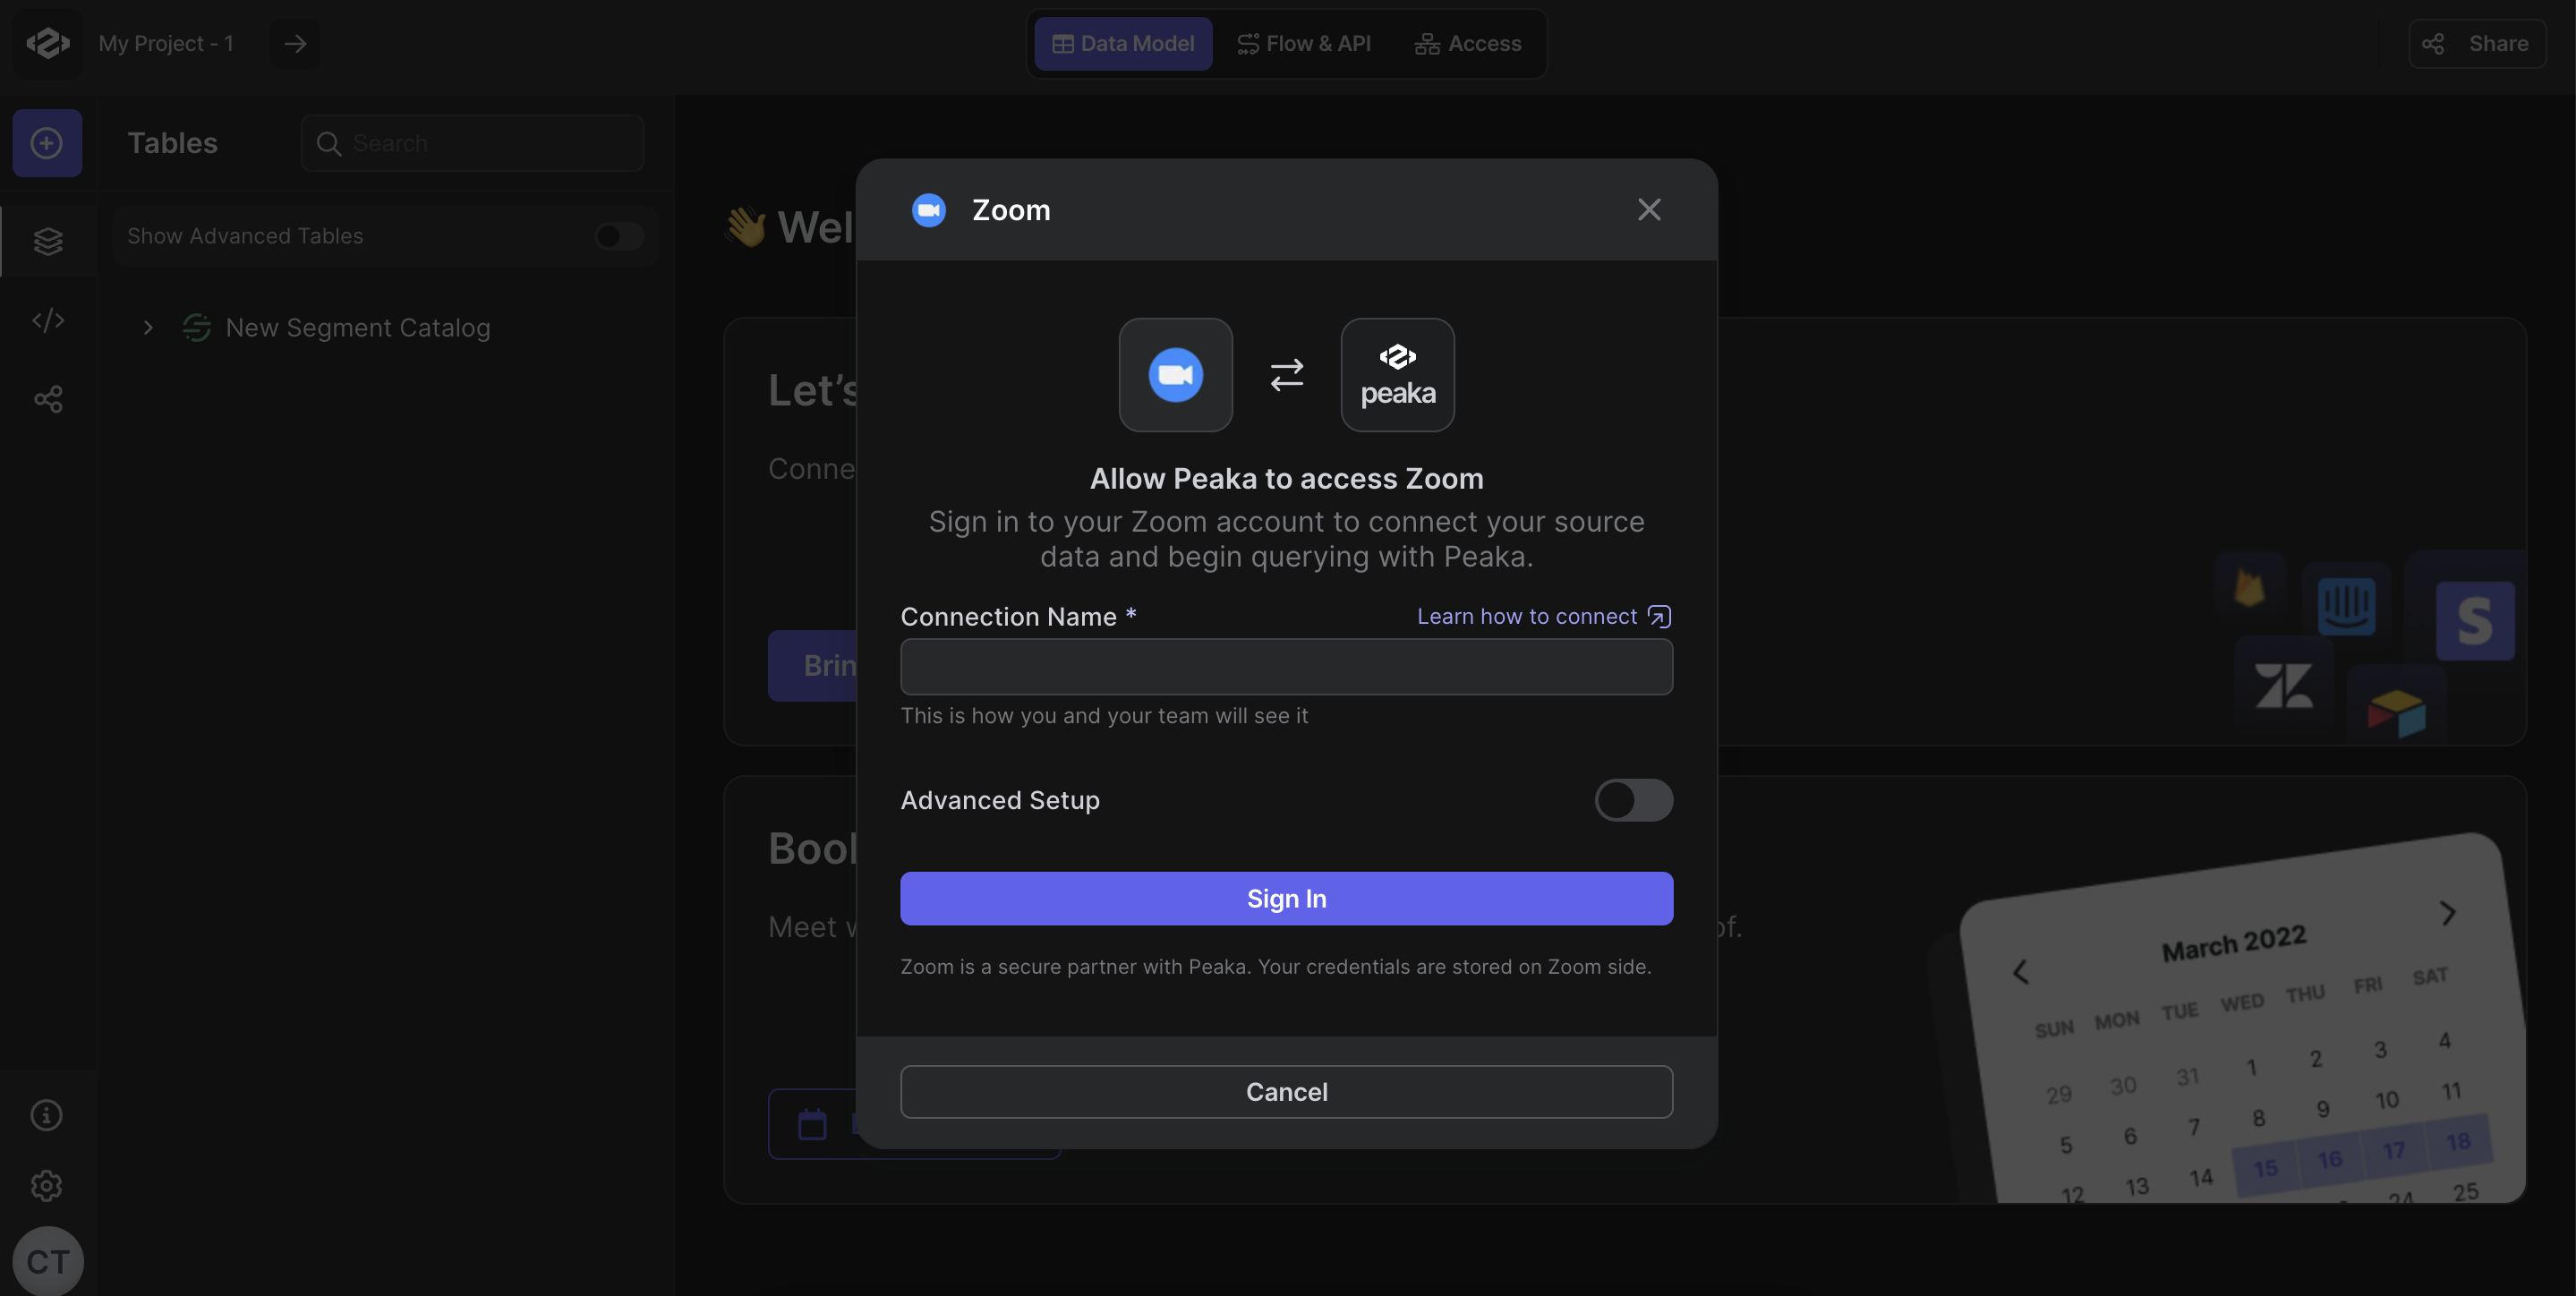 5. Click "Sign In" to connect Zoom and allow access to your data.
Congratulations! You've successfully connected Zoom to Upsolve. You can now access and manage your Zoom data seamlessly within the Upsolve platform.
5. Click "Sign In" to connect Zoom and allow access to your data.
Congratulations! You've successfully connected Zoom to Upsolve. You can now access and manage your Zoom data seamlessly within the Upsolve platform.