What is Row-Level Security?
Row-Level Security (RLS) lets you filter data based on who is viewing it. For example:- A user from “Acme Corp” only sees Acme Corp’s data
- A sales rep only sees their own deals
- Regional managers see data for their region
How RLS Works
- Define properties on users and organizations (e.g.,
region,department) - Write filter rules in your data model using those properties
- Queries are filtered automatically when users access data
Setting Up User Properties
Organization Properties
Properties set at the organization level apply to all users in that organization:- Go to your project’s Organizations tab
- Click on an organization
- Add properties in the Properties section
User Properties
Properties can also be set per user:- Go to your project’s Users tab
- Click on a user
- Add properties in the Properties section

Writing RLS Rules
RLS rules are SQL snippets that filter each table. They use placeholders to reference user/organization properties.Available Placeholders
| Placeholder | Description |
|---|---|
{{user.propertyName}} | User’s property value |
{{organization.propertyName}} | Organization’s property value |
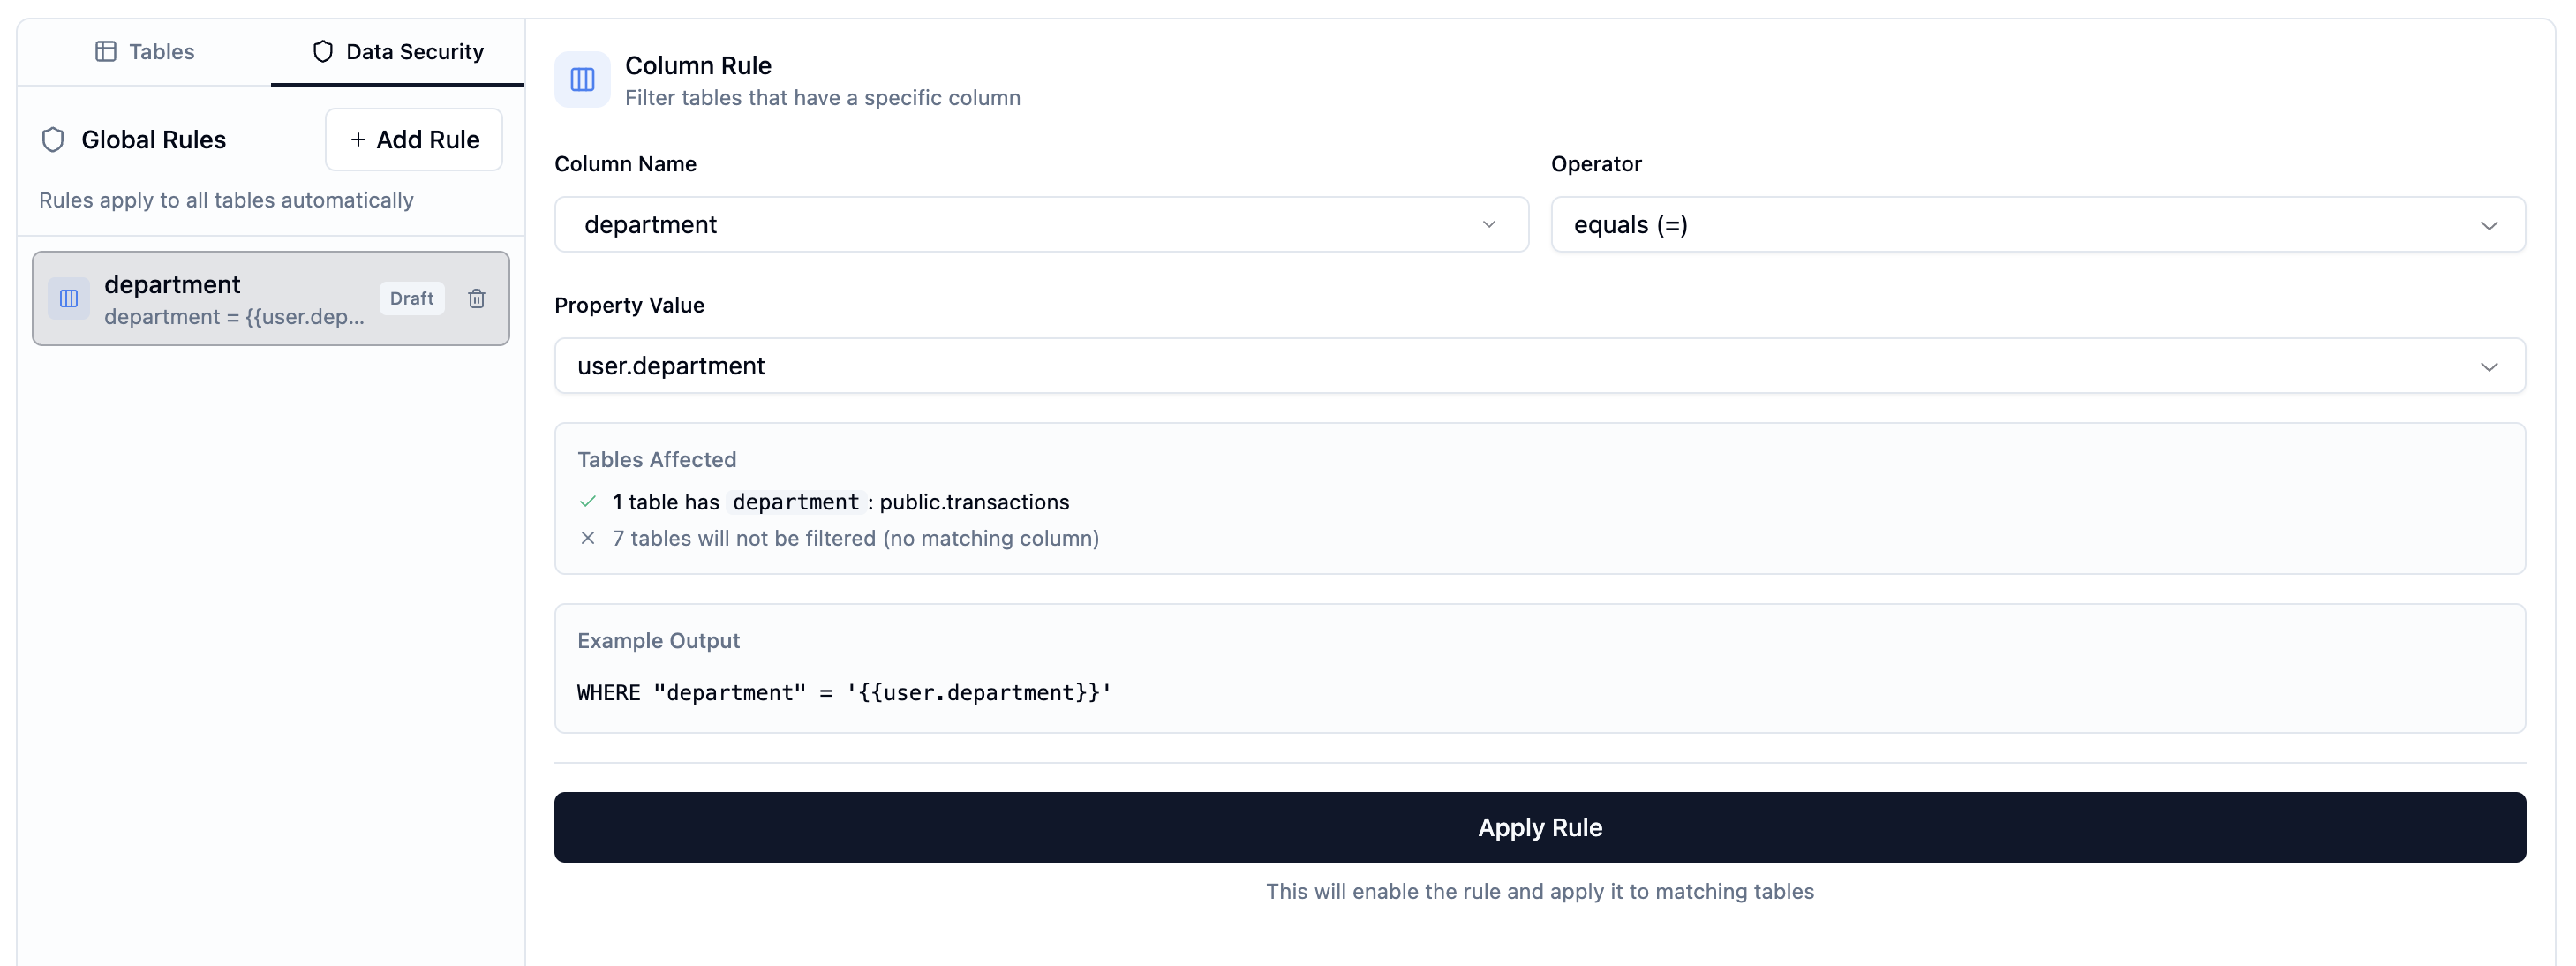
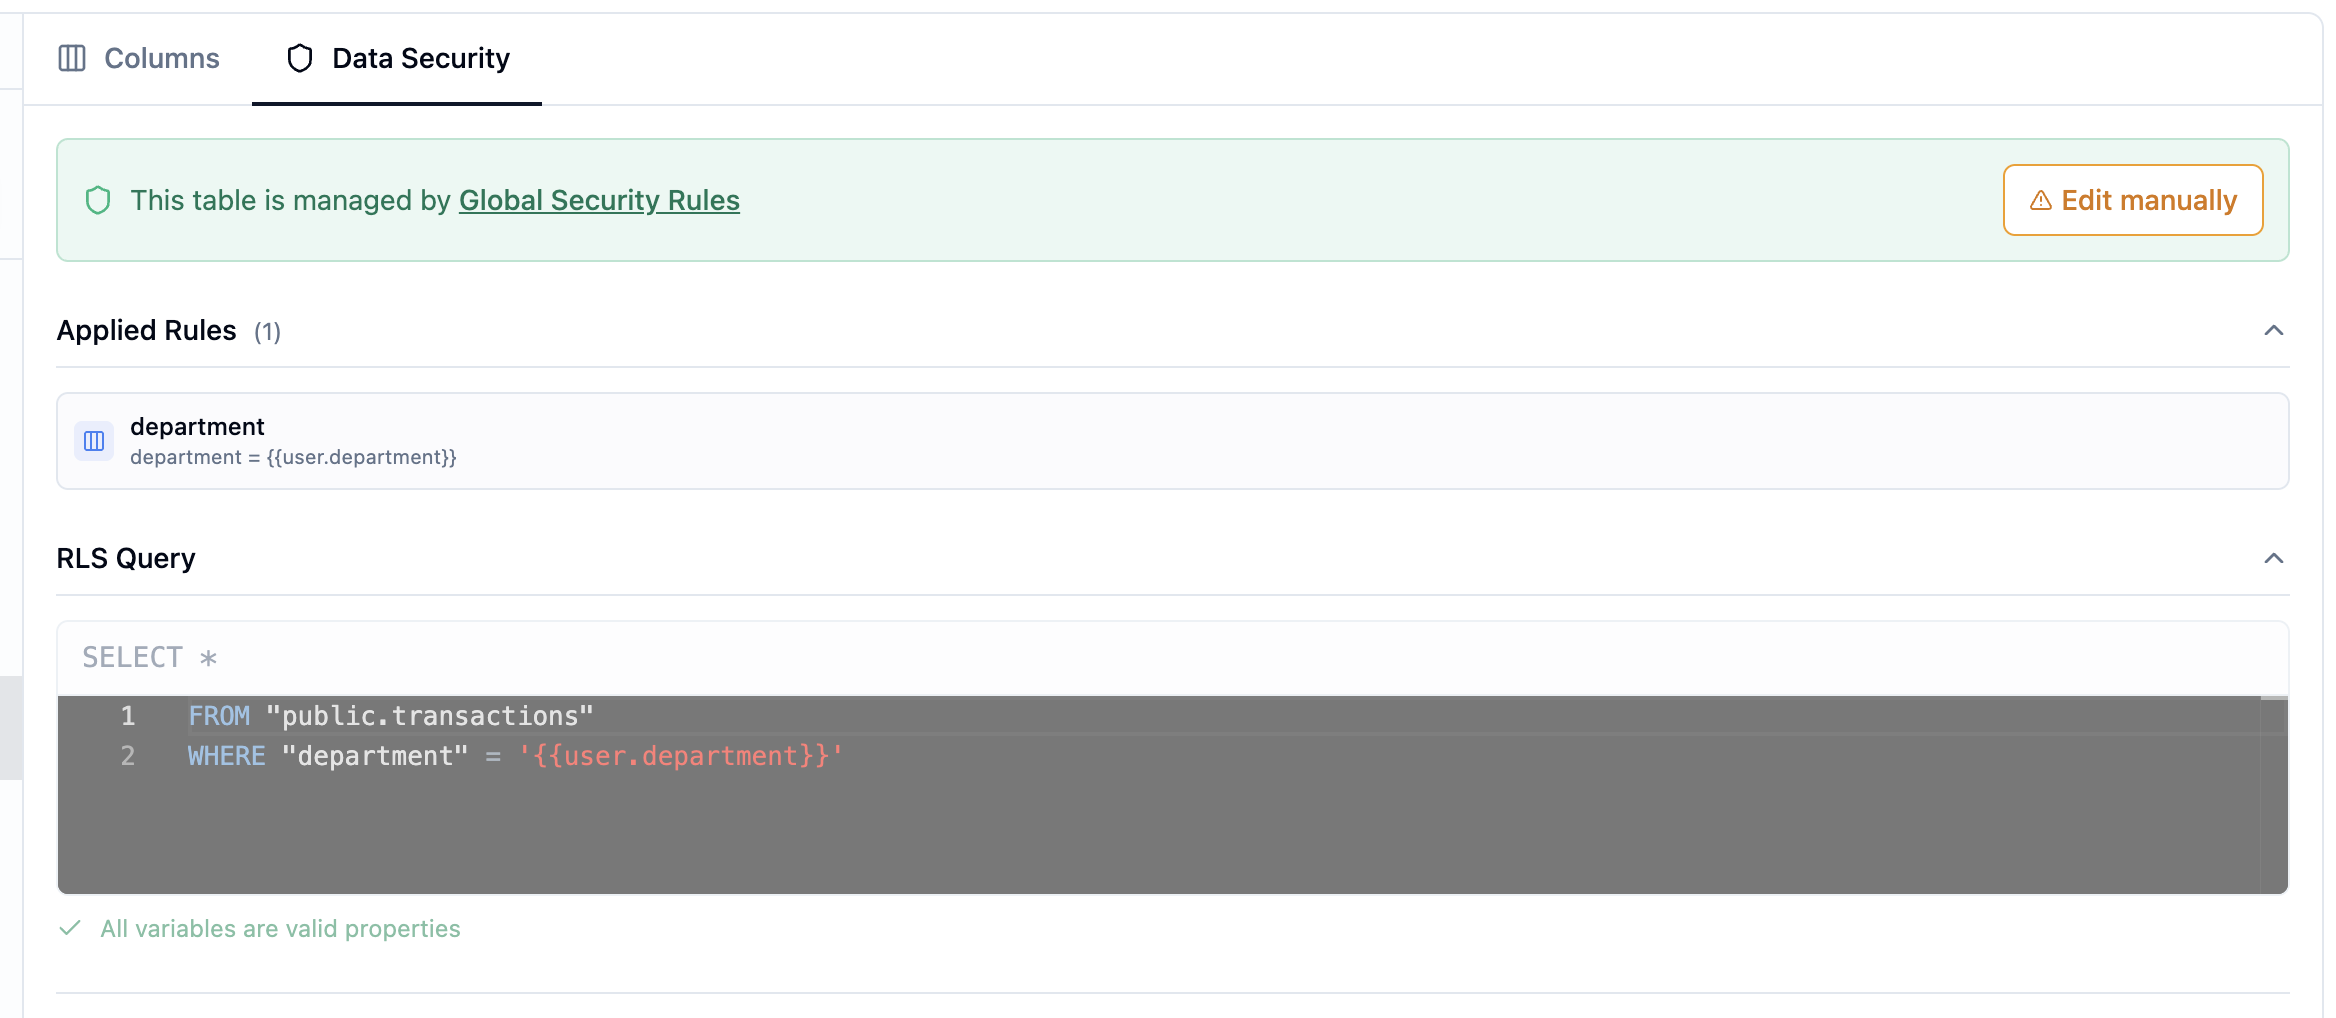
Creating RLS Rules
- Open your data model
- Click on a table to select it
- Go to the RLS tab
- Write your filter rule
- Click Save
Example Rules
Filter by organization’s company ID:Testing RLS Rules
You can test RLS rules before deploying to see exactly what data users will see.Running a Test
- Open your data model
- Select a table with RLS rules
- Click Test RLS
- Select a project user from the dropdown
- View their properties
- Click Run Test
- See the filtered results
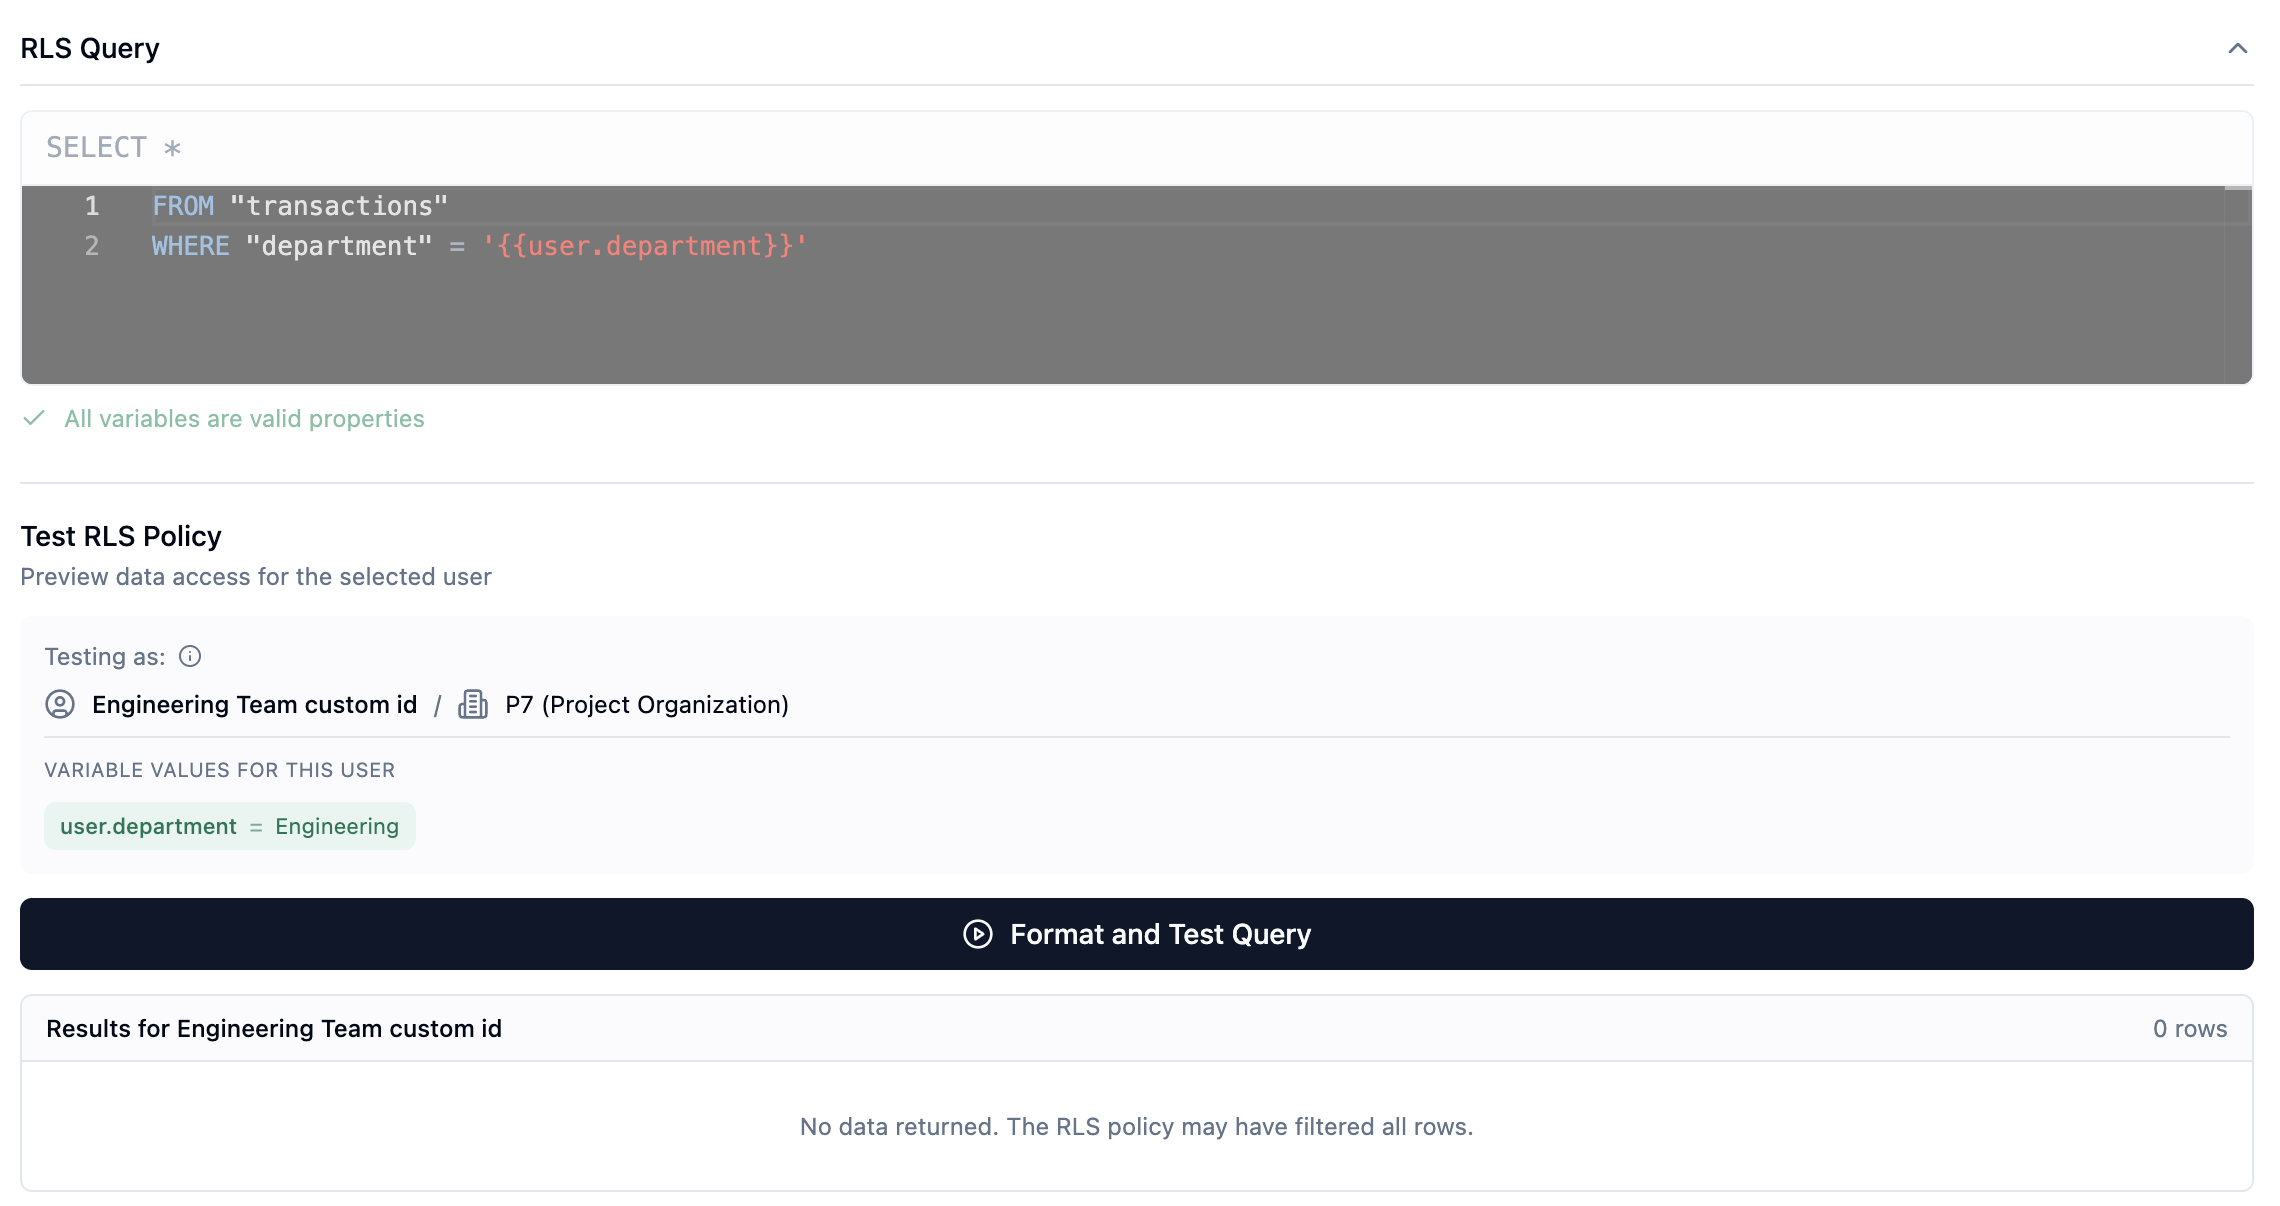
Understanding Test Results
The test shows:- The SQL query with placeholders replaced
- The actual data the selected user would see
- Row count for the filtered results
- The user’s properties don’t match any data
- The RLS rule syntax has an issue
Best Practices
1. Use Organization Properties for Tenant Isolation
For multi-tenant apps, filter by organization properties:2. Combine with User Properties for Fine-Grained Access
Add user-level filtering within a tenant:3. Test with Multiple Users
Always test RLS with:- Users from different organizations
- Users with different roles/properties
- Edge cases (missing properties)
4. Handle Missing Properties Gracefully
If a property might be missing, consider defaults:Troubleshooting
Users See No Data
Check:- User has the correct properties set
- Property names match exactly (case-sensitive)
- Data exists matching those property values
Users See Too Much Data
Check:- RLS rule is saved and applied
- Placeholders use correct syntax (
{{user.prop}}not{{user.prop}) - Data model version with RLS is set as production
RLS Not Applied
Check:- The table has an RLS rule defined
- The data model version is marked as production
- Users are accessing through the correct application
Next Steps
- Create an Agent that respects RLS rules
- Build an Application with filtered dashboards