Overview
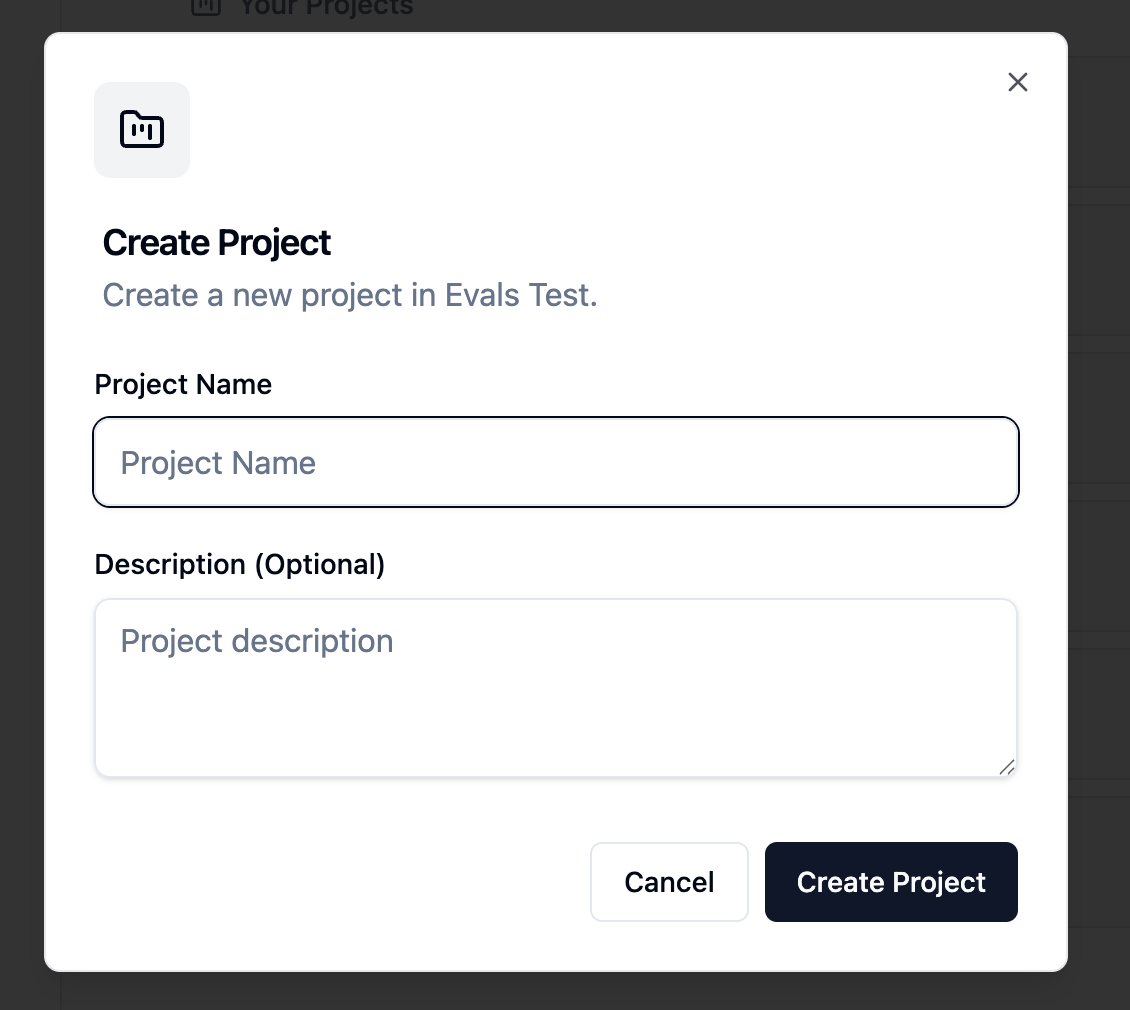
Here’s the journey from nothing to a production-ready data application:Step 1: Create Your Project
- Go to the Projects section
- Click Create Project
- Enter a name (e.g., “Customer Analytics”)
- Click Create
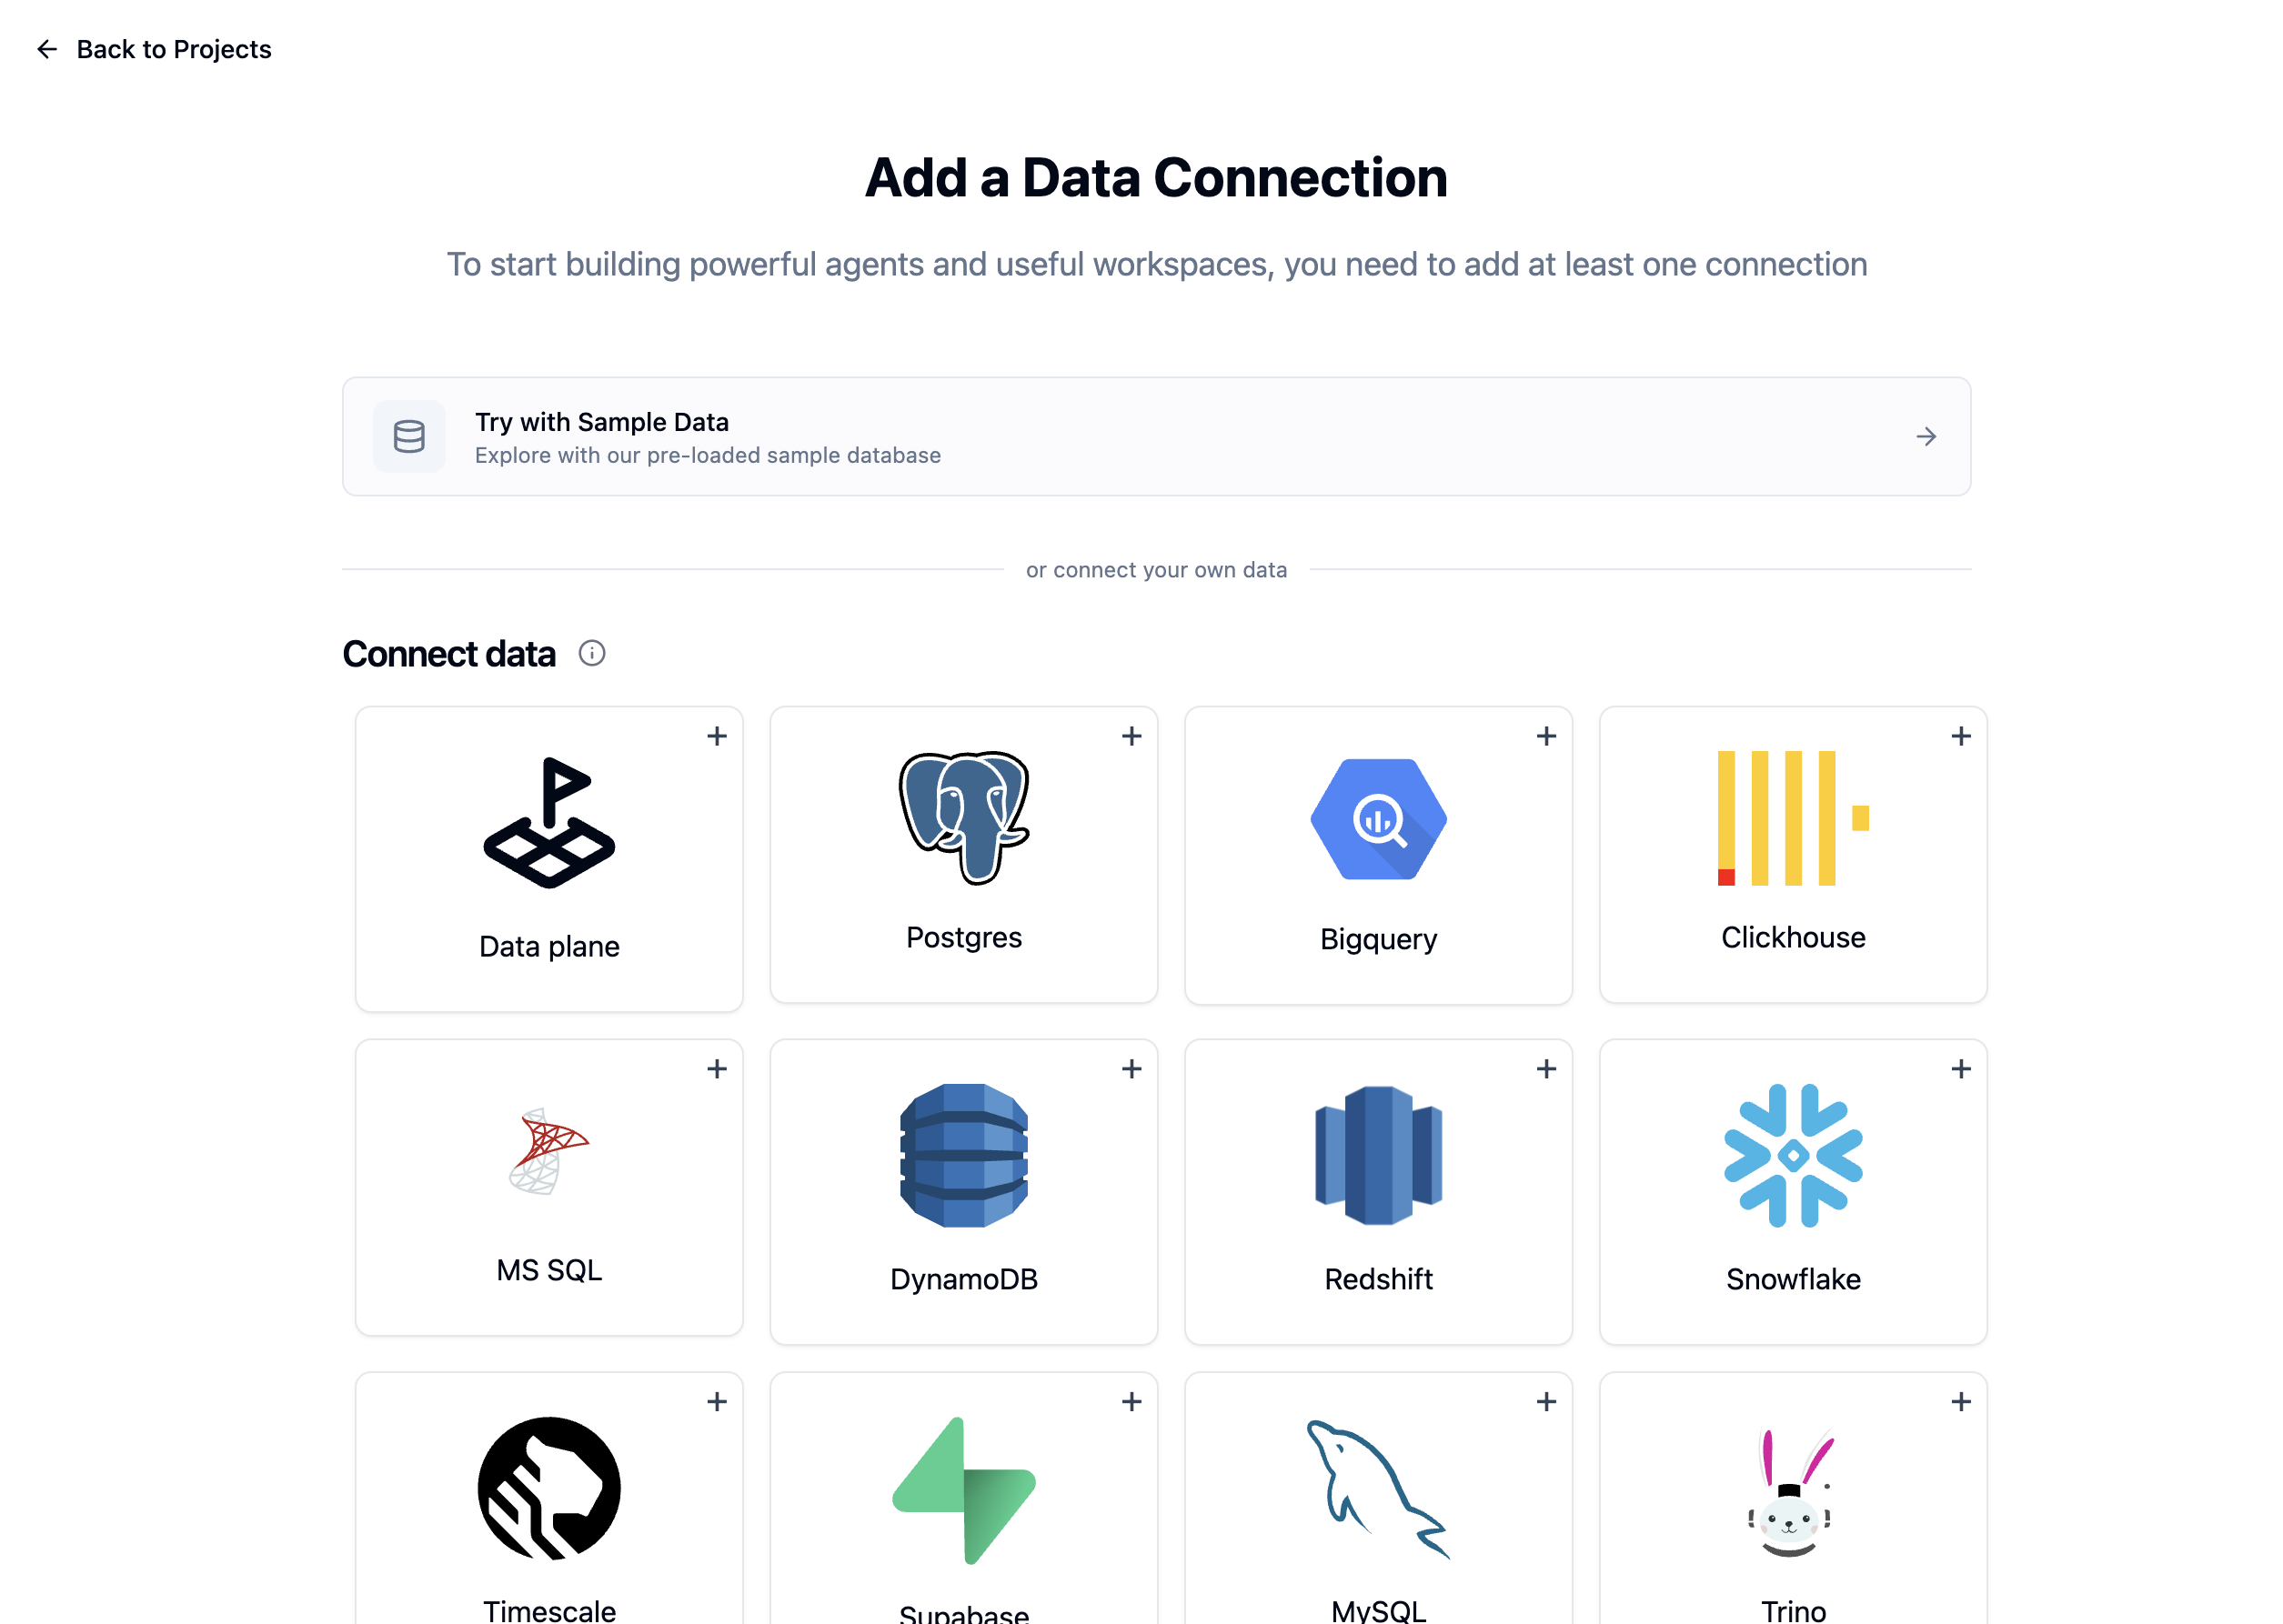
Step 2: Add a Connection
- Click Add Connection in your new project
- Choose Try Demo Data (or connect your real database)
- For real databases, enter credentials and test the connection
- Click Save
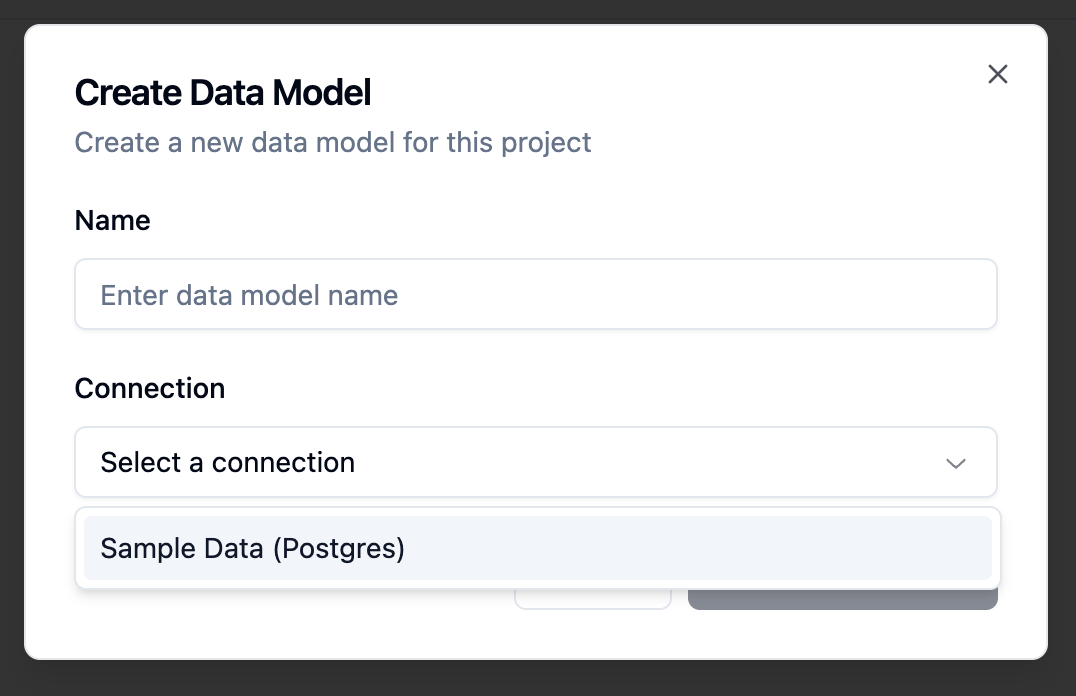
Step 3: Create a Data Model
- Go to the Data Models tab
- Click Create Data Model
- Select your connection
- Enter a name (e.g., “Analytics Model”)
- Click Create
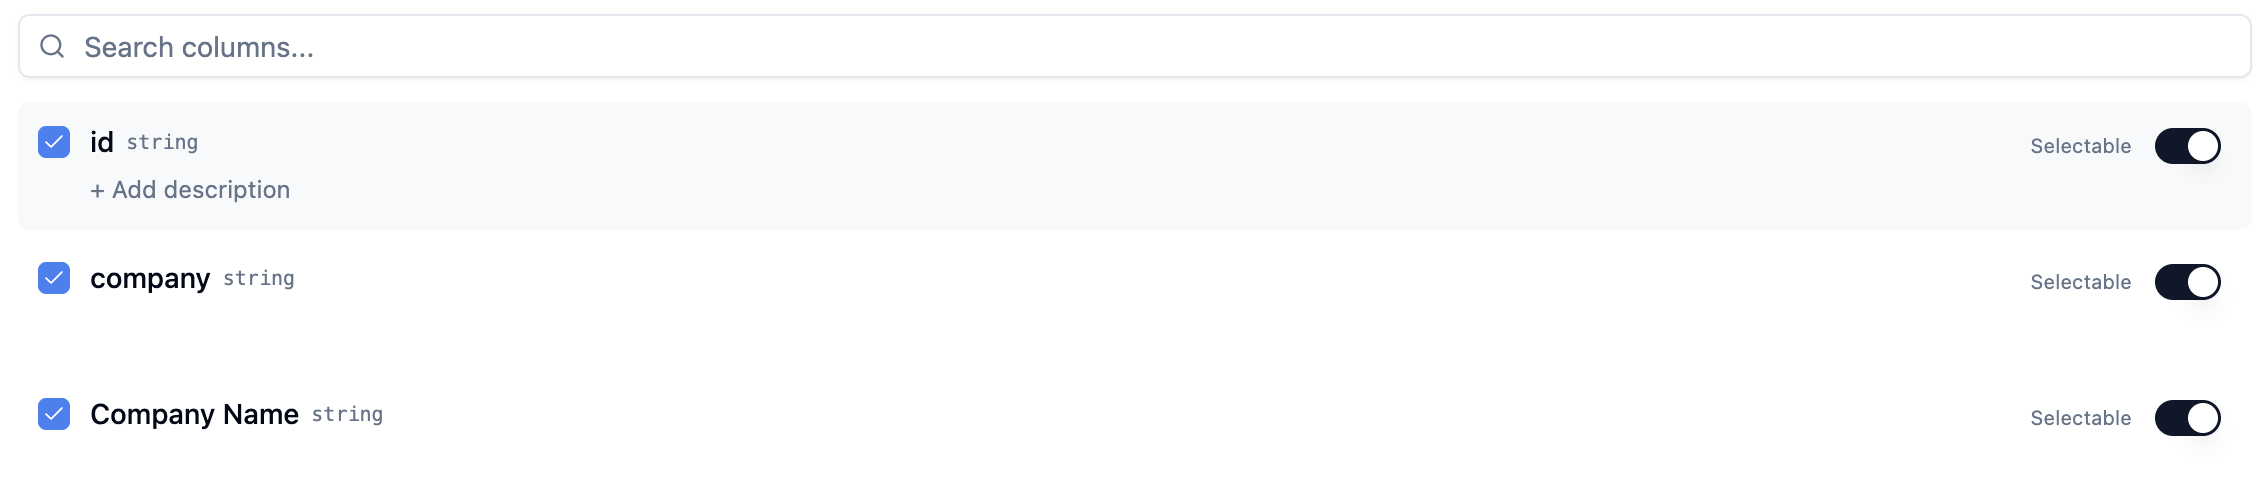
Configure the Data Model
- Select tables - Uncheck any tables you don’t want exposed
- Select columns - Uncheck sensitive columns (e.g., passwords, PII)
- Add descriptions - Help AI understand your schema
- Mark selectables - Flag columns with categorical values for AI filtering
- Click Save
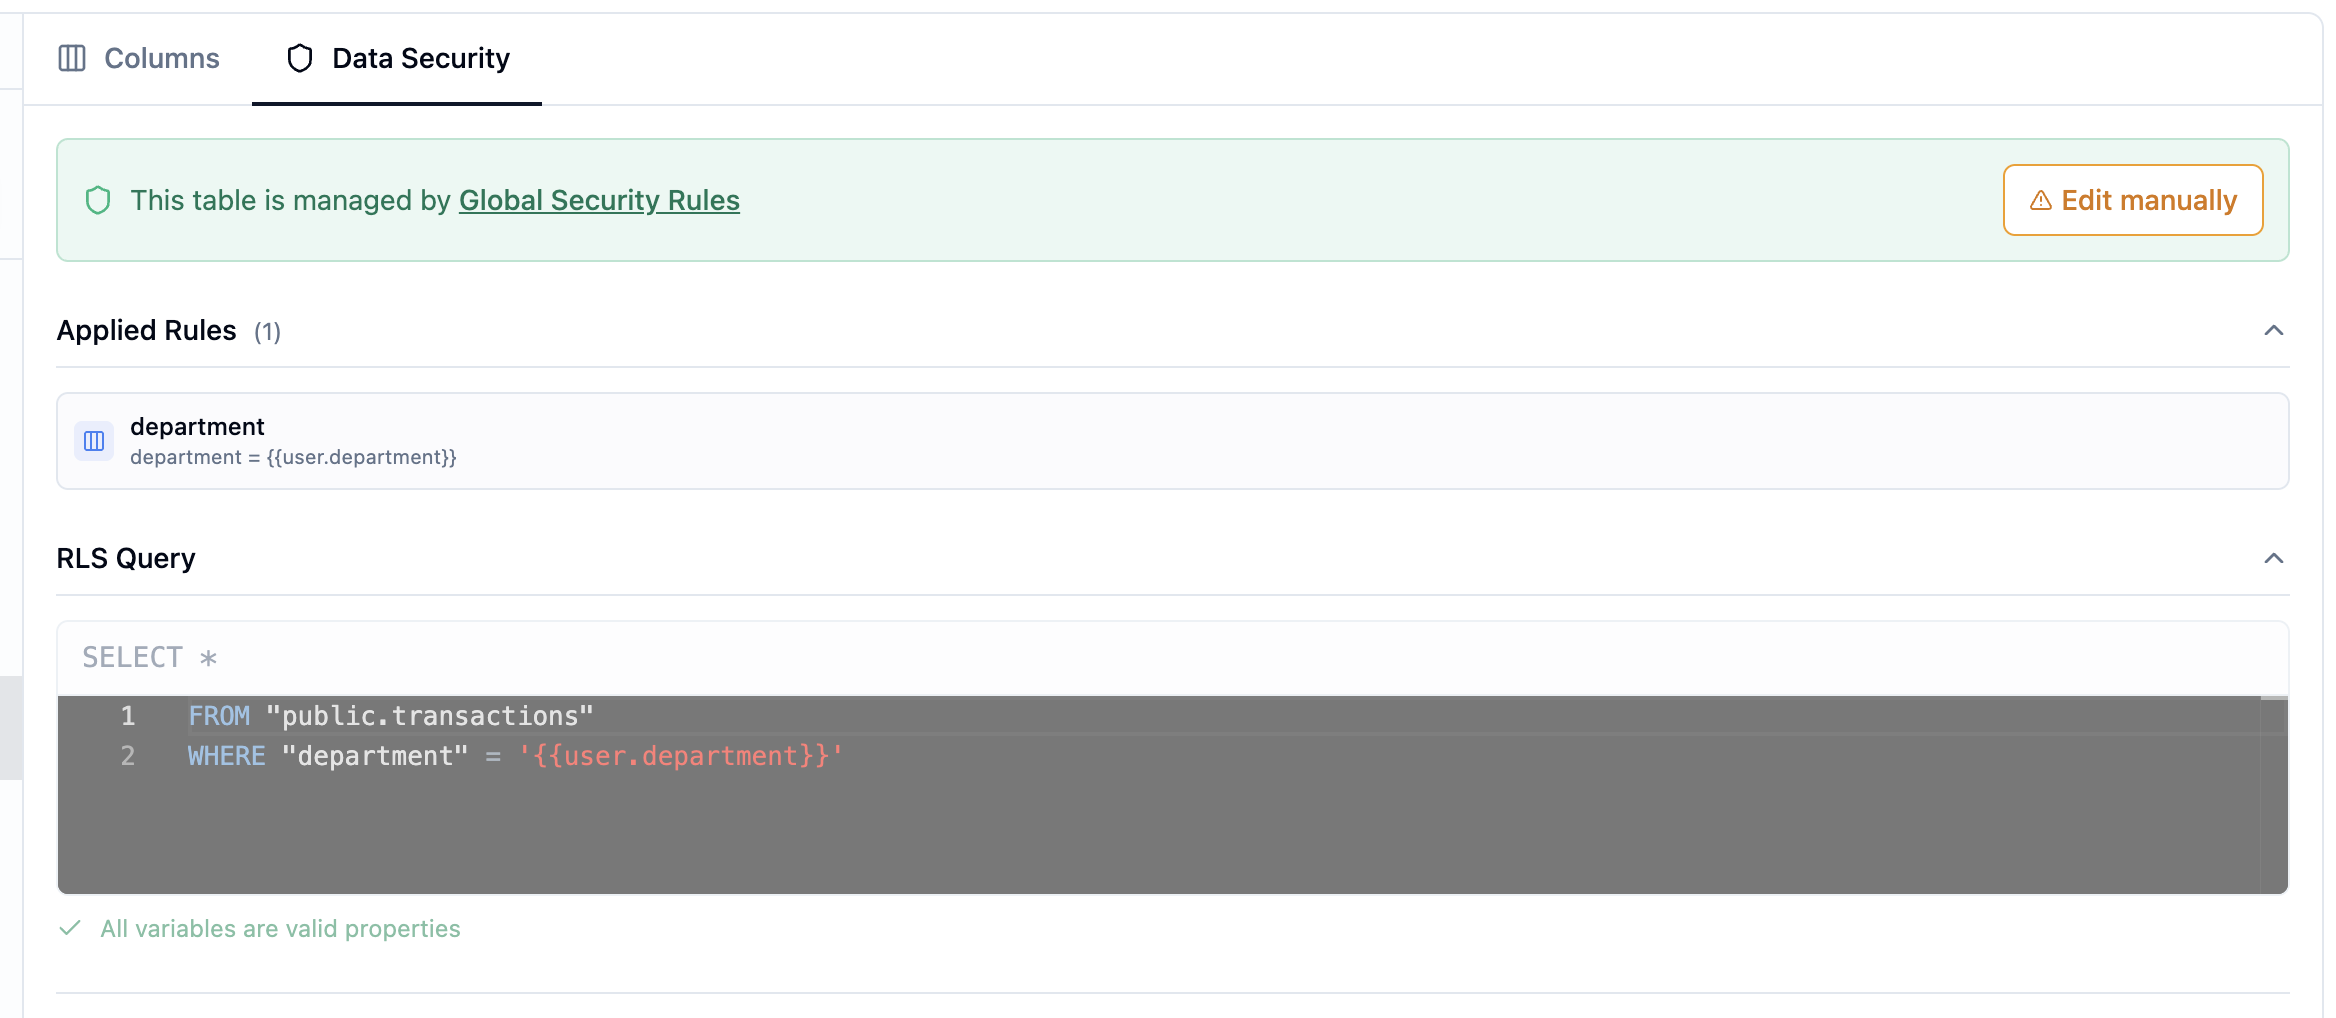
Set Up RLS (Optional but Recommended)
- Click on a table
- Go to the RLS tab
- Write your filter rule:
- Click Save
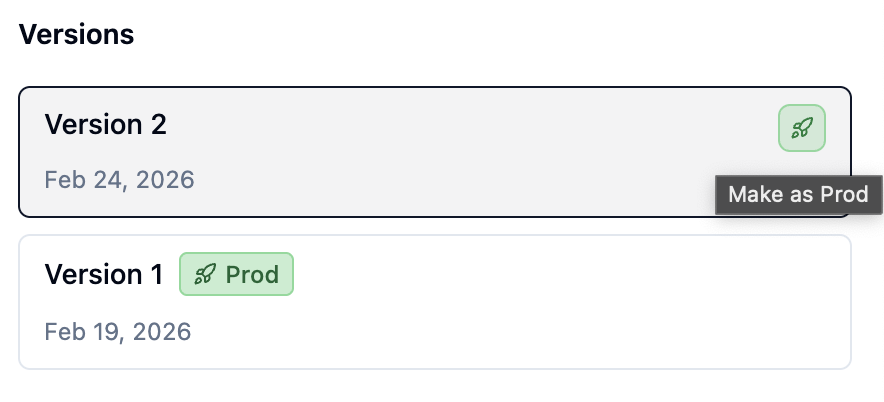
Step 4: Set Data Model to Production
- Go to the Versions tab in your data model
- Click Set as Production on the latest version
- Wait for validation to pass
Step 5: Create an Agent OR Application
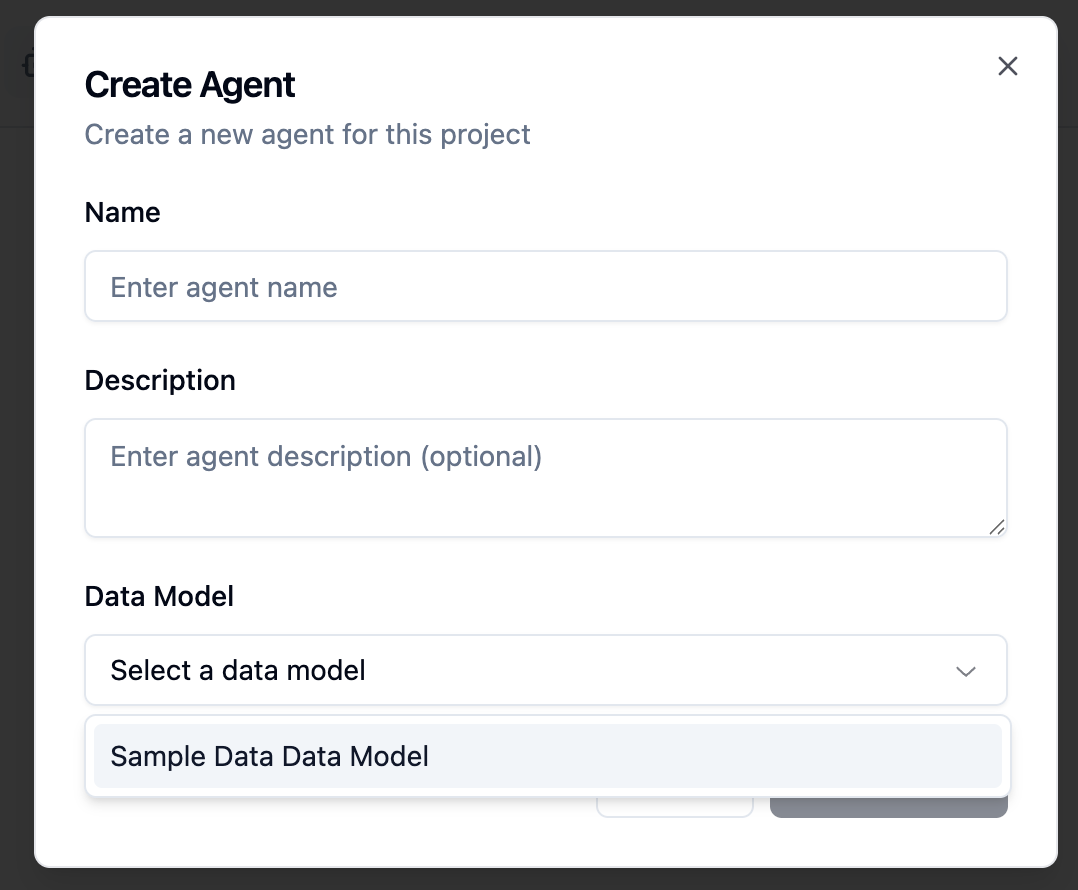
You can create either or both. They share the same data model.Option A: Create an Agent
- Go to the Agents tab
- Click Create Agent
- Select your production data model
- Click Create
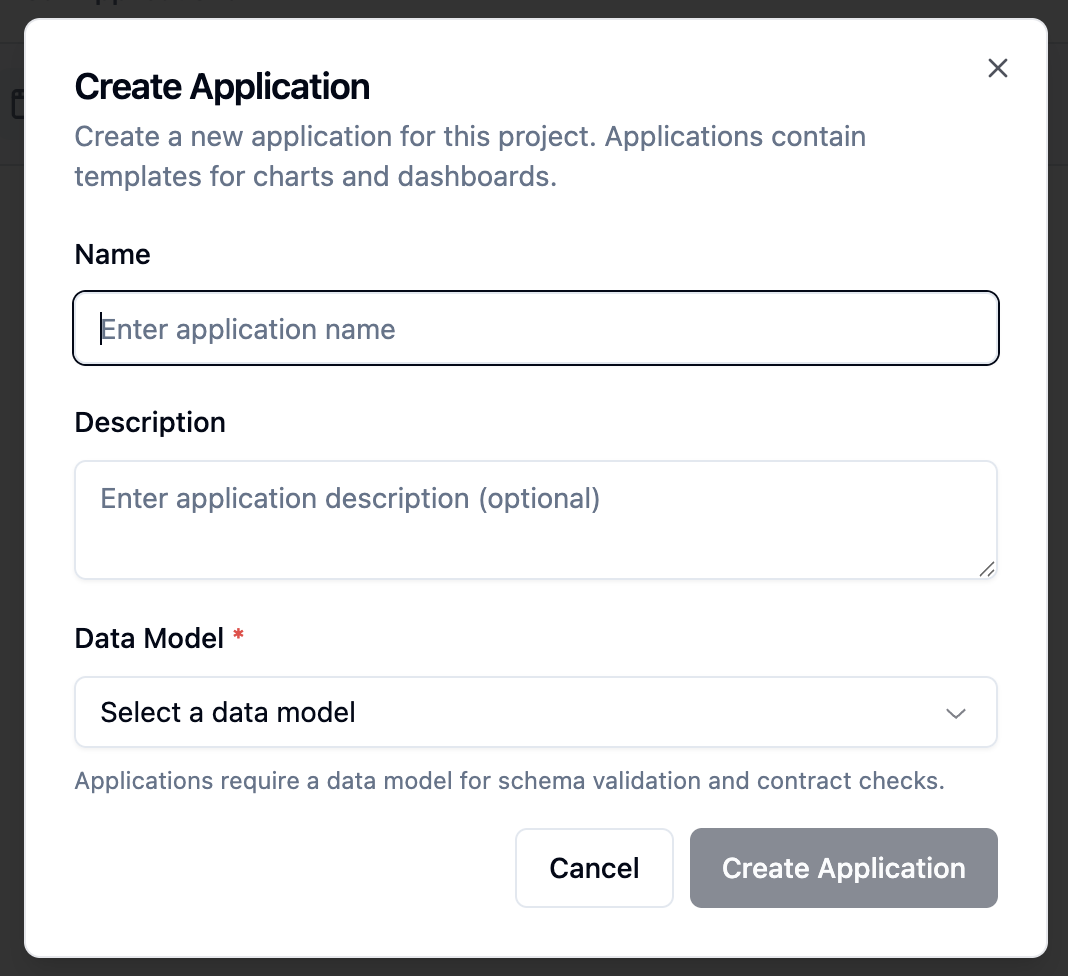
Option B: Create an Application
- Go to the Applications tab
- Click Create Application
- Select your production data model
- Click Create
Step 6: Configure Your Agent/Application
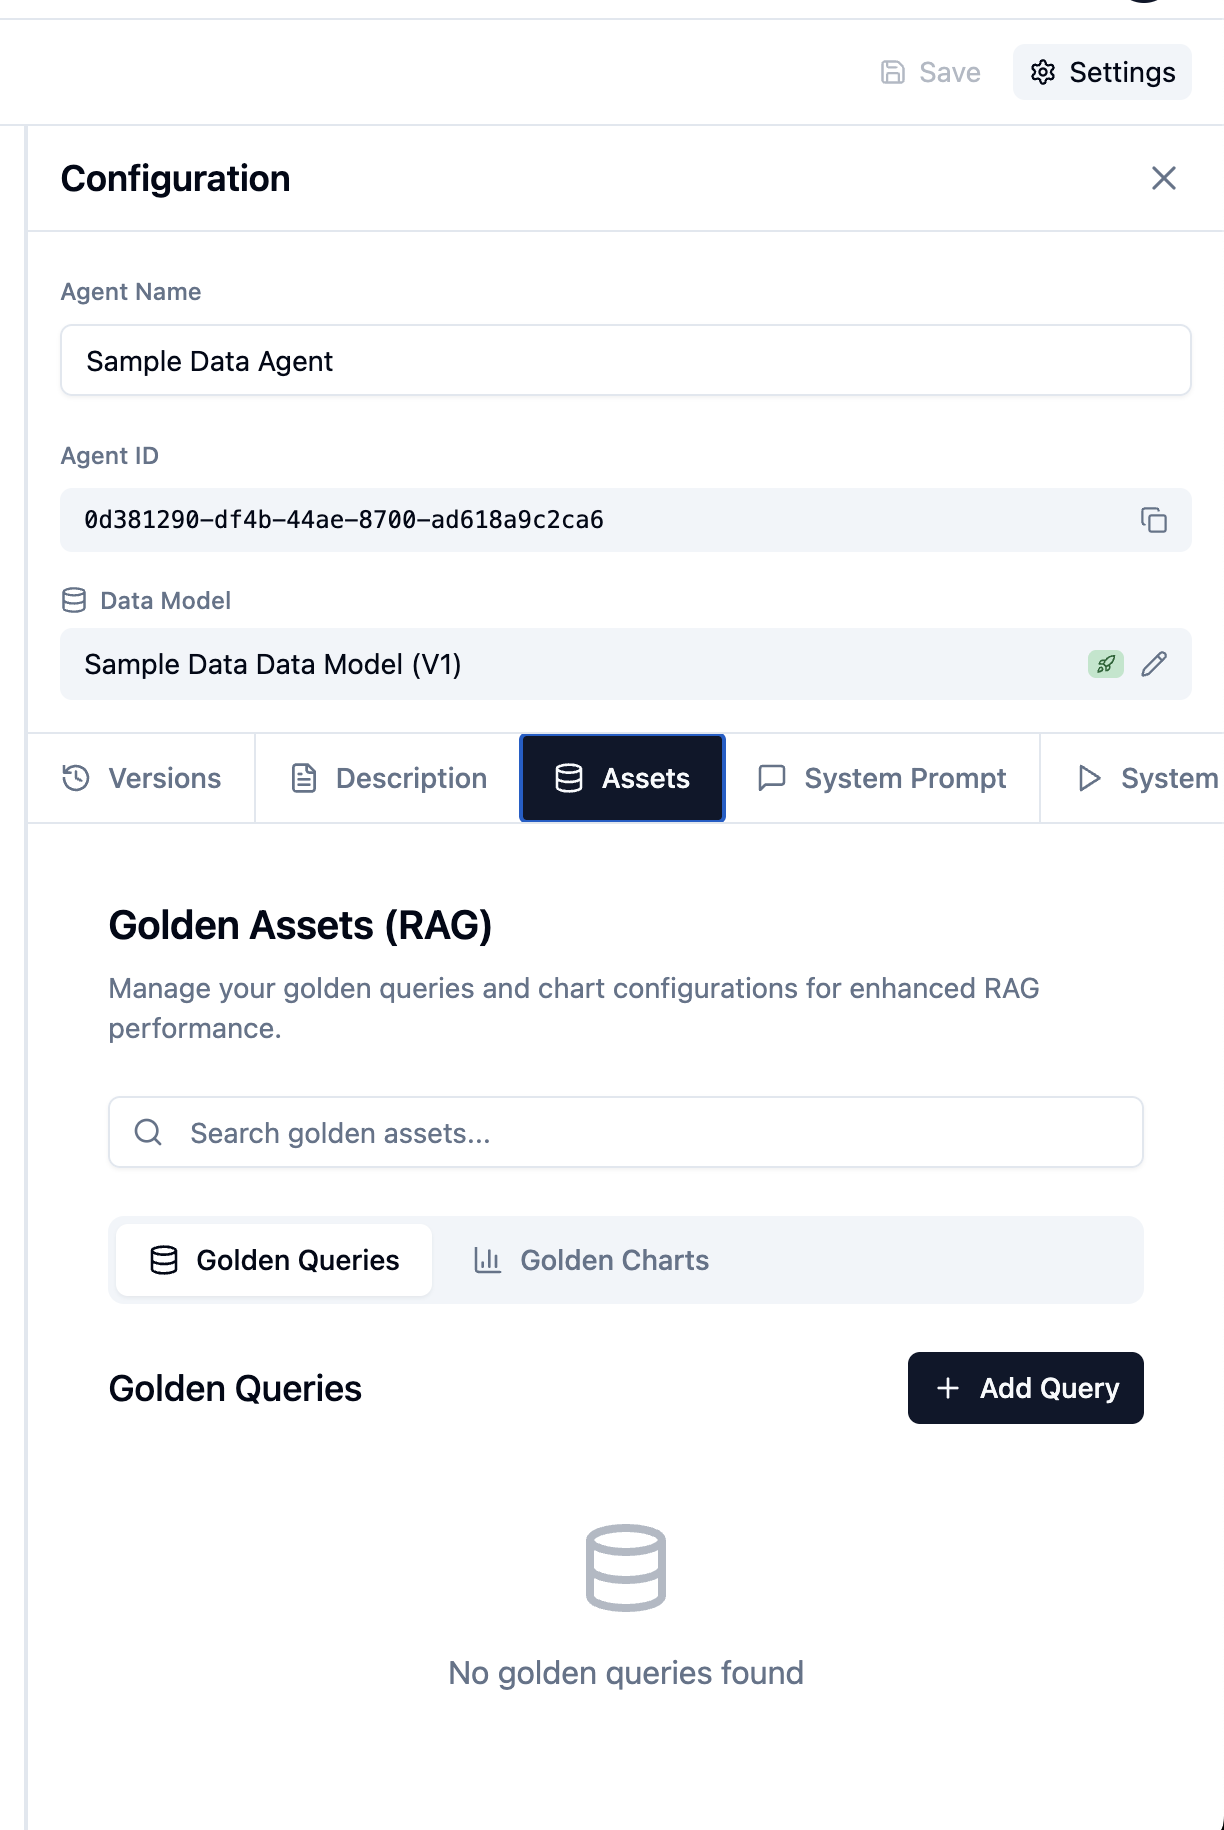
For Agents: Add Golden Assets
- Go to the Assets tab
- Click Add Asset
- Enter a sample question and SQL:
- Question: “What are our top 10 products by revenue?”
- SQL:
SELECT product_name, SUM(amount) as revenue FROM orders GROUP BY product_name ORDER BY revenue DESC LIMIT 10
- Click Save
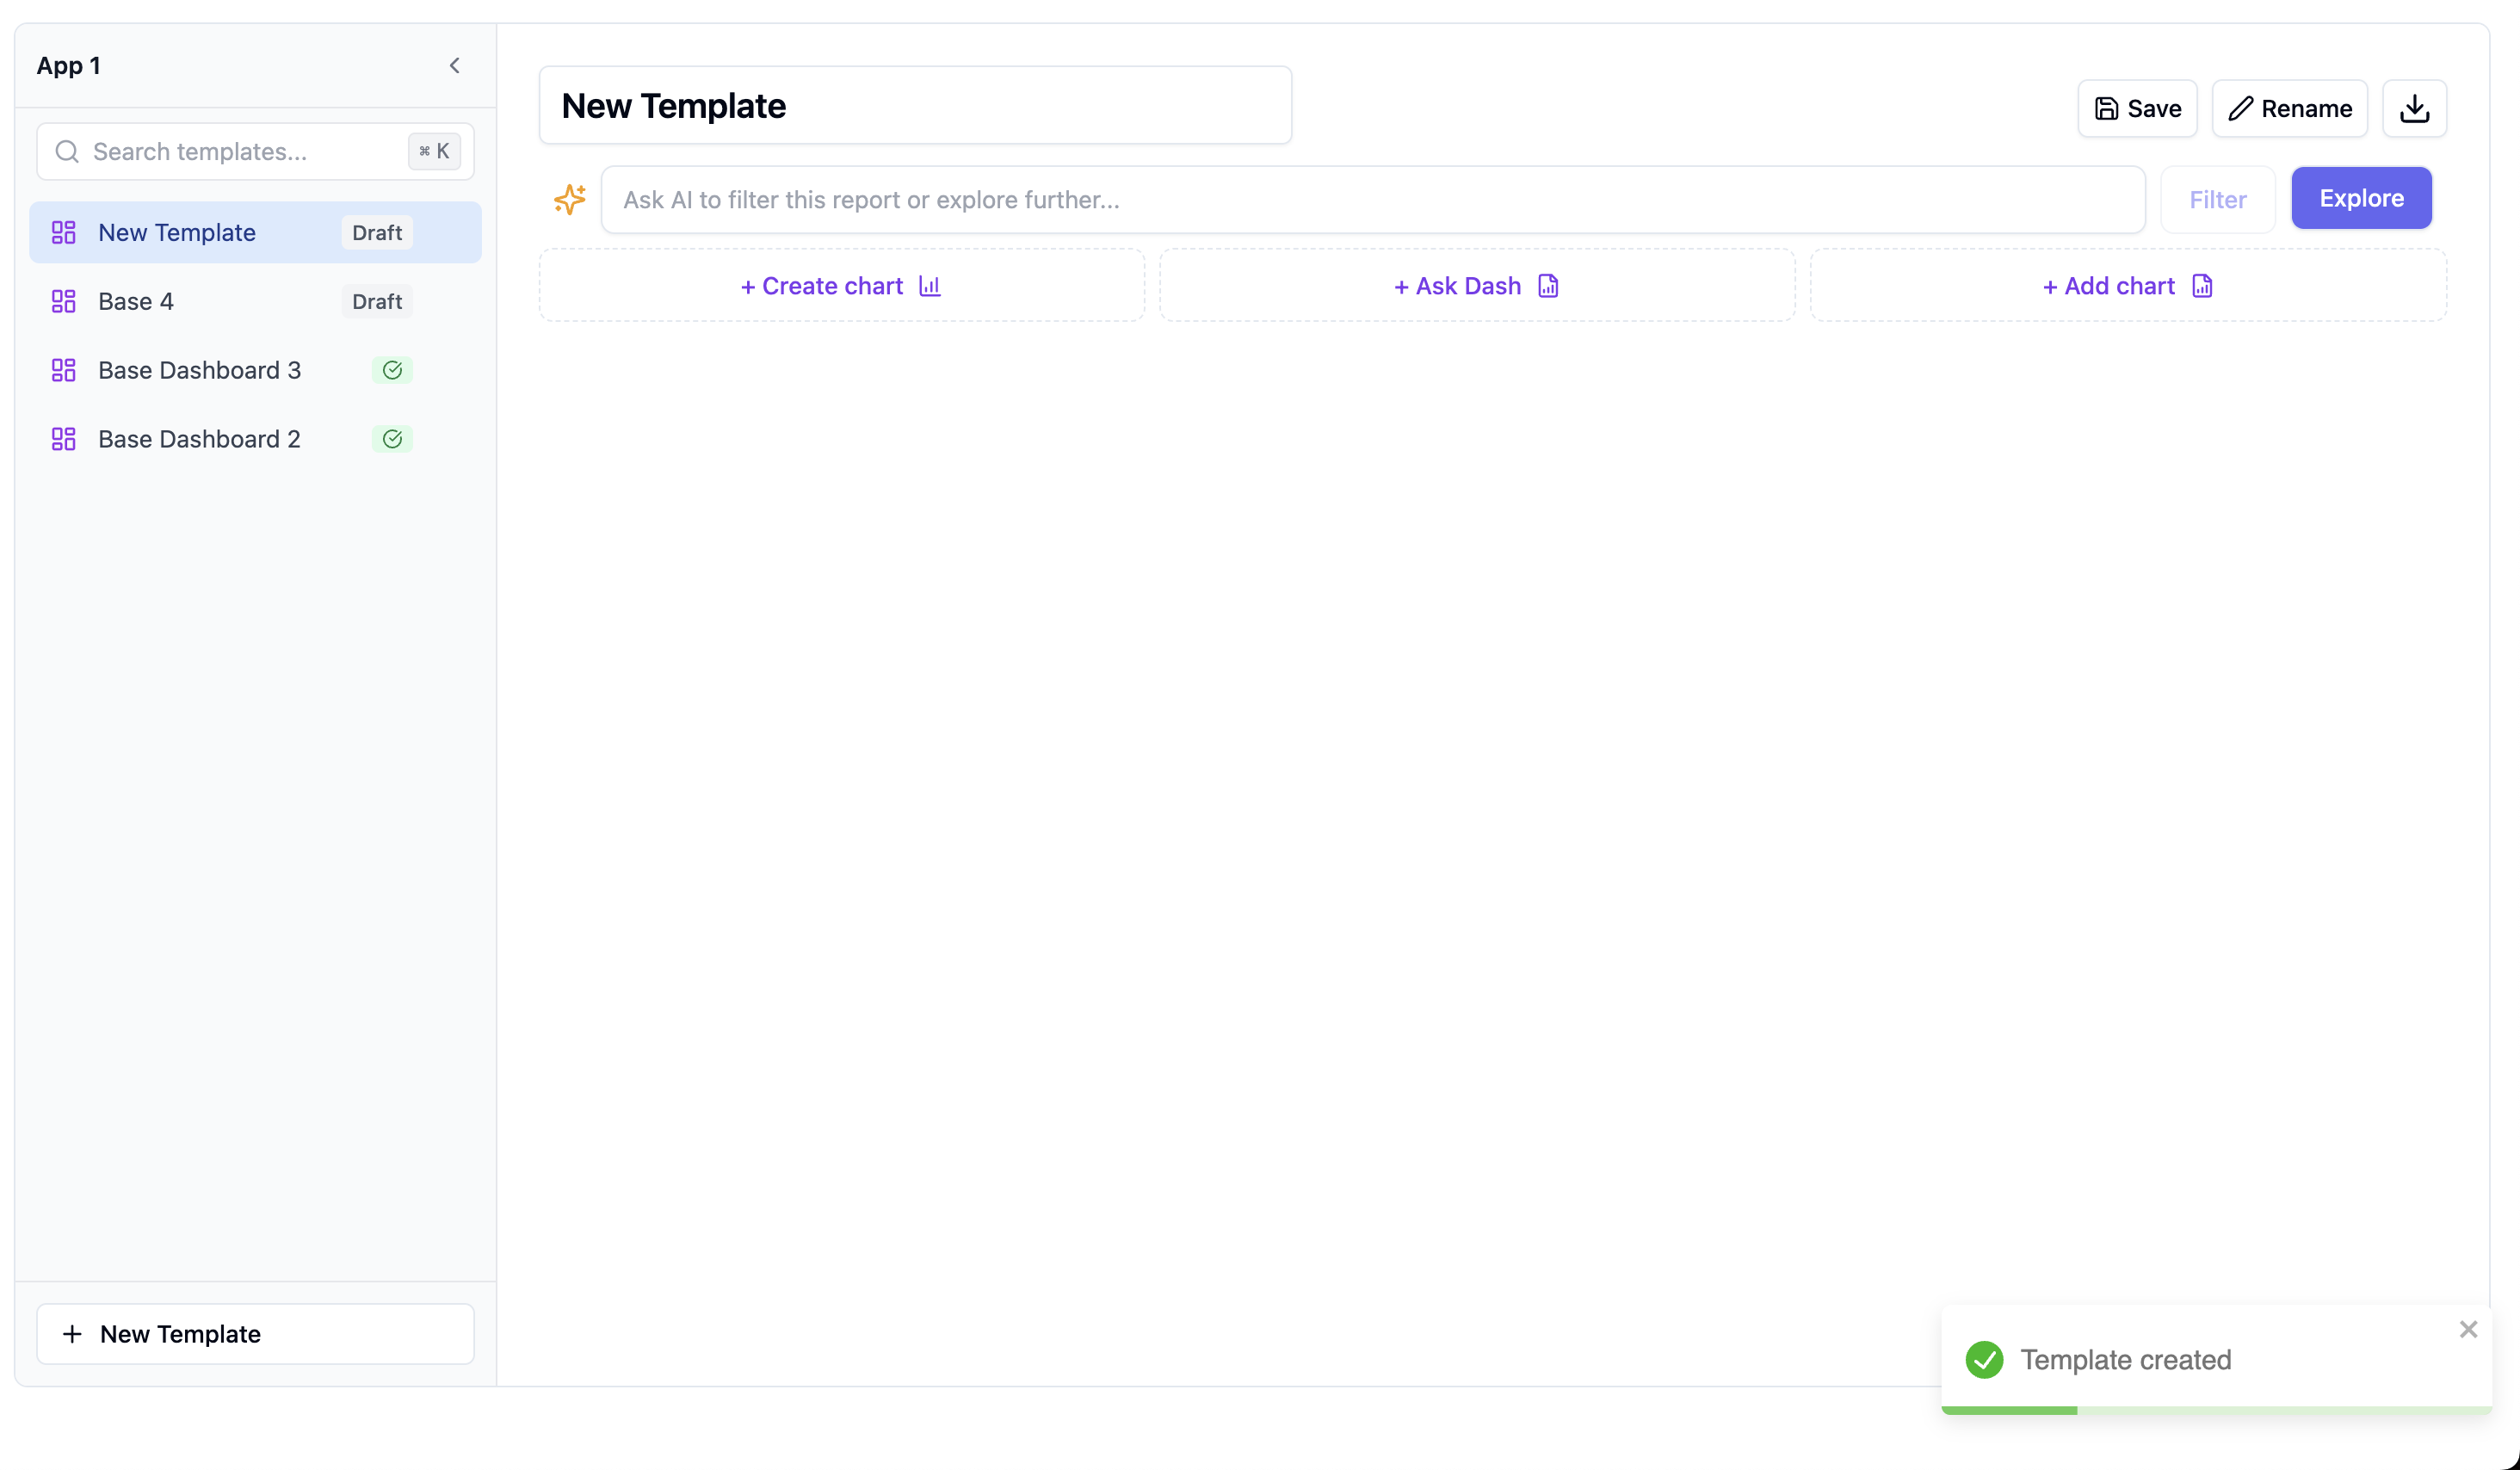
For Applications: Build Templates
- Click Add Dashboard
- Name it “Overview Dashboard”
- Add charts by clicking Add Chart
- Configure each chart with your data
- Arrange the layout
- Click Save
Step 7: Go to Production
For Agents
- Test the agent in admin view
- Go to the Versions tab
- Click Set as Production
For Applications
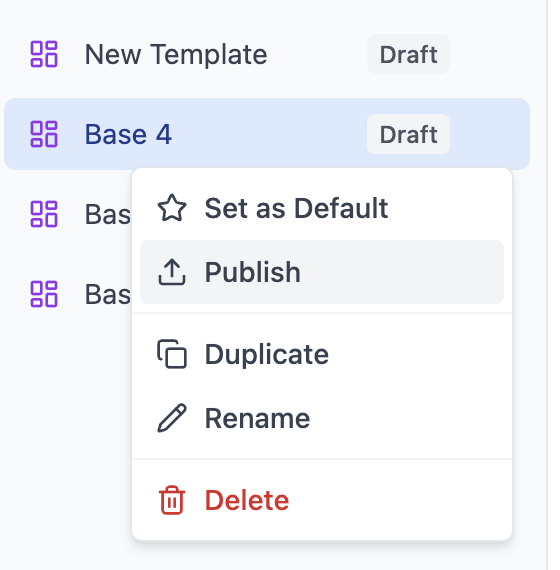
- Preview each template
- Click Publish on each template
- Templates propagate to all spaces
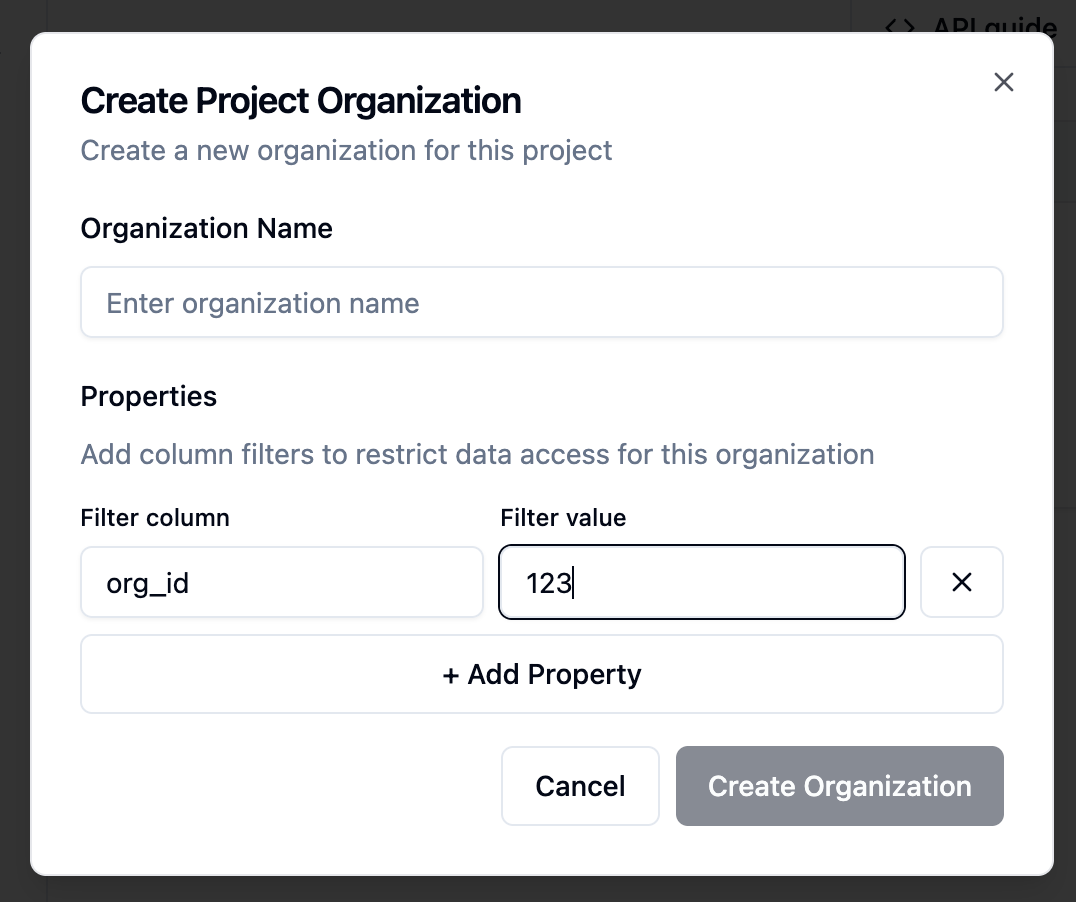
Step 8: Add Project Organizations
- Go to the Organizations tab
- Click Add Organization
- Enter the organization name (e.g., “Acme Corp”)
- Add properties for RLS:
- Click Create
Step 9: Register End Users
You can add users via the UI or programmatically via API.Via UI
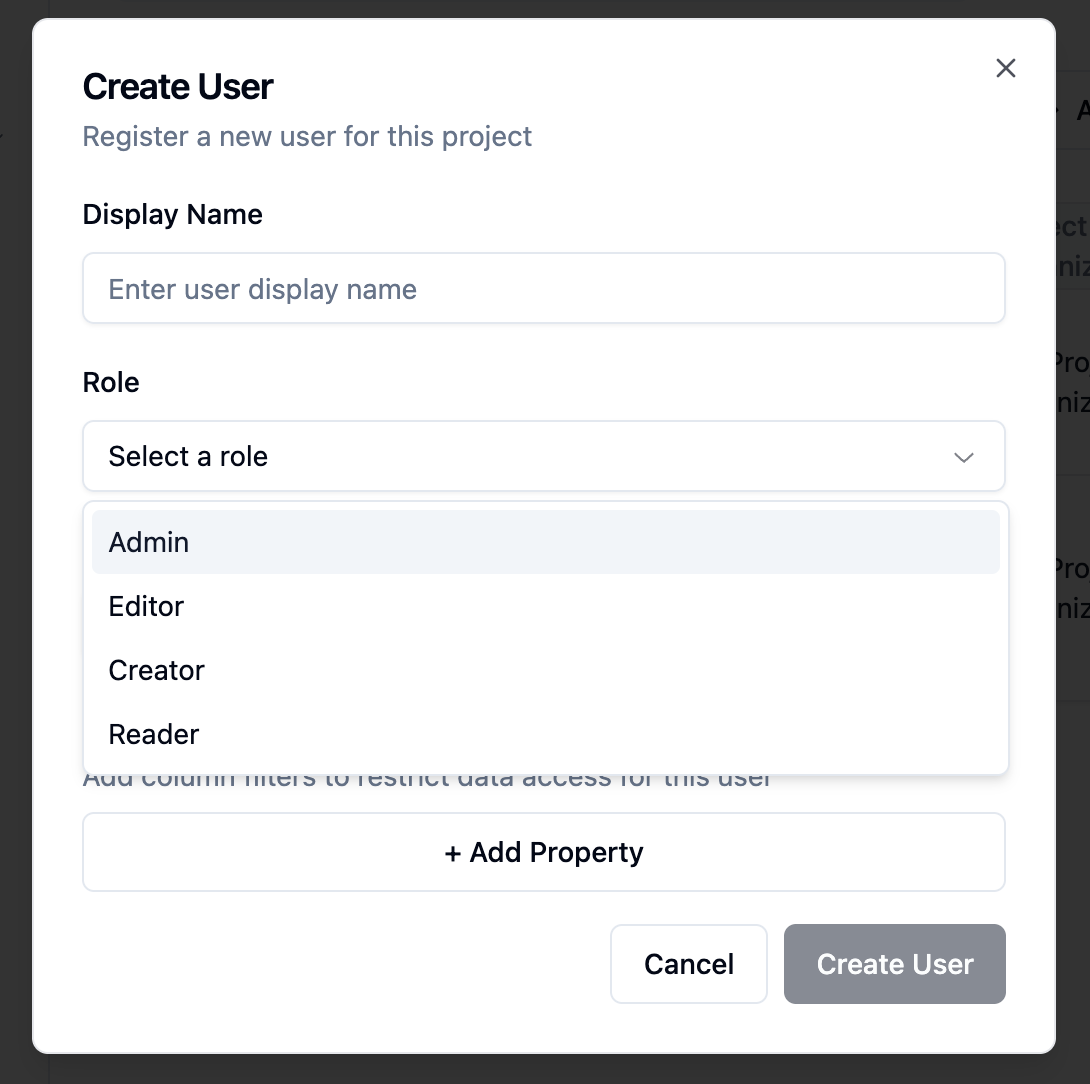
- Go to the Users tab
- Click Add User
- Enter user name
- Select organization and role
- Add properties if needed
- Click Create
Via API
Step 10: Generate User Tokens
Users need JWT tokens to access dashboards and agents.Via API
You’re Done!
Users can now:- Chat with agents using natural language
- View dashboards with their filtered data
- Create their own charts and dashboards in their space
Quick Checklist
| Step | Status | Required For |
|---|---|---|
| Project created | [ ] | Everything |
| Connection added | [ ] | Data access |
| Data model created | [ ] | Agents & Apps |
| Data model production | [ ] | Going live |
| RLS configured | [ ] | Multi-tenant security |
| Agent created | [ ] | AI chat features |
| Agent production | [ ] | User access to AI |
| Application created | [ ] | Dashboard features |
| Templates published | [ ] | User access to dashboards |
| Organizations added | [ ] | Multi-tenant isolation |
| Users registered | [ ] | End-user access |
Next Steps
- Read about Row-Level Security in detail
- Learn about Agent configuration
- Explore Application templates