Prerequisites
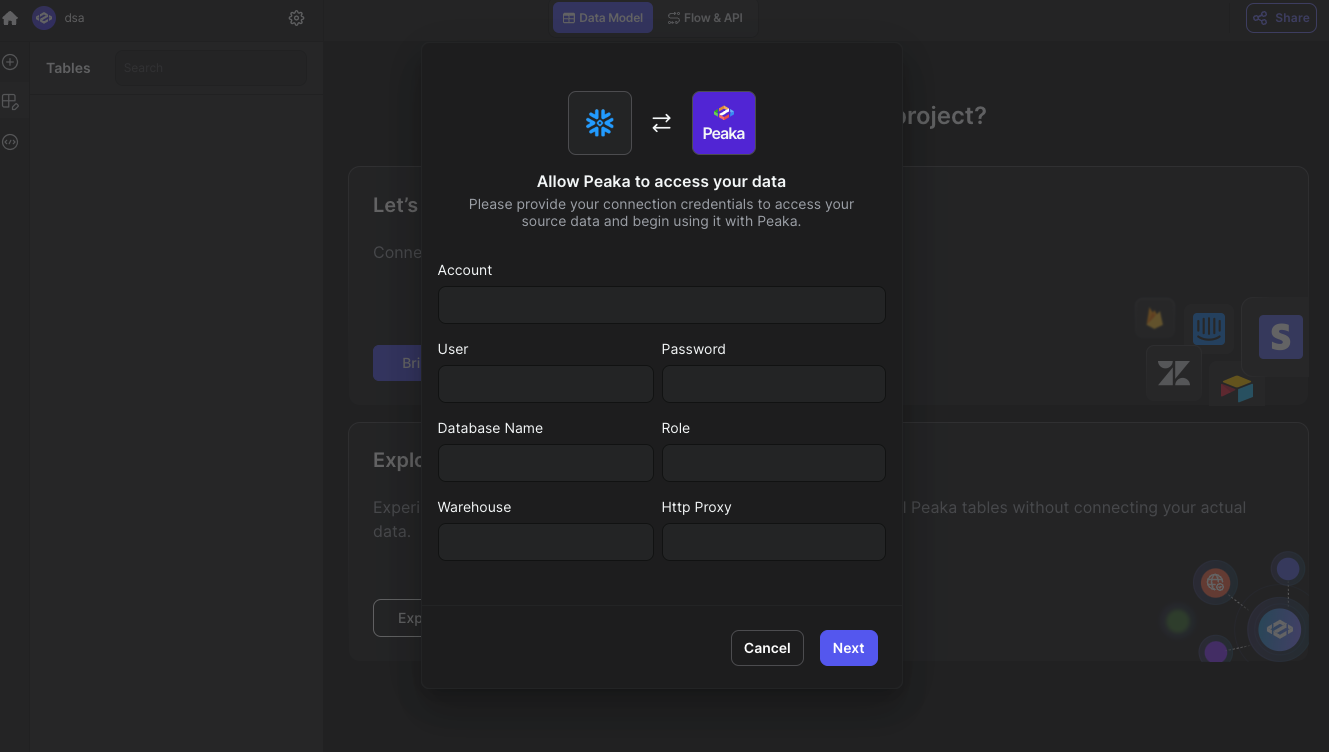
Before you begin, ensure you have the following credentials from ServiceTitan:- Account
- User
- Password
- Database Name
- Role
- Warehouse
- Http Proxy
-
To get the Account information, follow these steps:
- Log in to your Snowflake account. If you are logging in for the first time, use the email you have received from Snowflake.
- At the bottom left, click on your generated account name next to the Snowflake icon.
- Copy the Account name shown and store them in a safe place.
-
To get the User and Password information, follow these steps:
- User and Password fields are your Snowflake account’s login credentials.
-
To get the Database Name information, follow these steps:
- This is the name of your database before creation. If you haven’t created a database yet, you will need to do so.
-
To get the Role information, follow these steps:
- Navigate to Admin > Users & Roles in the left-hand menu.
- Select the Roles tab, and your roles will be displayed. Copy the necessary role.
-
To get the Warehouse information, follow these steps:
- Navigate to Admin > Warehouses in the left-hand menu.
- Your warehouses will be shown. Copy the required warehouse.
-
To get the Http Proxy information, follow these steps:
- If you need to set up an HTTP Proxy, refer to the following articles:
Connecting SnowFlake to Upsolve
Now that you have your SnowFlake Account, User,Password, Database Name, Role, Warehouse and Http Proxy, you can connect it to Upsolve using the following steps:- Navigate to the data model page in Upsolve.
- In the side menu bar, click the “New Data Source” button to initiate the connection process.
- In the modal that appears, select “SnowFlake” as your data source.
- Enter a name for your data source name and paste values that you before.
- Click “Next” to create your SnowFlake data source.